Welcome to Web2Chat! This guide will help you set up your account, configure key settings, and get your workspace ready to provide outstanding support to your customers. Follow these steps to get started.
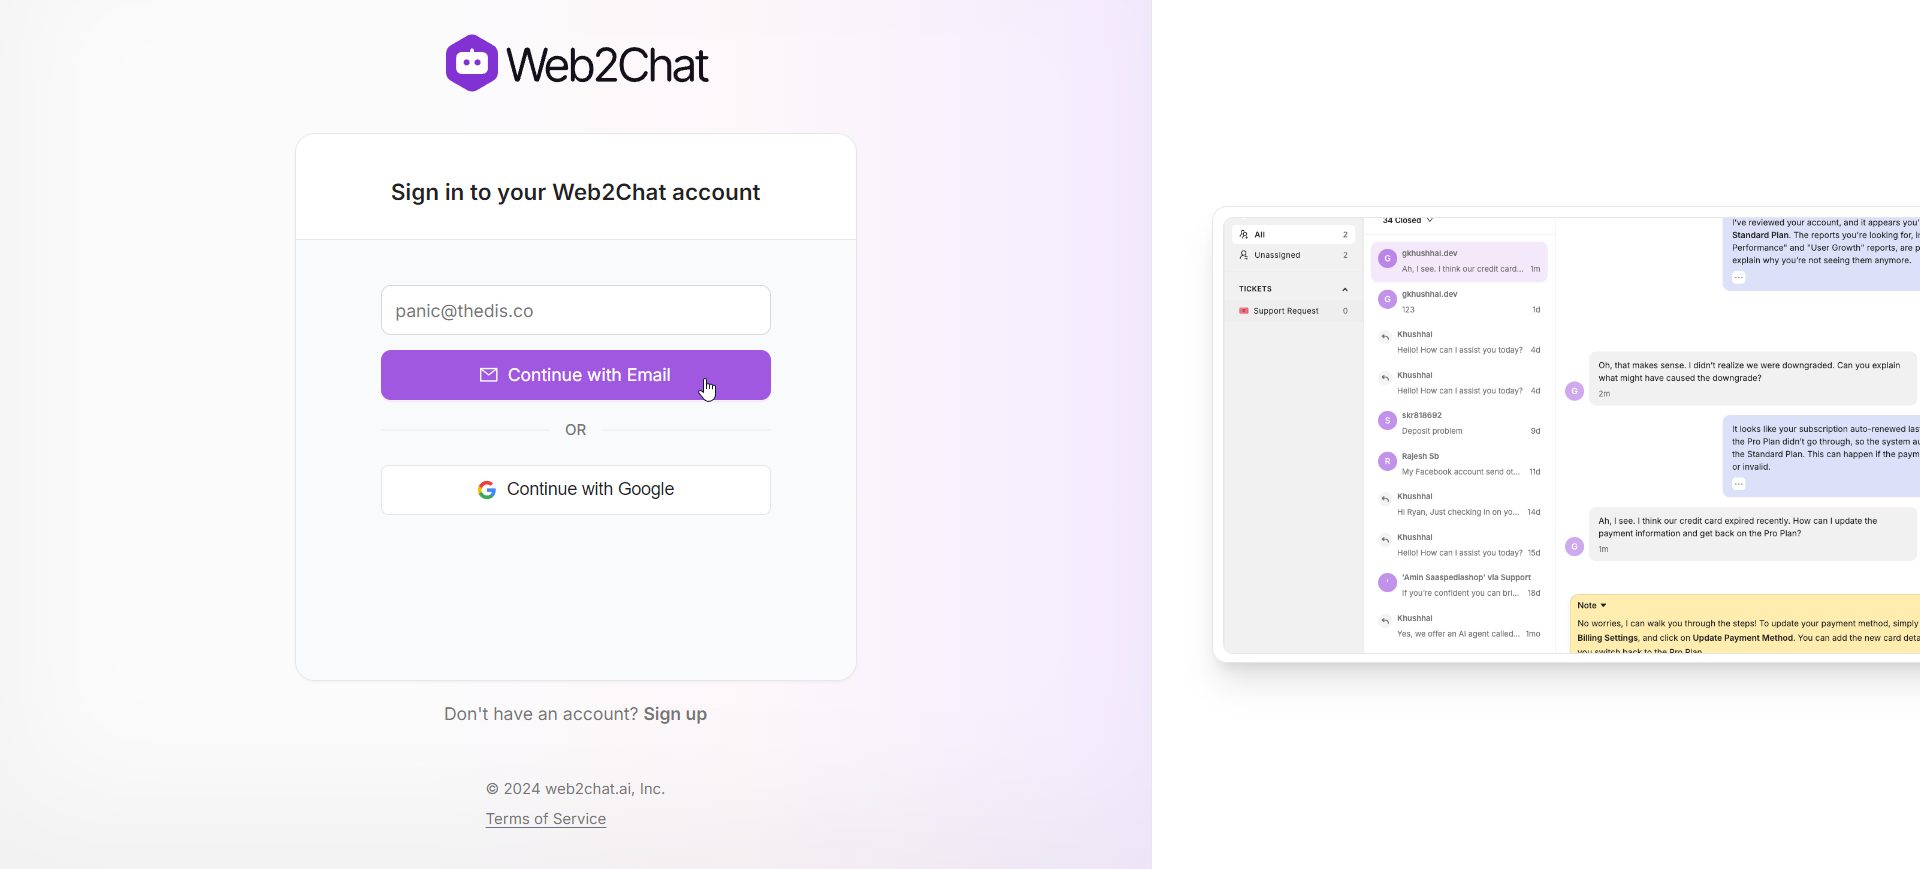
1. Sign Up and Create Your Account
- Visit the Web2Chat Sign-Up Page.
- Enter your email address and create a password.
- Check your inbox for the confirmation email and click the link to verify your account.
- Log in to Web2Chat using your credentials.
2. Set Up Your First Workspace
Workspaces are central to organizing your content and managing different teams or brands. To create your first workspace:
- Log in to your Web2Chat account.
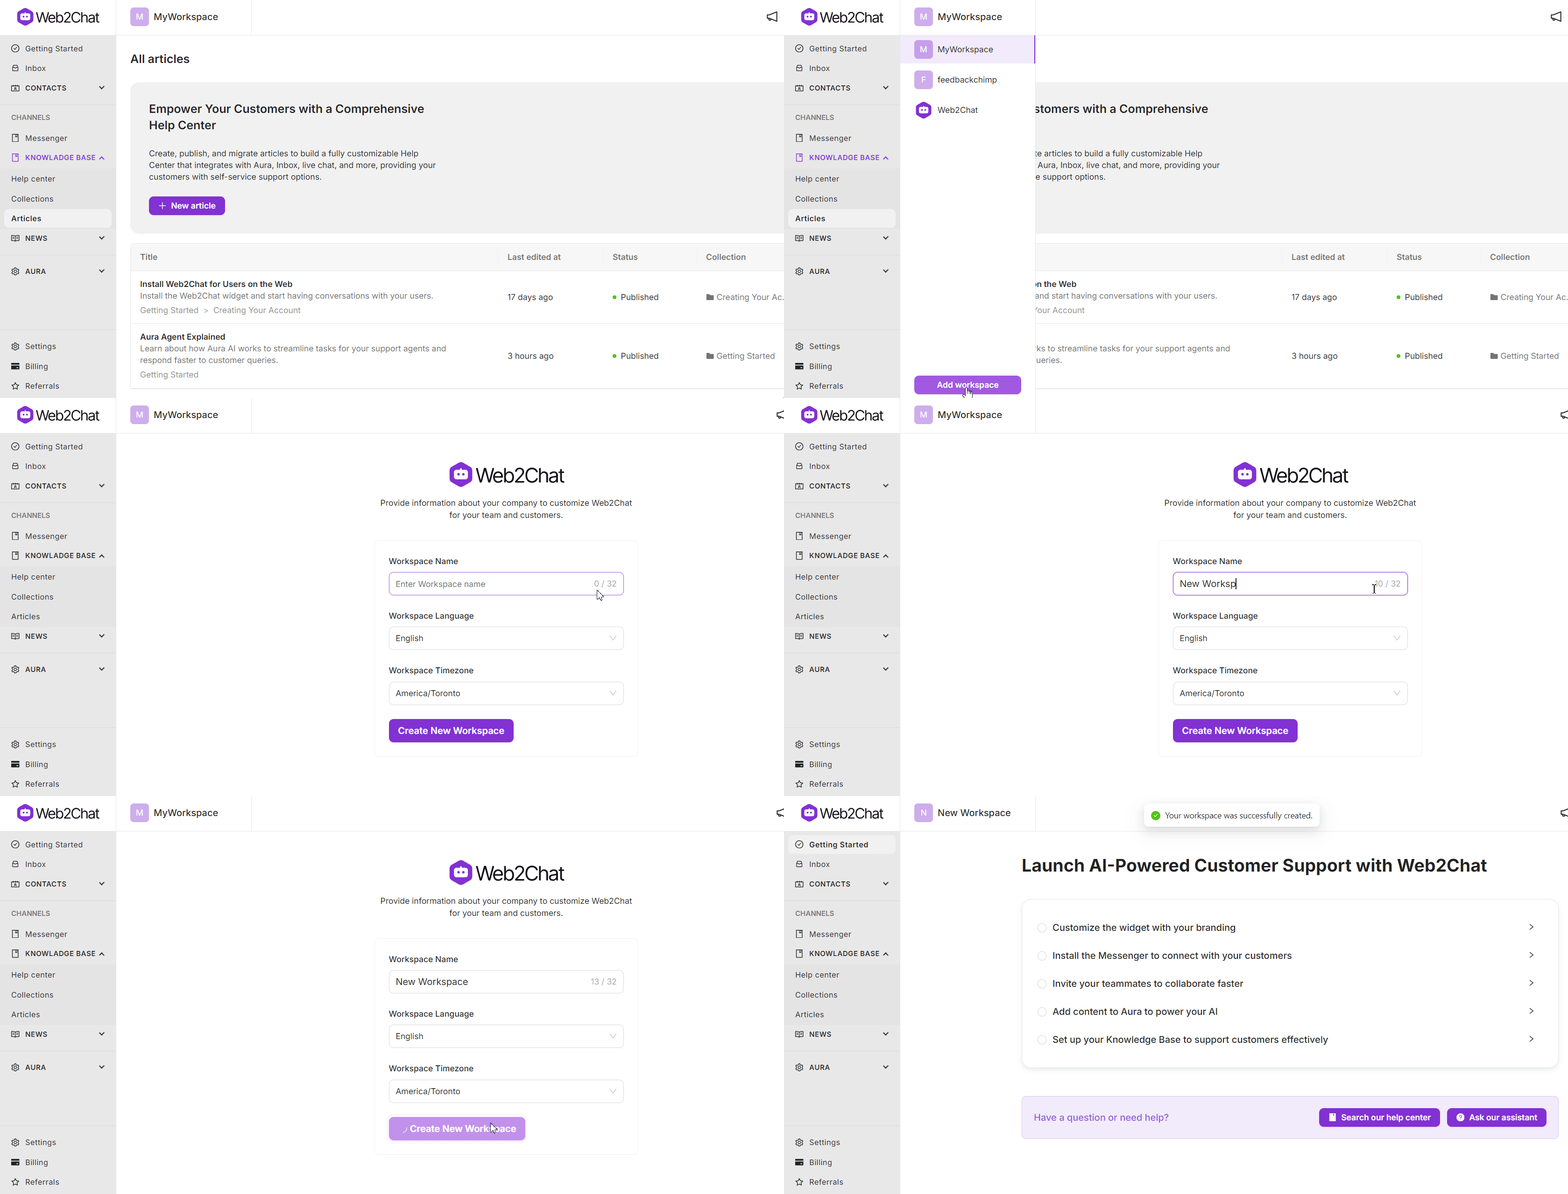
- Click the Workspace option on the top bar of your dashboard.
- Click the Add Workspace button.
- Enter a name for your workspace, select your preferred language and timezone.
- Click Create New Workspace to complete the setup.
3. Customize Your Workspace Settings
Personalize your workspace to align with your brand:
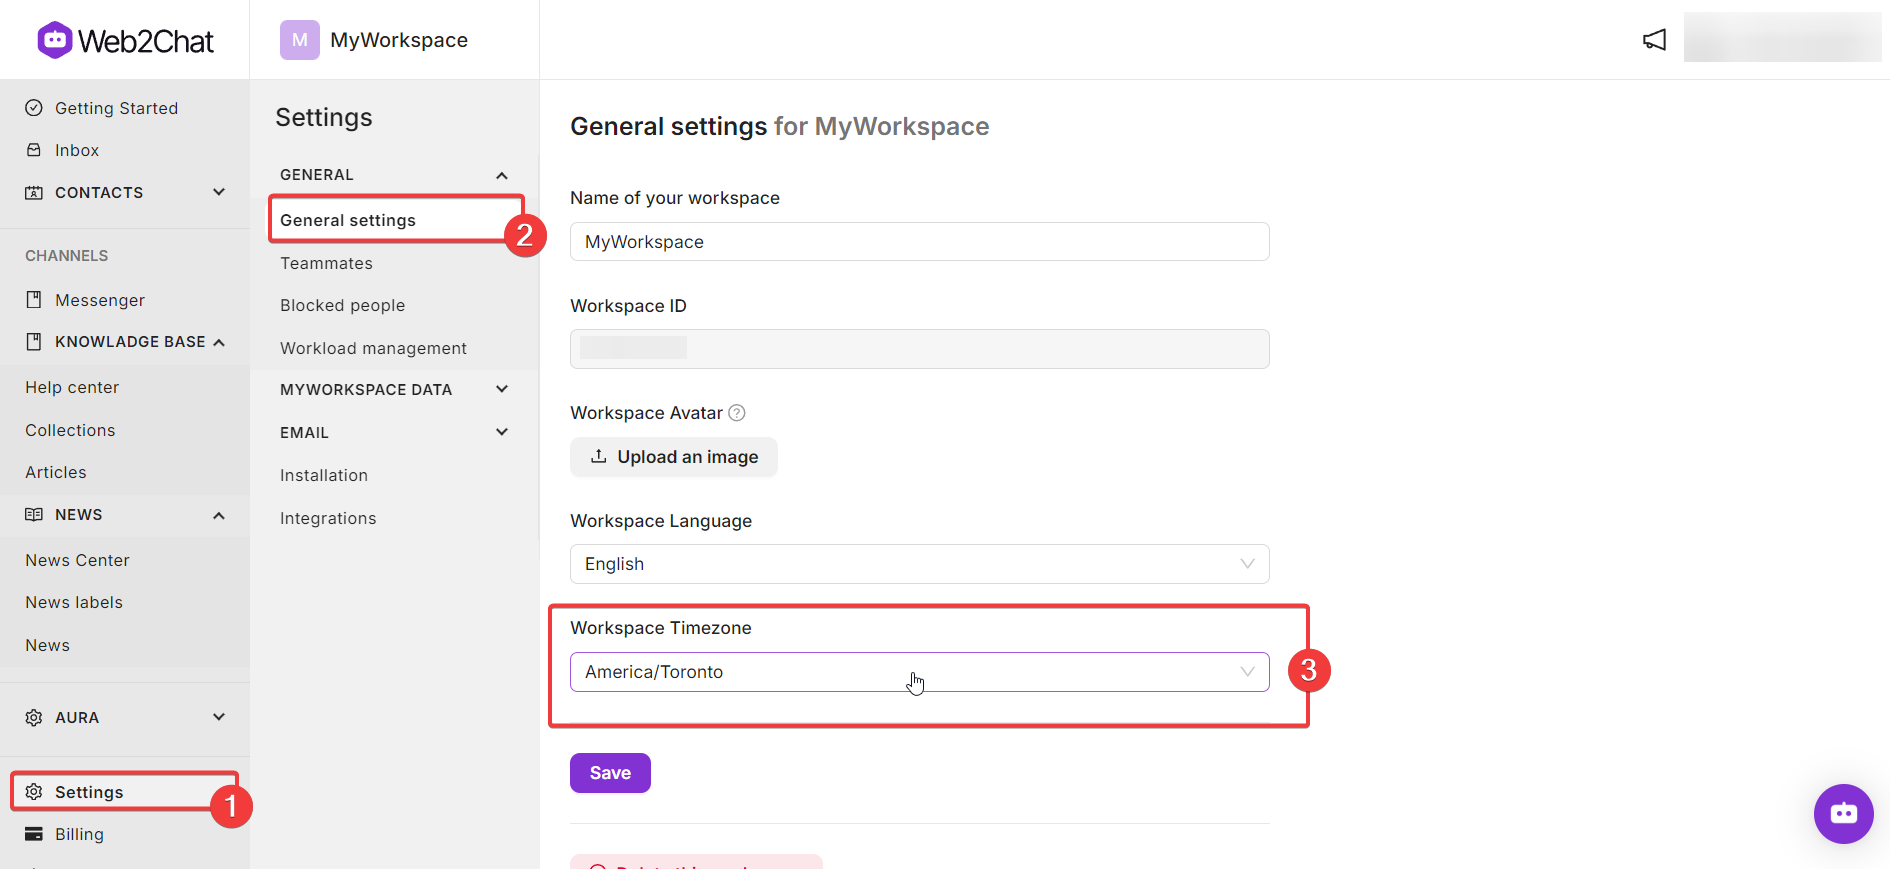
- Go to Settings > General Settings.
- Update your workspace’s name, avatar, and other branding elements.
- Set the language and timezone according to your business requirements.
4. Add and Manage Your Teammates
To collaborate effectively, invite your teammates to Web2Chat:
- Navigate to Settings-->General-->Teammates.
- Click Invite Teammate.
- Enter their email address, assign a role (e.g., Admin, Support), and send the invitation.
- Once they accept the invitation, they will have access to your workspace.
5. Customize Your Help Center
Web2Chat allows you to create a branded Help Center where customers can access your support content. To set up your Help Center:
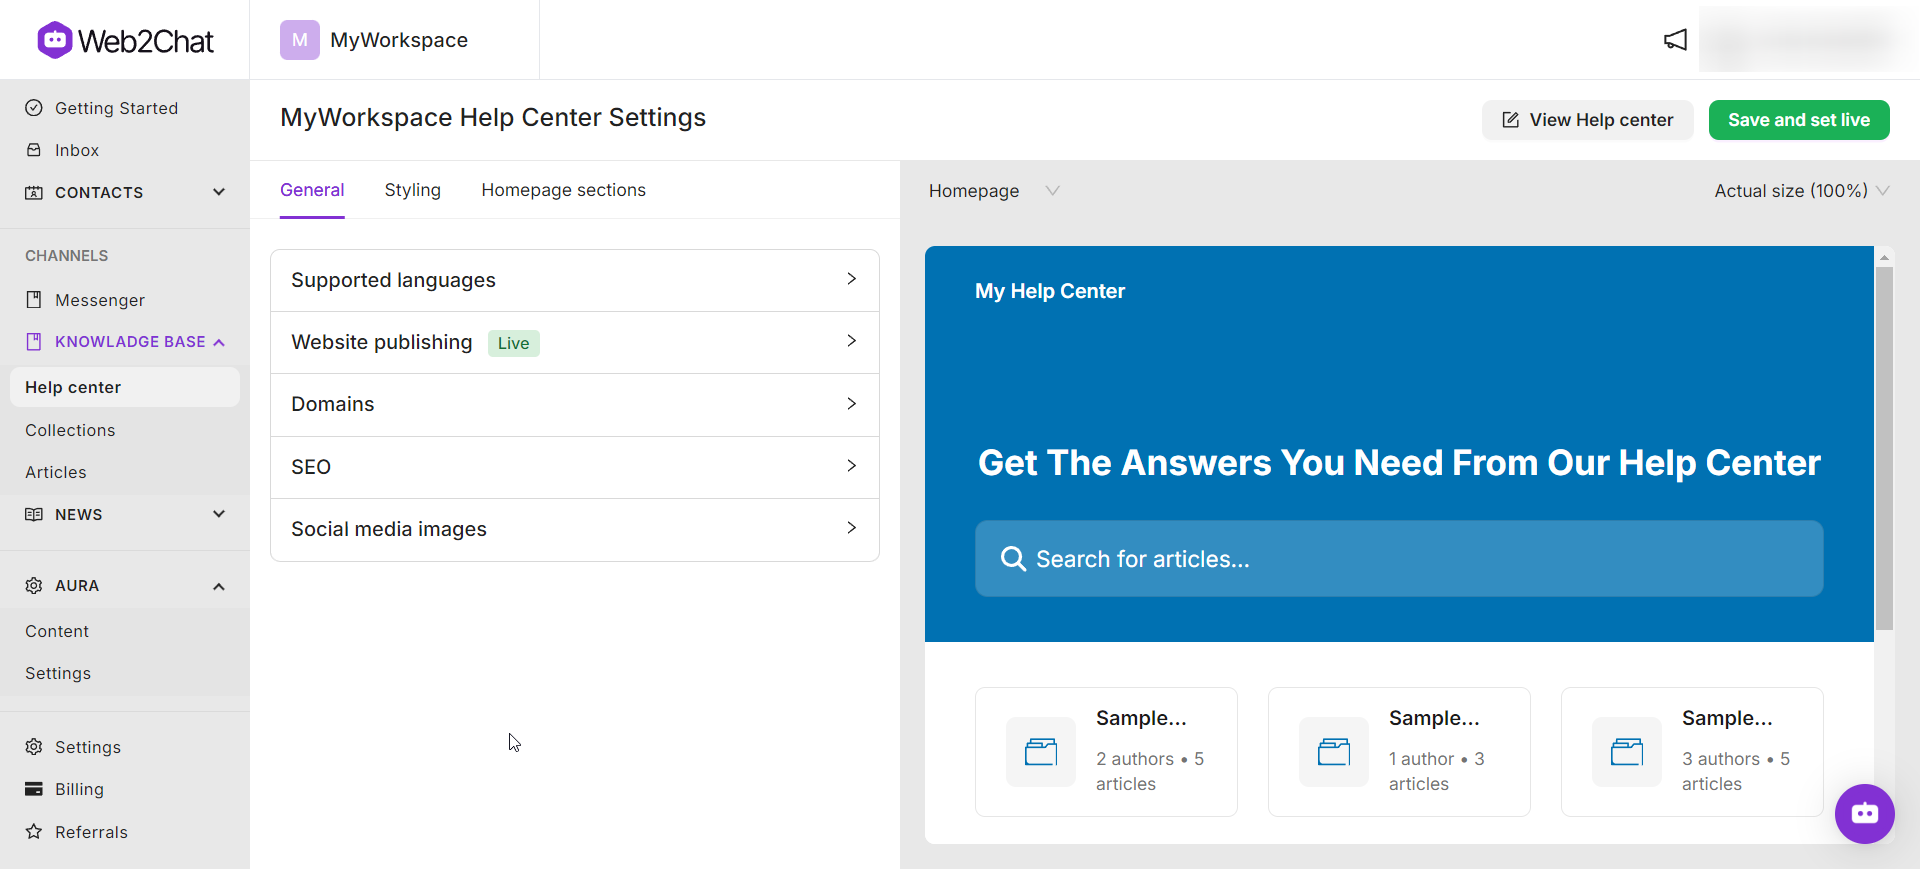
- Go to Settings > Help Center.
- Update your Help Center’s appearance using themes, colors, and fonts to match your brand.
- Configure additional settings like social media links, article suggestions, and more.
6. Create and Organize Articles
Articles are the backbone of your Help Center, providing customers with answers to common questions:
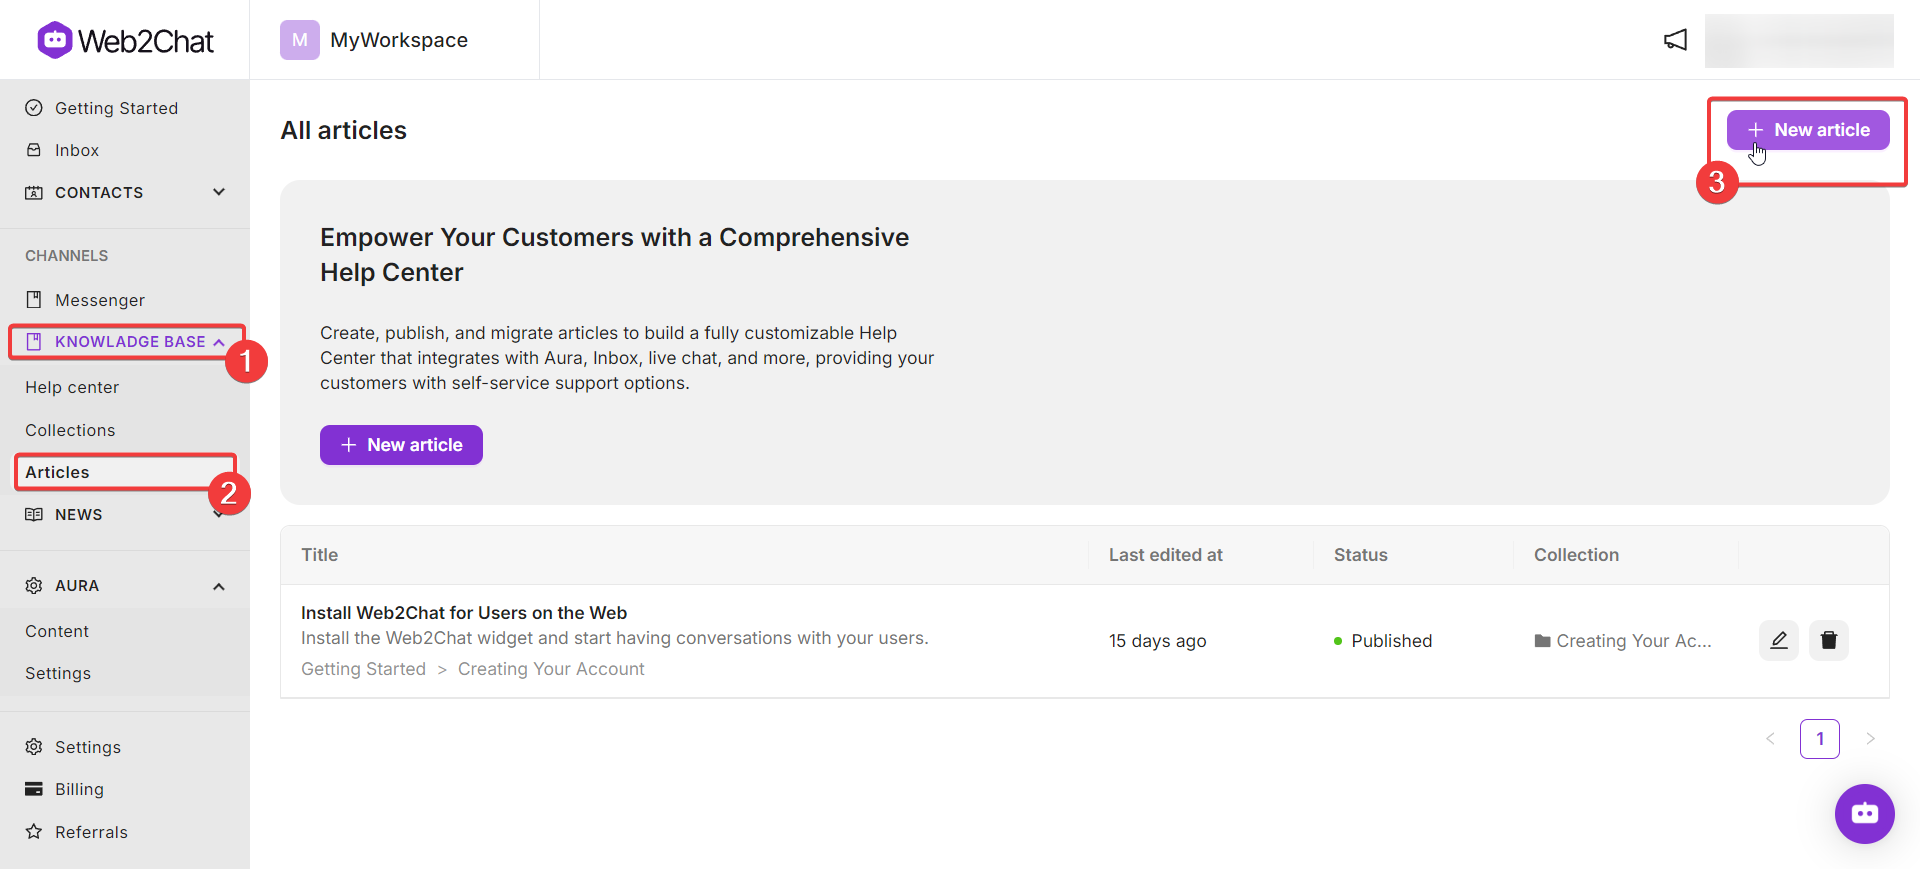
- Go to Help Center → Articles from your Web2Chat dashboard.
- Click on the + New Article button to start creating a new article.
- Add your content, format it, and use categories to organize the article.
- Save your article as a draft or publish it immediately for customers to see.
7. Configure Web2Chat Messenger
Ensure your customers can reach you easily using Web2Chat's built-in Messenger.
- Go to Messenger from your dashboard.
- Configure the content from Messenger Settings including supported languages, adding a welcome message and home apps, etc.
- Customize the appearance of your Messenger.
8. Train Aura AI for Smart Suggestions
With Aura AI, Web2Chat’s smart assistant, you can enable intelligent suggestions for customers:
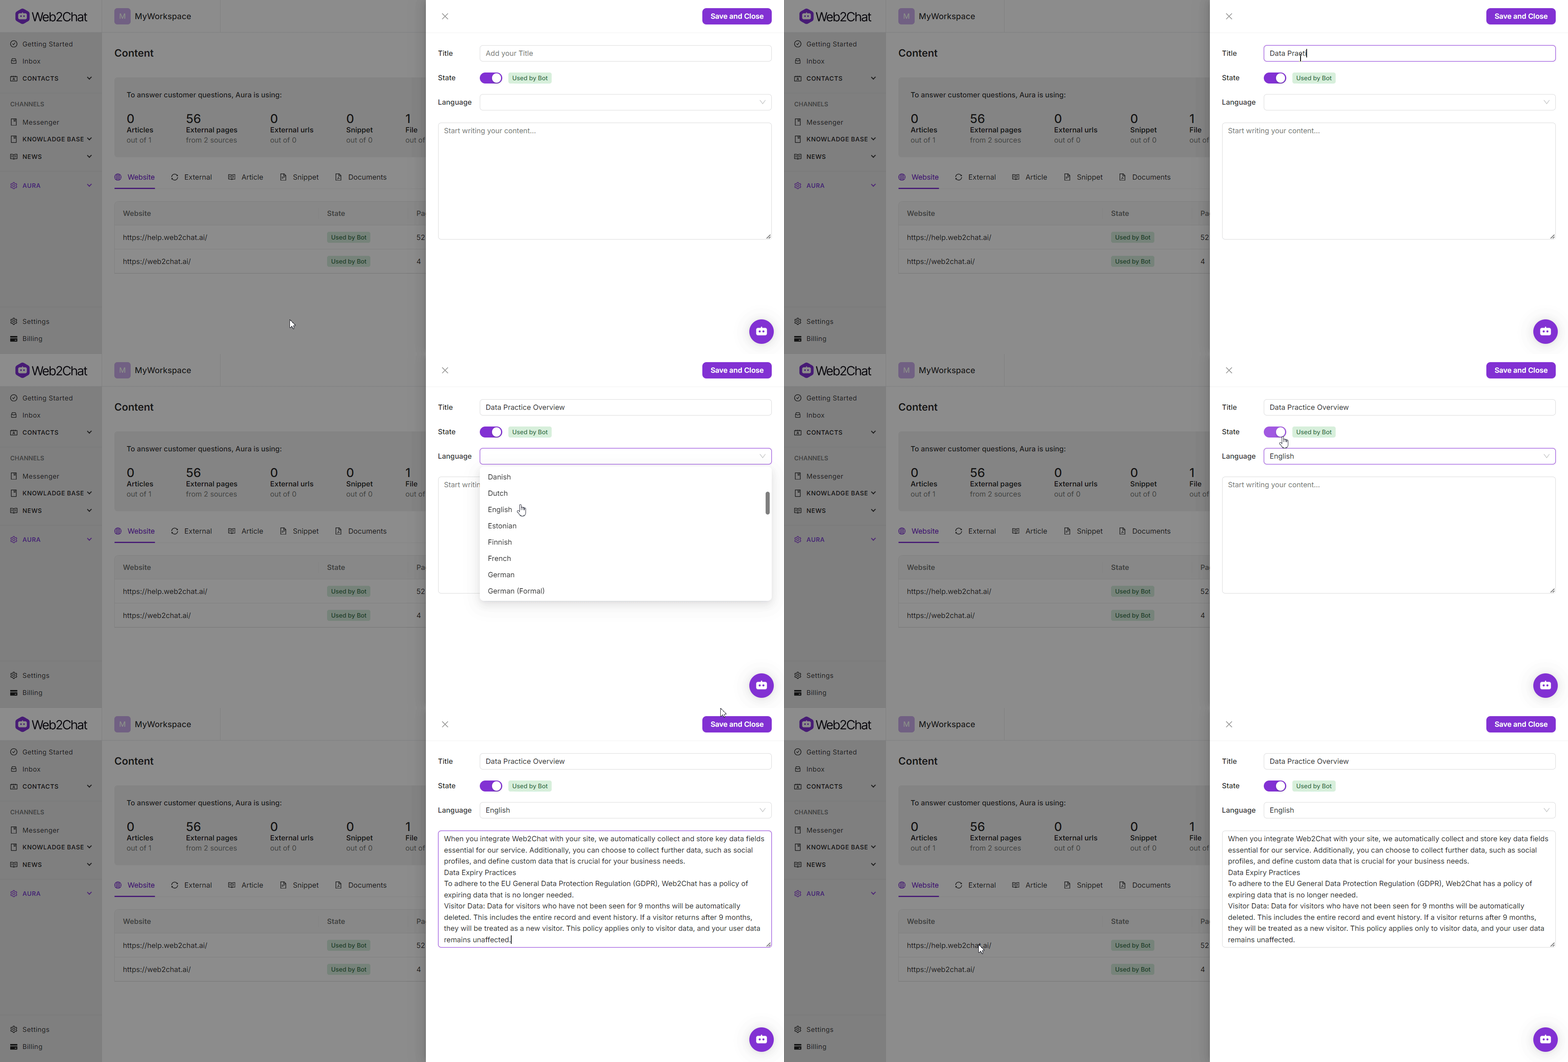
- From your Web2Chat dashboard, go to Aura → Content.
- Click the + New Content button to begin adding new material for Aura's training.
- Upload content, FAQs, and guides relevant to your business for training purposes.
Note: Aura AI is only available when you purchase any of the Aura AI pricing plans.
9. Test Your Workspace Before Going Live
Before launching your Help Center, it’s a good idea to test everything:
- Create a test workspace by following the same steps you used to set up your primary workspace.
- Check the functionality of articles, messaging channels, and Aura AI responses.
- Make necessary adjustments based on your test results.
10. Monitor and Improve
Once your Help Center is live, continue optimizing it by:
- Tracking user activity and feedback using built-in analytics tools.
- Regularly updating articles to reflect the latest information.
- Adding new teammates or creating new workspaces as your support needs grow.
By following these steps, you can efficiently set up your Web2Chat workspace, ensuring your customers have an excellent support experience from the very beginning.
If you need further assistance, contact our Customer Support.
