Before fully launching Web2Chat on your website or app, it's essential to conduct thorough testing to ensure a smooth user experience. Follow these best practices to make sure your setup is accurate and ready to go live.
1. Set Up a Test Workspace
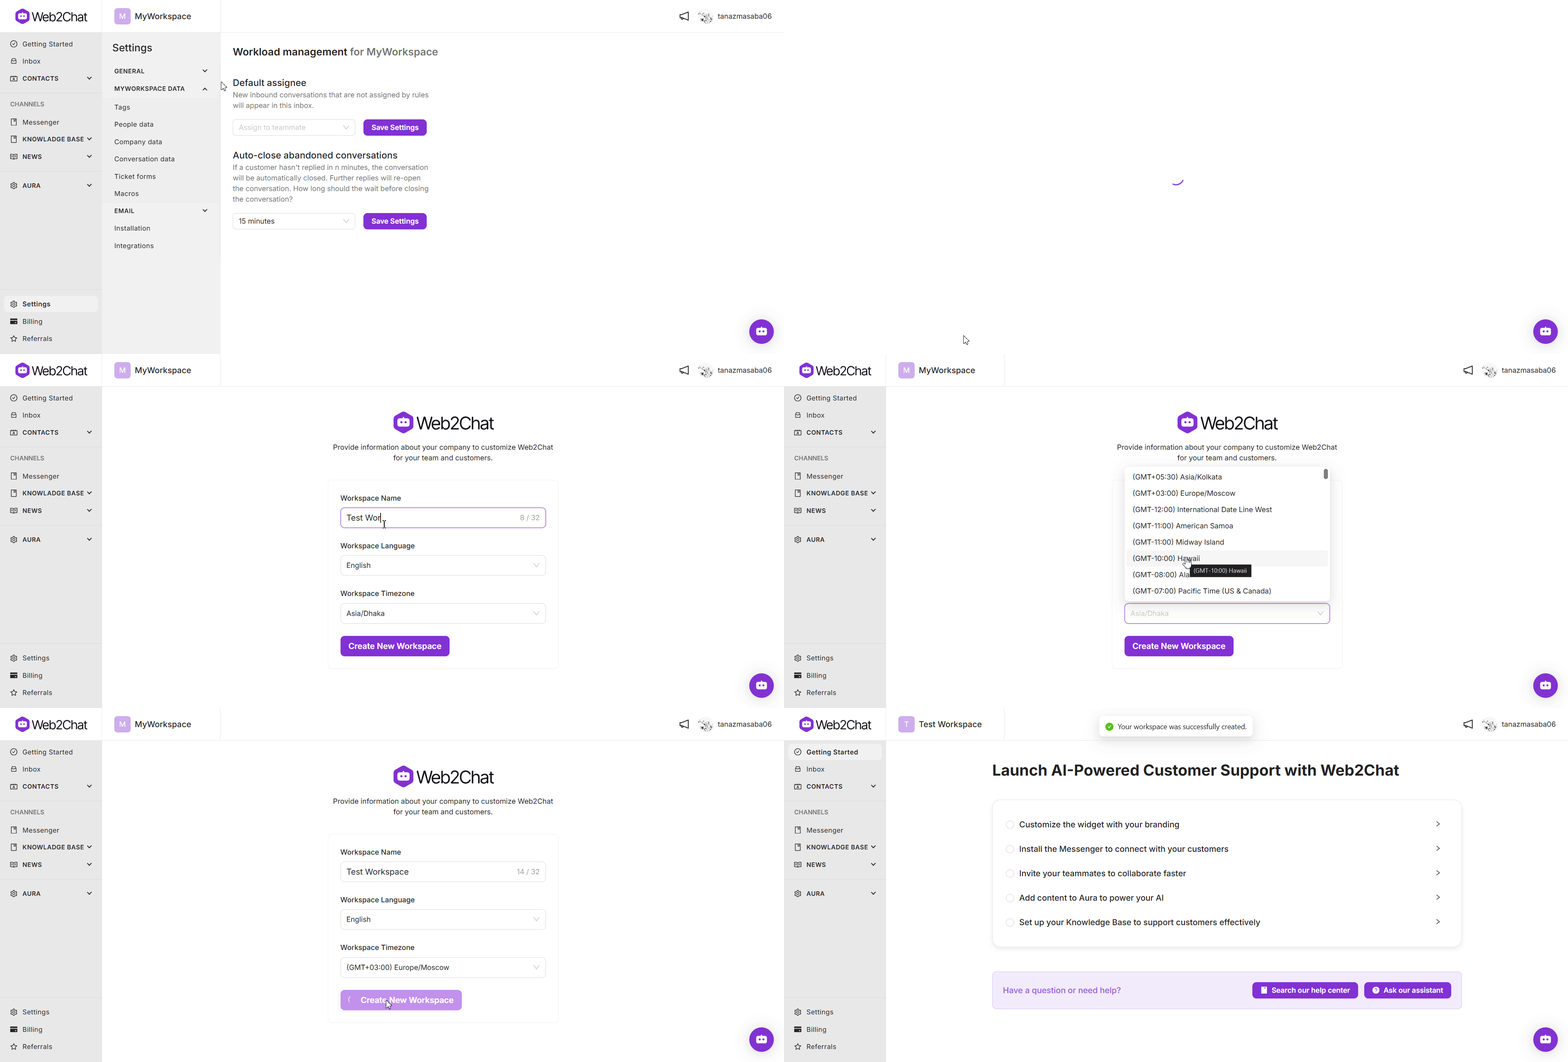
Create a dedicated Test Workspace in Web2Chat to simulate the live environment. This separate space will allow you to test features, settings, and customizations without affecting your primary workspace.
- Go to the Workspace option at the top of your Web2Chat dashboard.
- Click on Add Workspace and label it as your “Test Workspace.”
- Use this workspace to trial different configurations and ensure everything works as expected.

2. Test Your Help Center Configuration
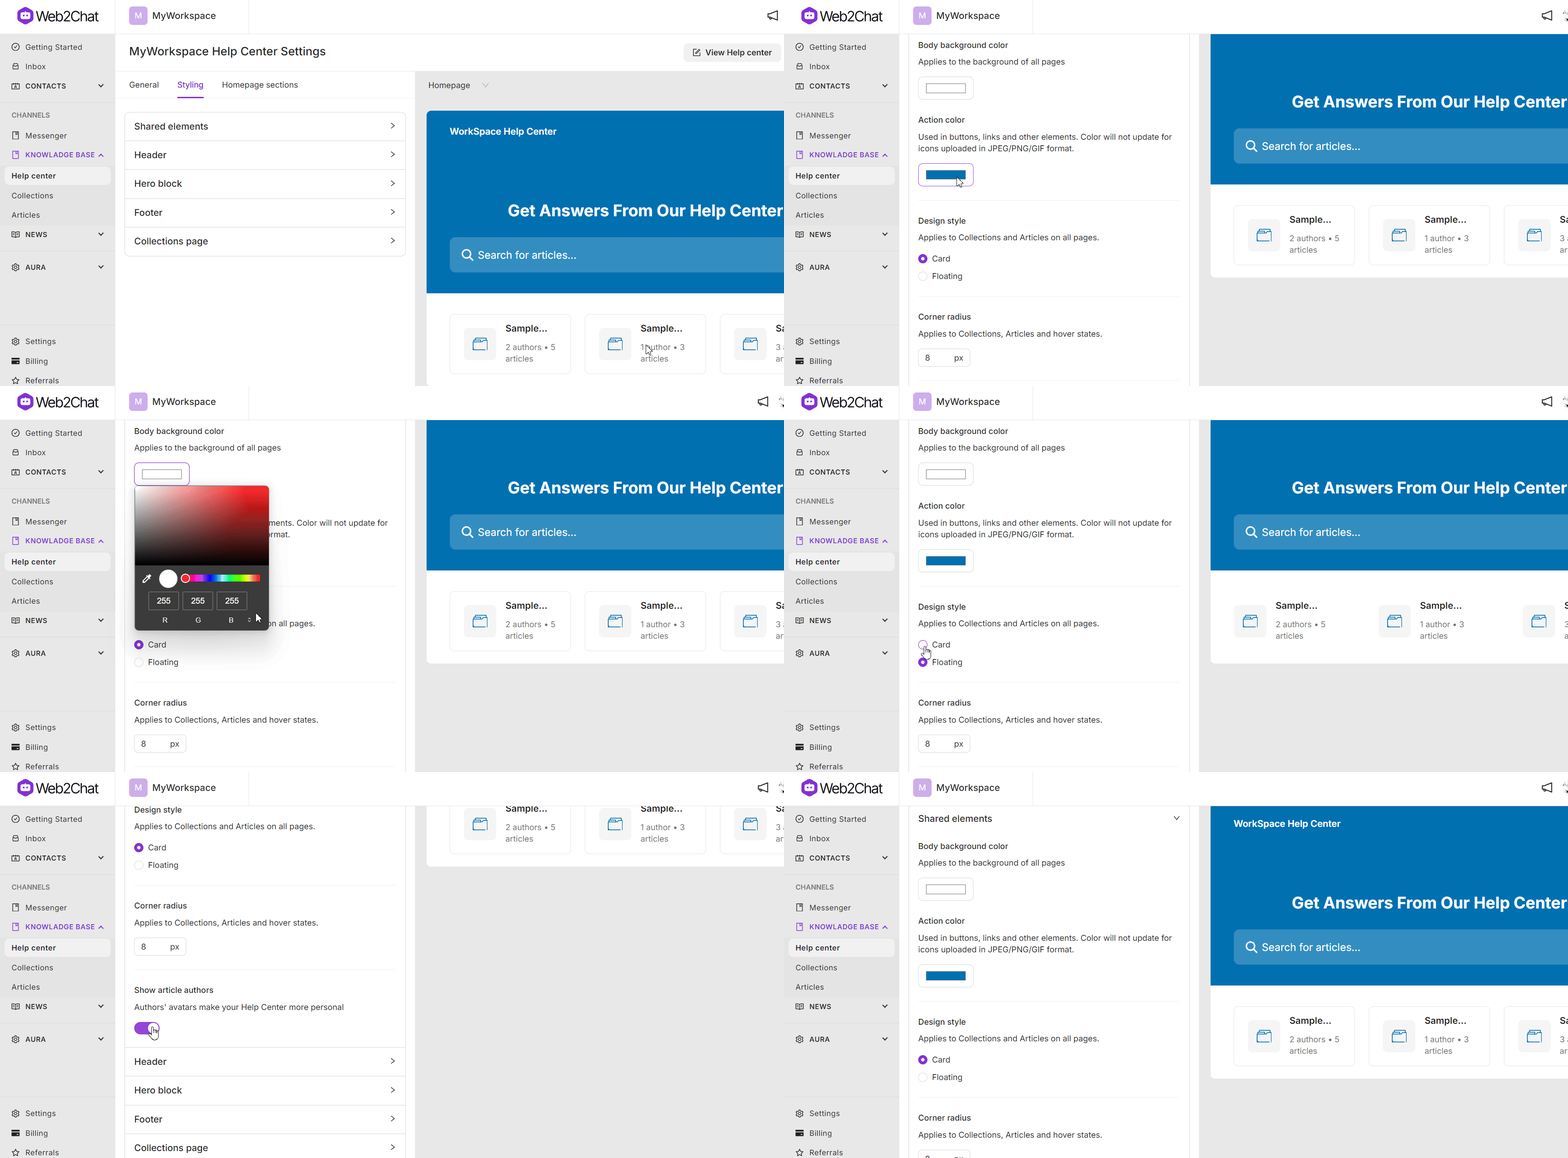
Test your Help Center's layout, design, and content to ensure it aligns with your brand guidelines. Consider the following when testing:
- Appearance: Verify that colors, logos, and layout are displaying correctly.
- Content: Make sure all articles are up-to-date and correctly categorized.
- Navigation: Check that links and search functionalities work smoothly.

3. Test the Messenger and Chat Features
Before going live, you should test the chat features to verify their behavior in real-life scenarios:
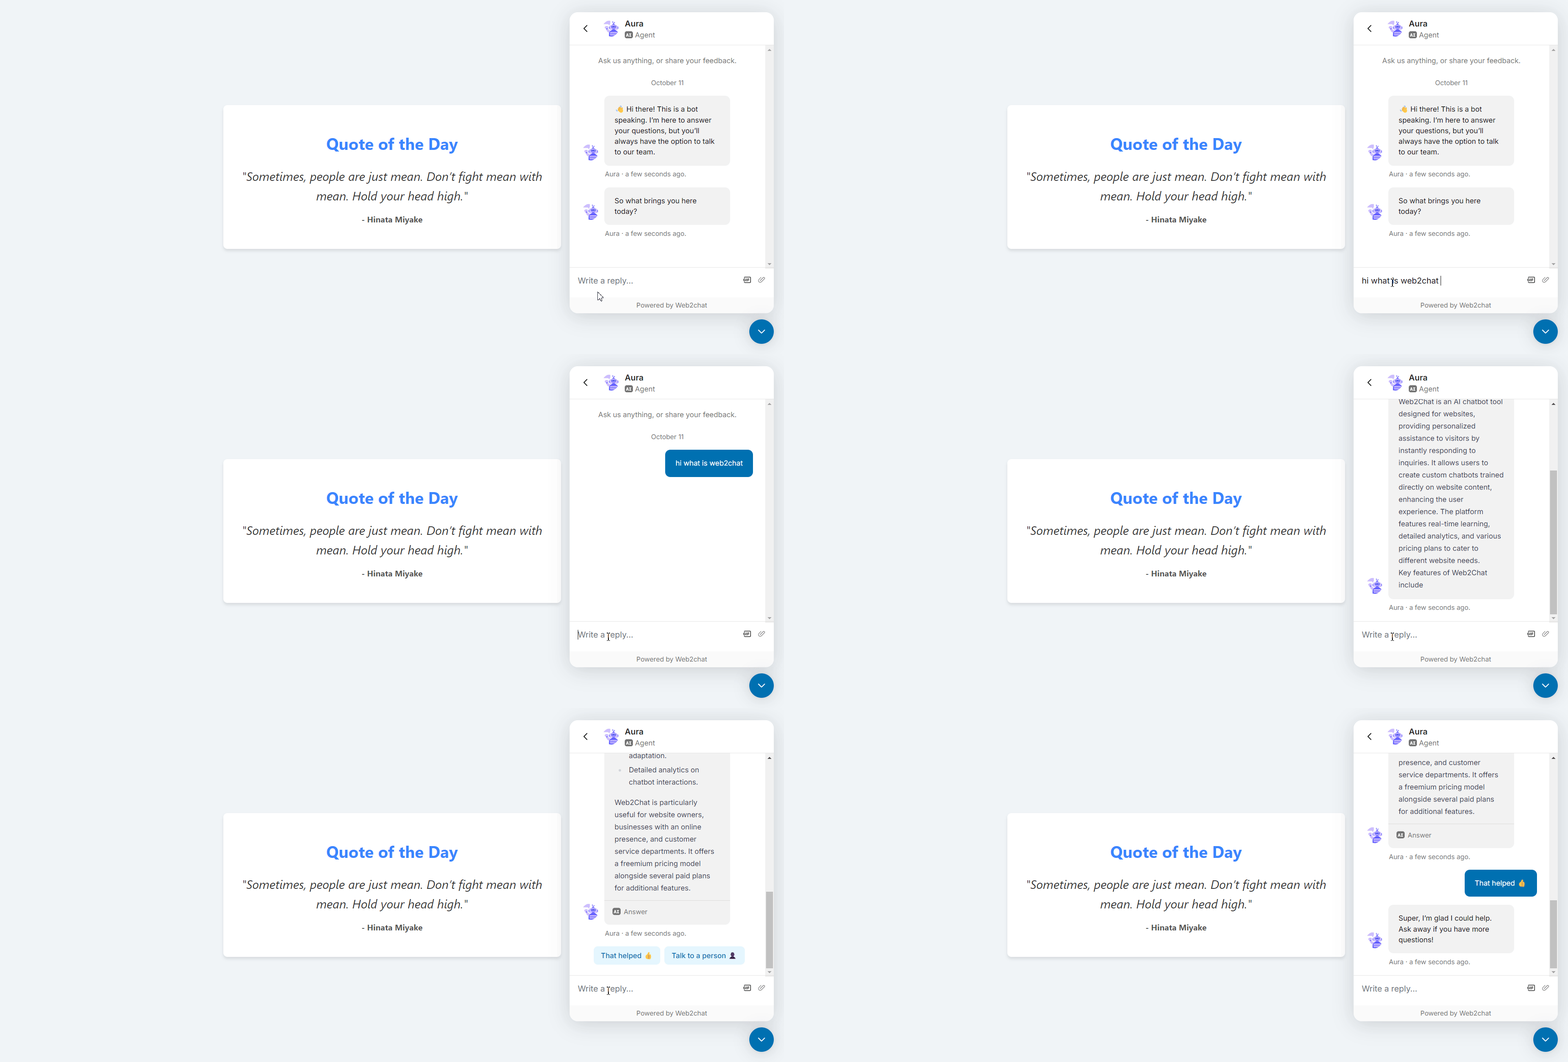
- Test a conversation flow: Initiate a chat as a visitor to see how the chatbot responds, which pre-set messages are triggered, and whether interactions are fluid.
- Test saved replies: Create a few saved replies and test them to ensure they are easily accessible and functional.
- Test message delivery: Send messages in different scenarios (e.g., when online or offline) to make sure they're delivered correctly.
4. Test Aura AI Responses
If you are using Aura AI to automate responses, make sure it’s properly trained to handle typical user questions.
- Simulate common questions: Type in expected queries and confirm that Aura AI provides accurate and helpful answers.
- Test fallback responses: Make sure that if Aura AI doesn’t have a precise answer, it offers guidance on how to contact support or find relevant Help Center articles.

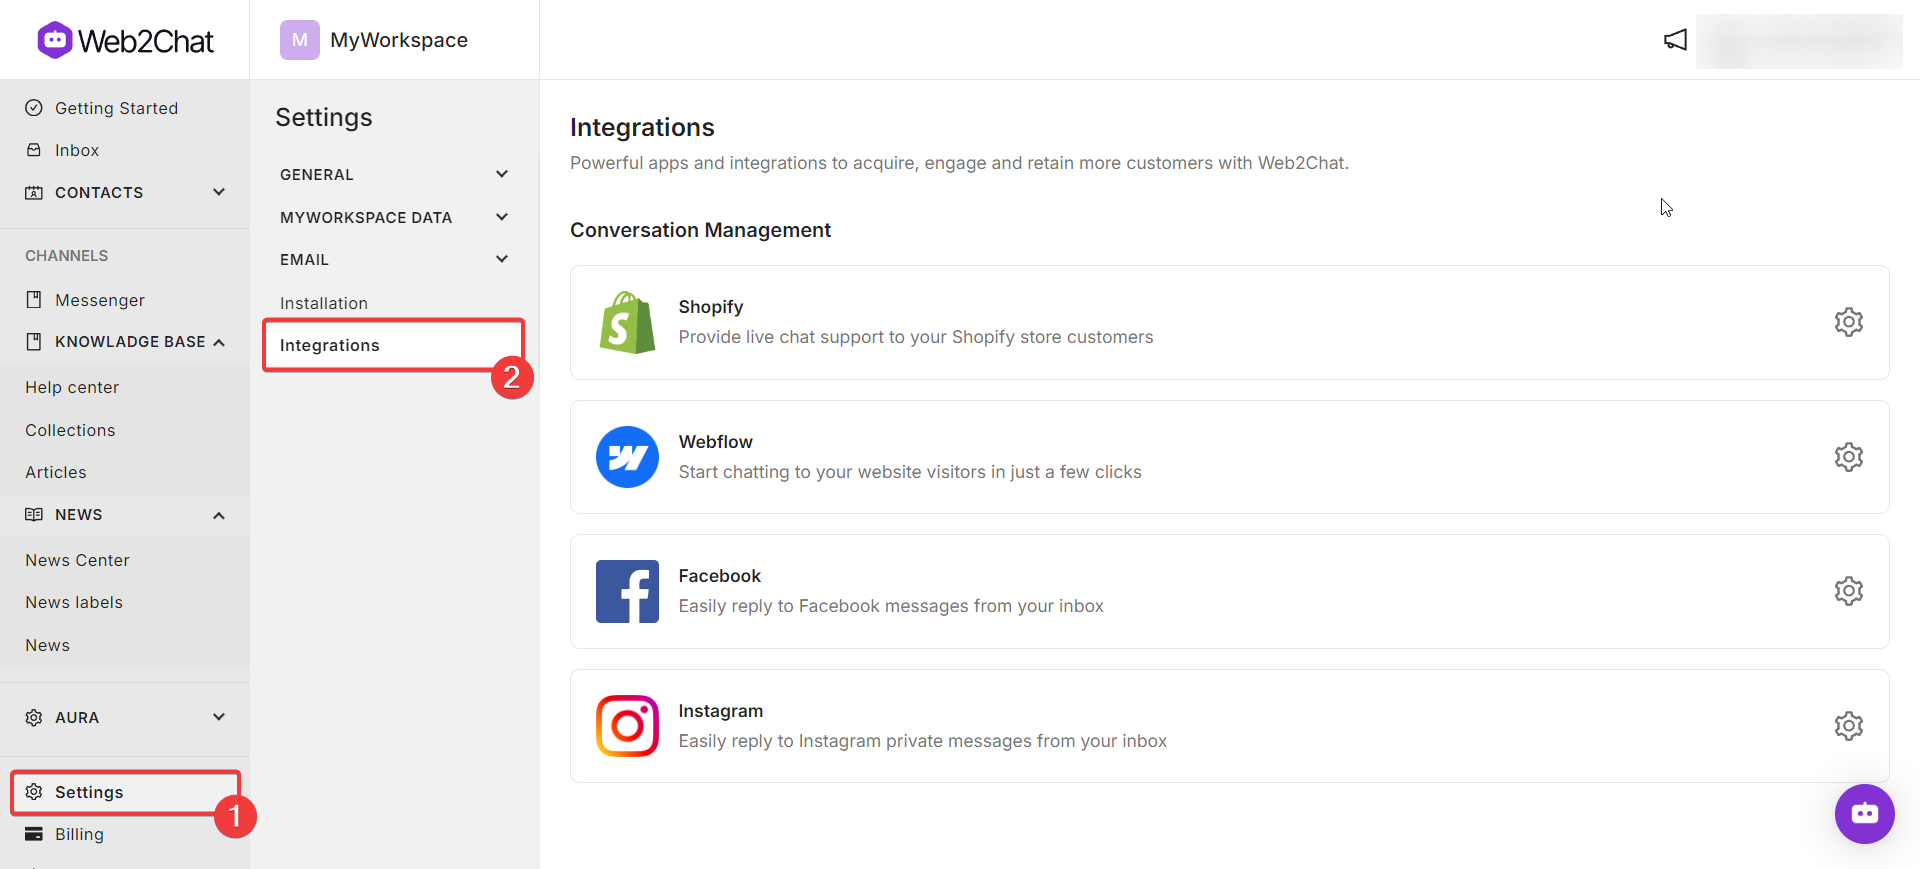
5. Test Your Integrations
If you’ve set up integrations with third-party apps or services, ensure they function properly within Web2Chat.
- CRM Integration: Verify that any customer information gathered through chats is sent correctly to your CRM.
- Email and Messaging: Check that email notifications and messages are being sent and received as configured.
- Analytics Tools: Confirm that data is accurately tracked through connected analytics tools, so you can monitor user engagement.

6. Review User Permissions and Roles
Go through the user roles and permissions to make sure they are correctly set up:
- Roles: Assign appropriate roles to team members and verify that they have the right access levels to sensitive information.
- Permissions: Confirm that only authorized users have admin privileges to modify the Help Center and settings.
7. Run User Scenarios
Test from the perspective of your customers by simulating different user scenarios:
- New visitor: Test as a first-time user and interact with your Help Center or chatbot.
- Returning user: Simulate returning to the chat or Help Center to see if user data is retained and behaves as expected.
- Mobile experience: Test the Help Center and messenger on mobile devices to make sure they are mobile-responsive.
8. Go Through a Final Pre-launch Checklist
Before launching, ensure the following tasks are completed:
- All Help Center articles are proofread and categorized.
- User roles and permissions are finalized.
- Integrations are connected and functioning.
- Messenger is customized and responds correctly.
- Chatbots, like Aura AI, are adequately trained and tested.
- Notifications are configured for both users and team members.
9. Use Real-World Testing
After running tests in your Test Workspace, conduct final checks in your Live Workspace:
- Test all features using your real workspace to ensure accuracy.
- Interact with the Help Center as if you were a customer, looking out for any last-minute adjustments needed.
- Test during various times of the day to see how your support system handles different scenarios.
10. Monitor and Optimize After Launch
Once you go live, continue to monitor your Help Center and messaging:
- Review analytics: Use built-in analytics tools to review user behavior, popular articles, and chat interactions.
- Gather feedback: Collect feedback from customers and your support team to find areas for improvement.
- Optimize content: Update or add articles based on common user questions or recurring issues.
11. Communicate Changes with Your Team
Keep your support team informed about any updates or changes:
- Share testing results and insights.
- Provide training on how to use new features.
- Schedule regular review sessions to discuss any support challenges.
Thorough testing is essential to ensure your Web2Chat setup is effective and user-friendly before going live. Follow these best practices to create a reliable, engaging experience for your customers. Keep monitoring performance post-launch to make continual improvements.
If you need further assistance, contact our Customer Support.
