The Help Center in Web2Chat allows you to create a self-service knowledge base where customers can access articles and resources on their own. Setting up the Help Center not only helps your customers find answers faster but also reduces the number of repetitive support requests your team has to handle.
Step 1: Set Up the Help Center
To start using the Help Center, follow these steps:
- Go to Help Center → General from your Web2Chat dashboard.
- Configure the basic settings, including the supported languages, domain and publishing.
- Navigate to the 'Styling' tab to make your Help Center reflect your brand by adjusting the logo, colors, and fonts.
- Enable or disable sections for both 'Collections' and 'Articles' from the 'Homepage sections' tab to enhance navigation within the Help Center.
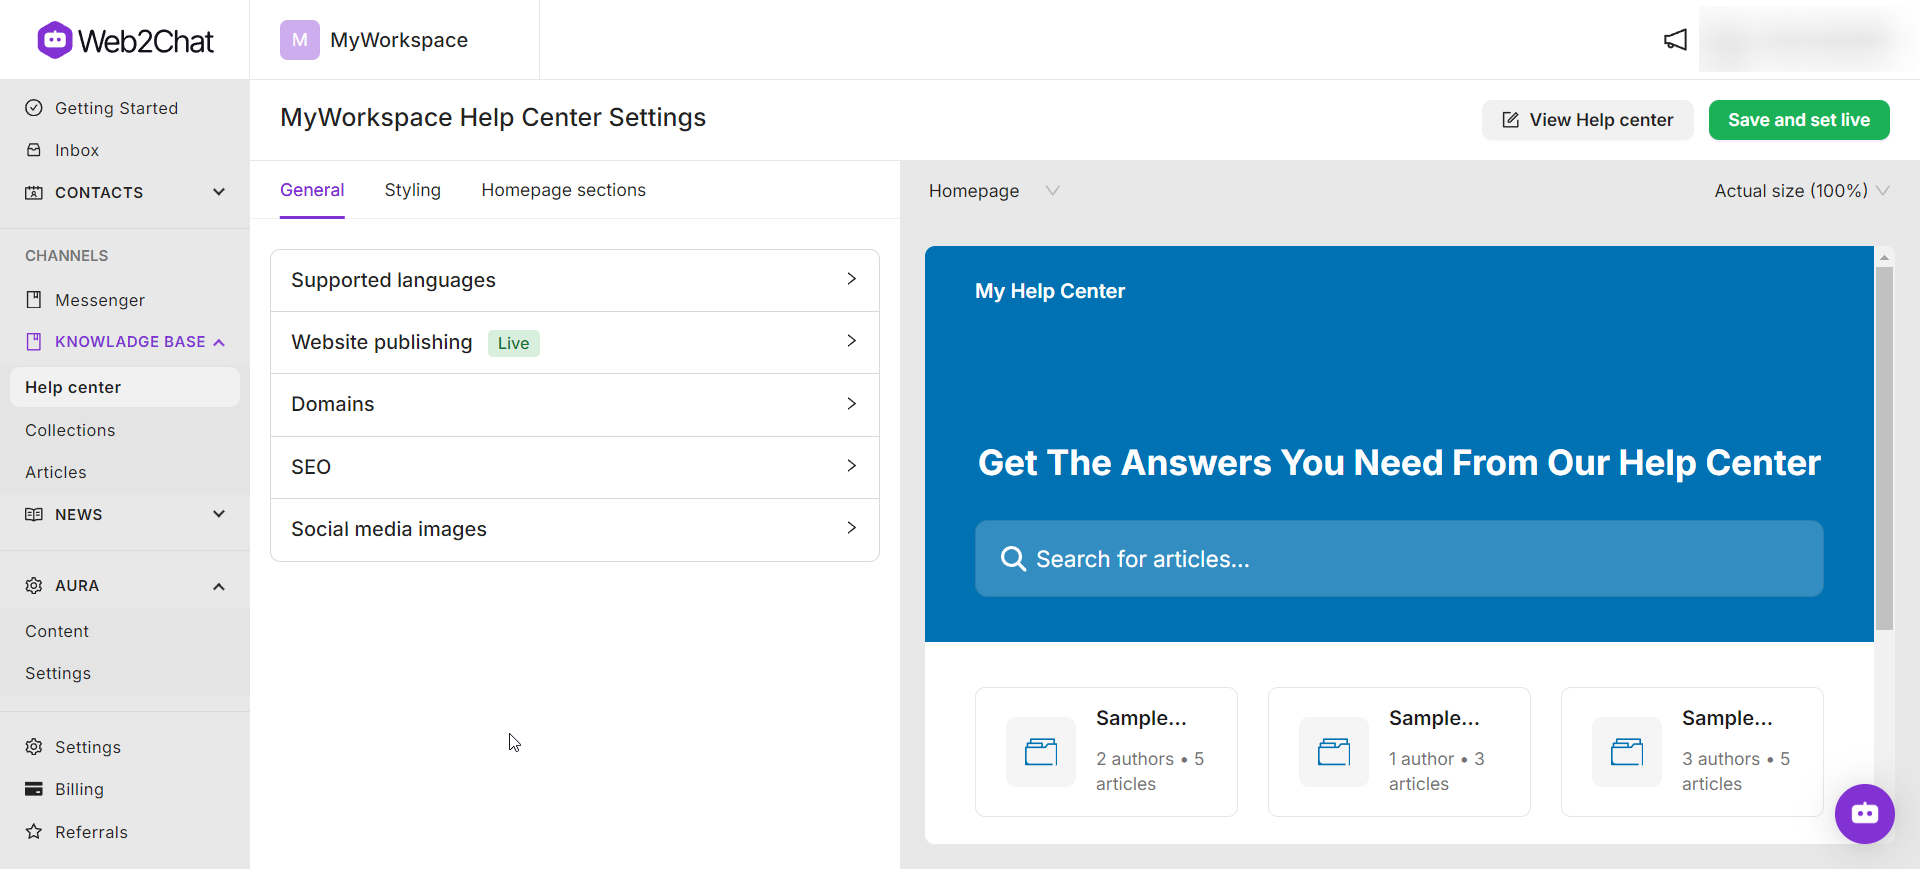
Learn more about customizing your help center here.
Step 2: Organize Your Content
Creating a structured knowledge base will make it easier for customers to find the information they need. With Web2Chat, you can do this by creating categories, also known as 'Collections'.
- Navigate to Knowledge Base → Collections and click Add Collection.
- Provide a name and description to help users understand what each category covers.
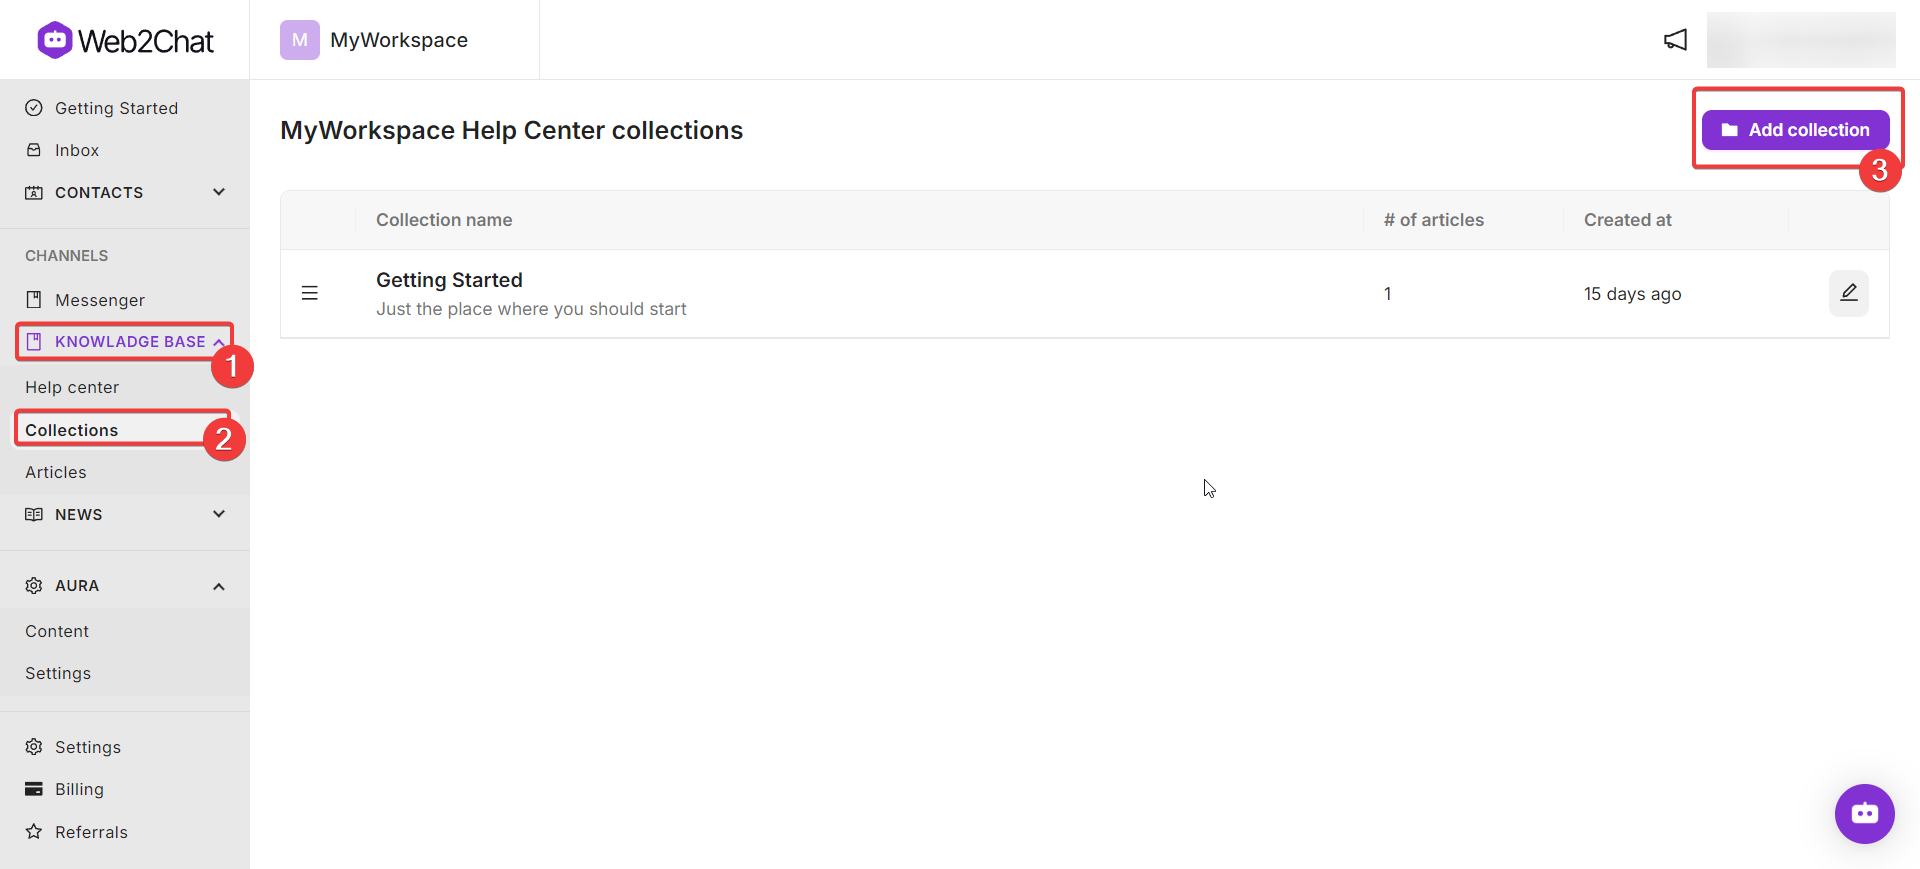
Collections can be used to group similar articles, such as FAQs, product guides, or troubleshooting tips. Once you have added collections in Web2Chat, it's time to start adding your articles to your help center. Learn more about managing collections here.
Step 3: Create Help Articles
To create an articles for your help center or knowledge base in Web2Chat, follow the steps below:
- Navigate to Knowledge Base → Articles and select + New Article.
- Enter a title, content, and assign it to a category.
- Make sure to use clear headings and bullet points to enhance readability.
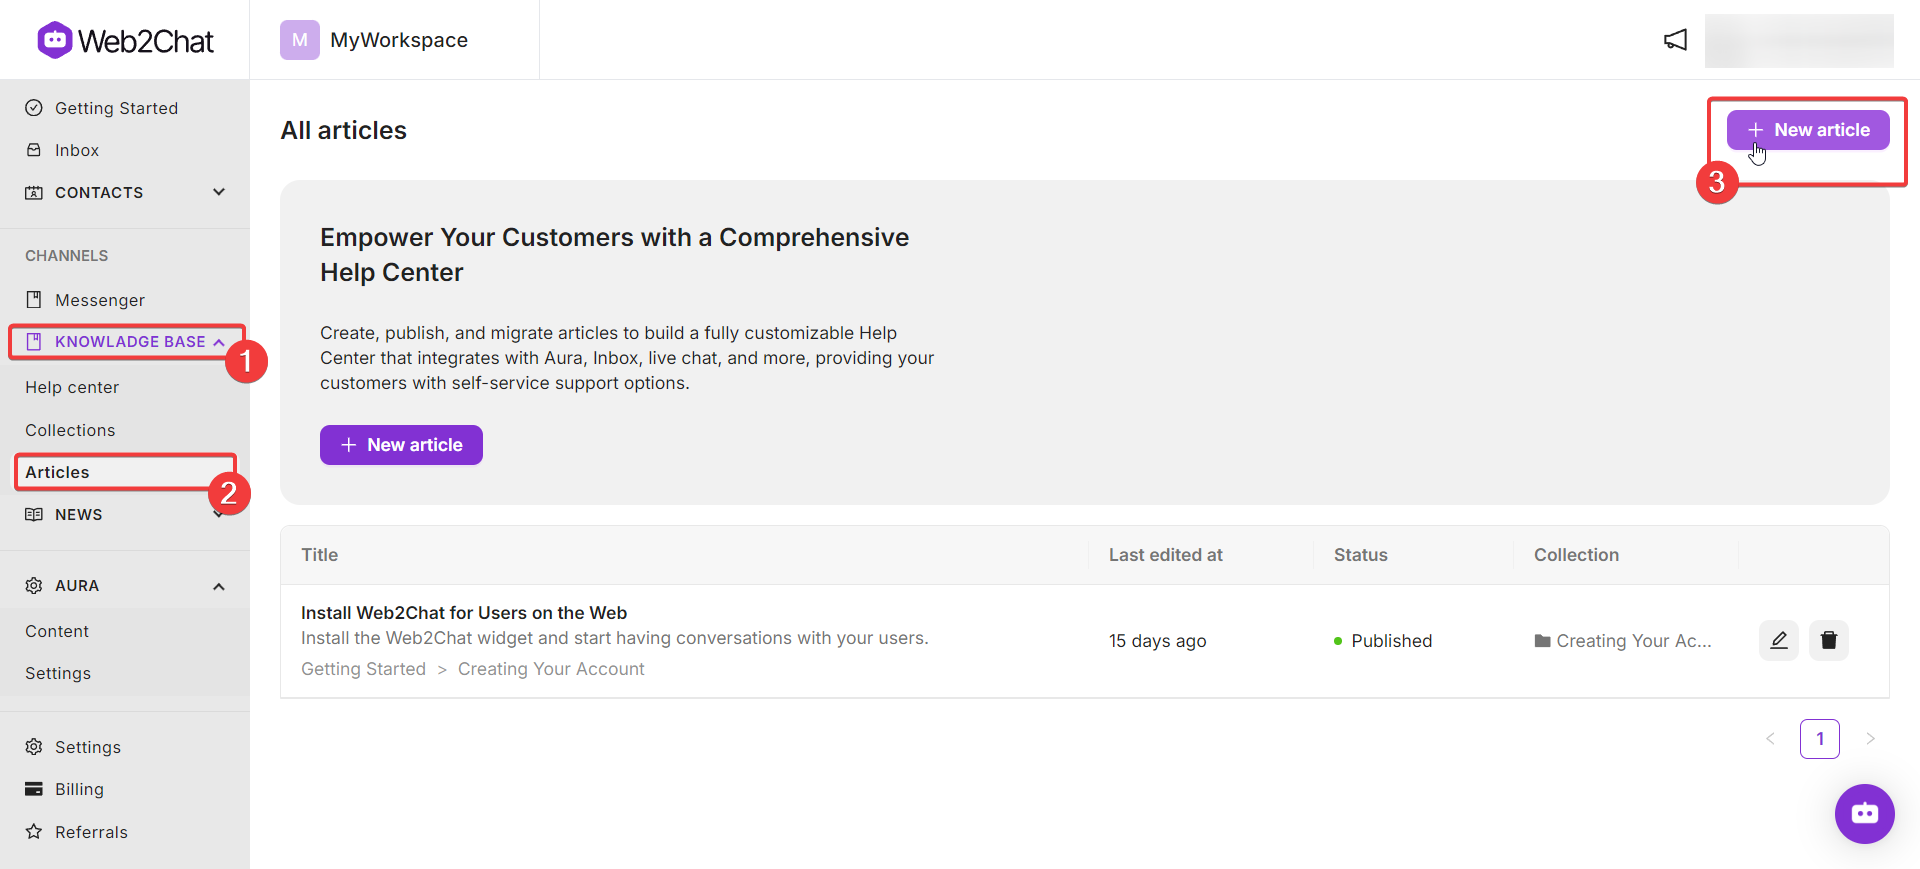
Learn more about creating articles in Web2Chat here.
Step 3: Configure Search Bar
To help users find articles quickly, Web2Chat's Help Center includes a powerful search feature.
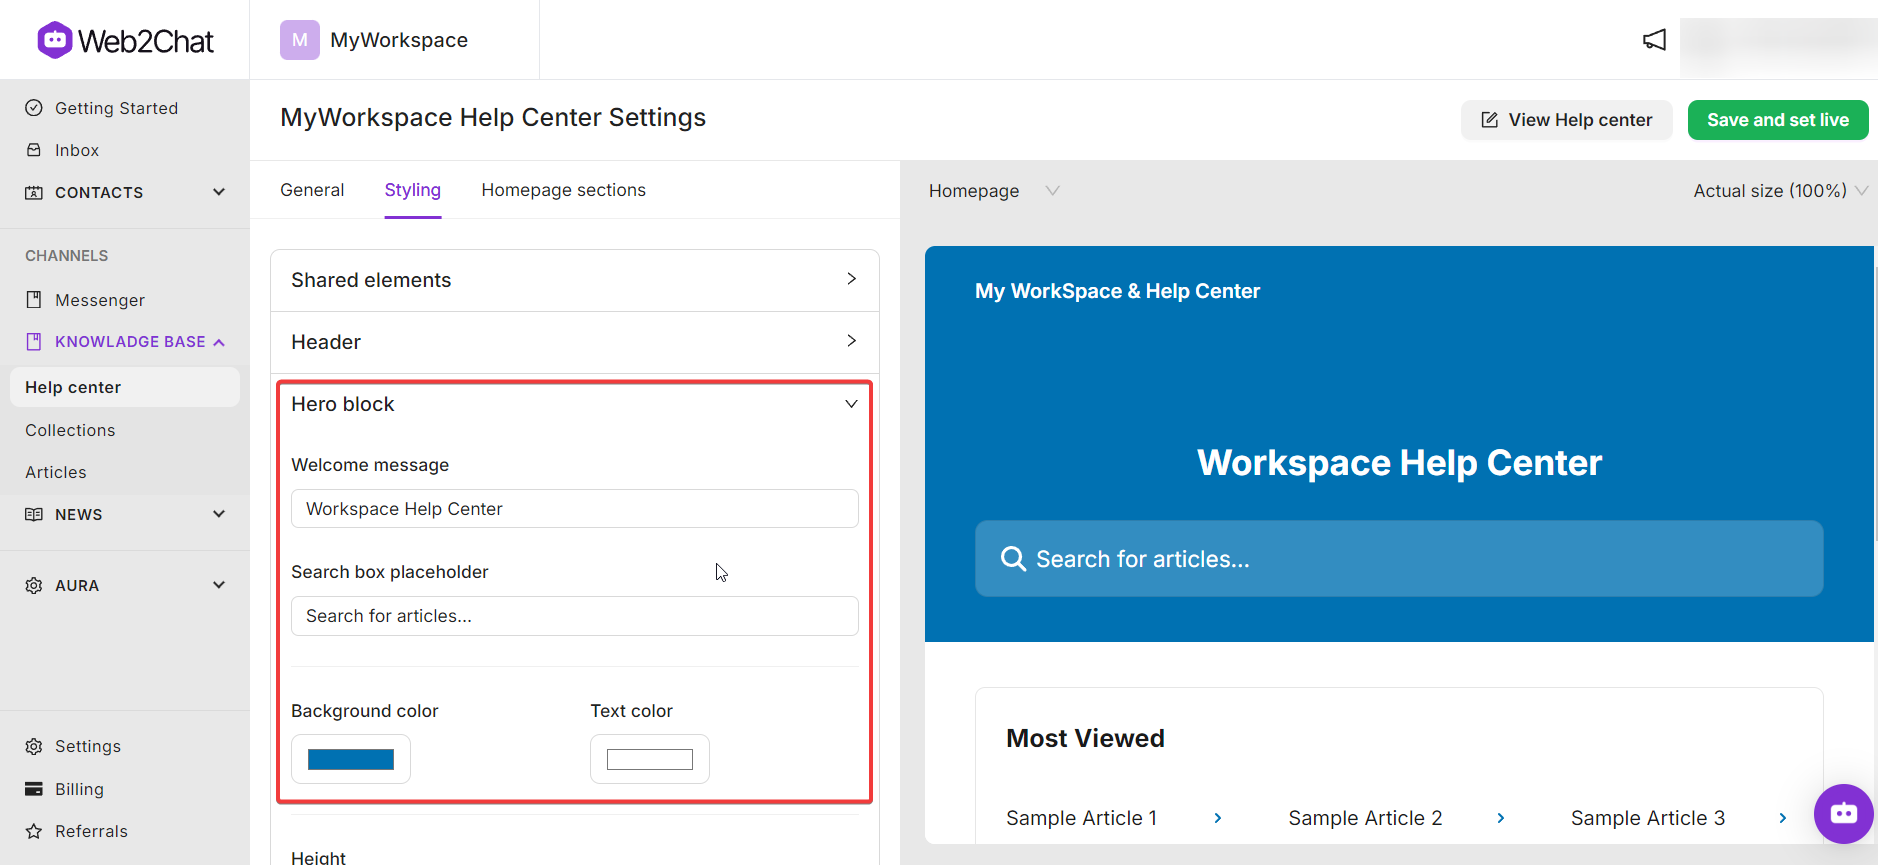
- Go to Help Center → Styling to customize your search bar.This feature allows users to type in keywords and find relevant articles.
- Scroll down to the 'Hero Block' section.
- Customize and configure your search bar by adding a welcome message, changing the colors, width and height, adding a placeholder text, and more.
Step 4: Integrate Aura with Your Help Center (Optional)
Enhance the Help Center experience by integrating it with Aura, Web2Chat's AI-powered assistant. Aura can suggest relevant Help Center articles to customers during live interactions.
- Enable Aura integration by purchasing the Aura Addons.
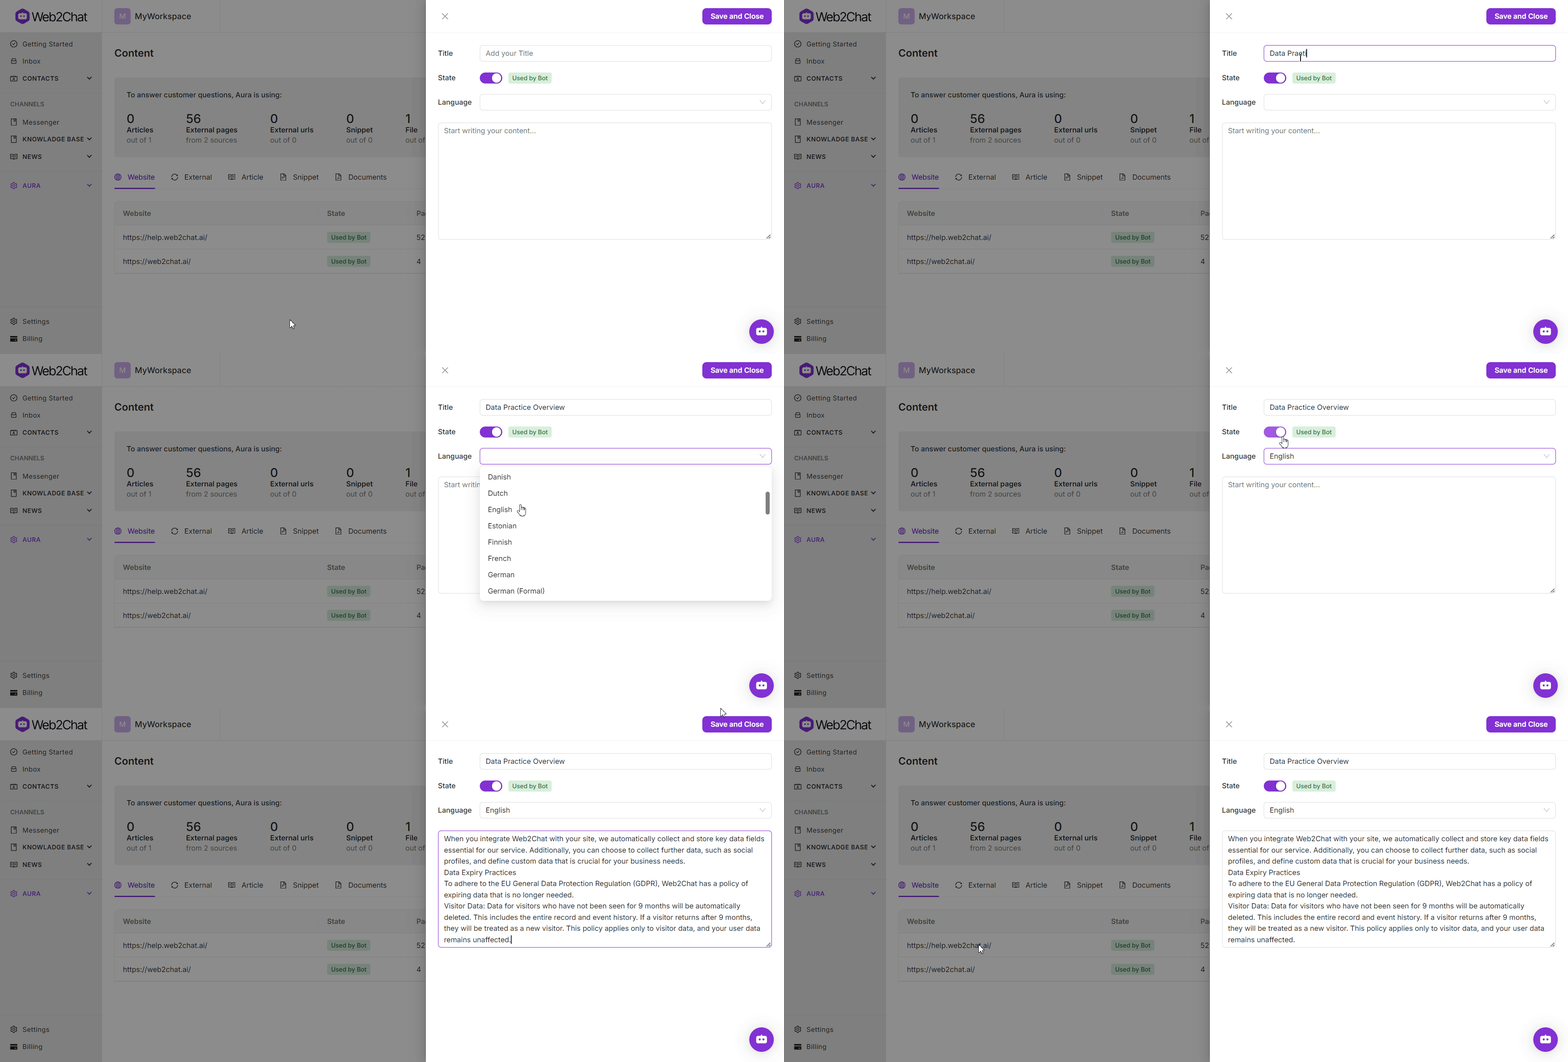
- After your purchase, navigate to Aura → Content.
- Train Aura with your own help center articles, external sources, snippets and uploaded documents.
- This will allow Aura to suggest relevant Help Center articles during customer interactions. Learn more about training Aura AI here.
Step 5: Publish Your Help Center
Once your Help Center is set up and content is added, it’s time to make it available to customers.
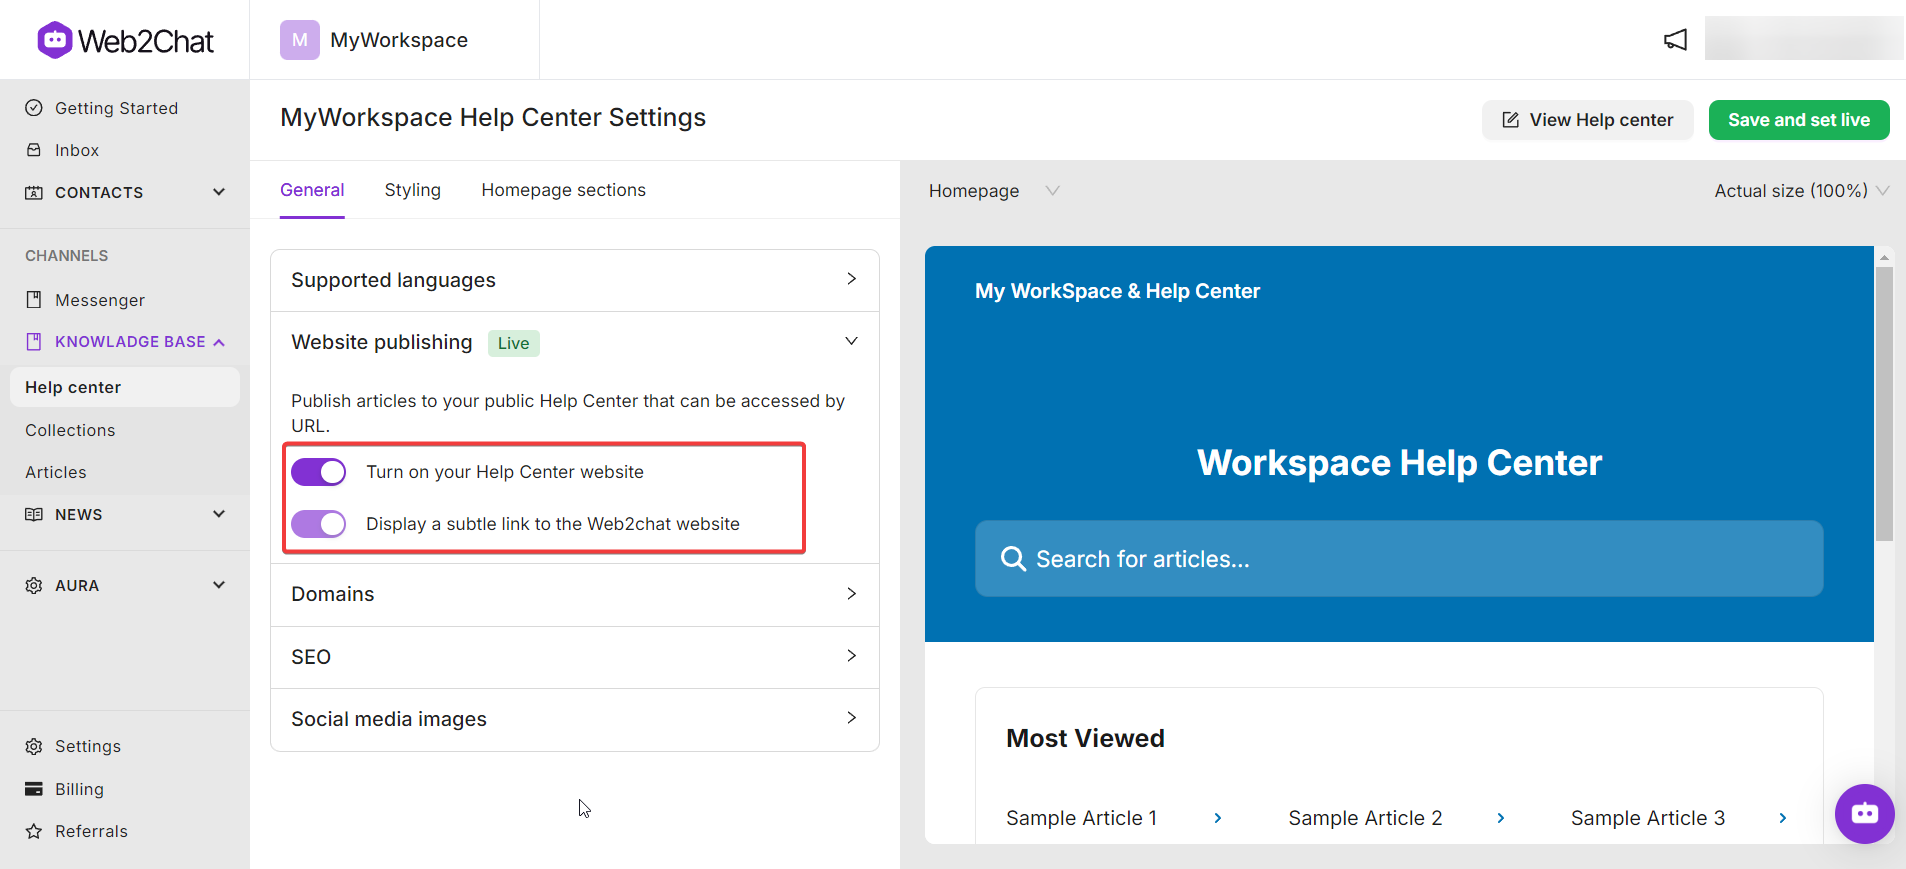
- In Help Center → General, navigate to the 'Website publishing' section.
- Toggle to enable the 'Turn on your Help Center website' option. Your Help Center will now be accessible to customers.
- Optionally, you can also add a shareable link to the Help Center on your website, emails, etc. to make it easily discoverable.
Tips for Success
- Keep Content Up to Date: Regularly review and update articles to ensure accuracy.
- Monitor Analytics: Use Help Center Analytics to track performance and identify popular topics.
- Encourage Feedback: Allow users to rate articles and provide feedback to improve content quality.
Getting started with the Help Center in Web2Chat is straightforward, allowing you to quickly set up a valuable resource for your customers. Follow the steps above to create an organized, user-friendly knowledge base and start enhancing the customer experience.
If you need more assistance, feel free to contact our Customer Support.
Related Articles
Explore more to make the most out of your Help Center:
