Effectively managing your Help Center content ensures that your articles stay organized, up-to-date, and easily accessible for your users. In Web2Chat, you can edit articles, change their status, delete them, move articles between collections, and select which articles appear on the homepage.
Managing Articles (Basics)
Below are some of the ways you can edit, update and manage the articles in your Help Center with Web2Chat.
Edit an Article
To keep your Help Center content accurate and relevant, you may need to edit articles:
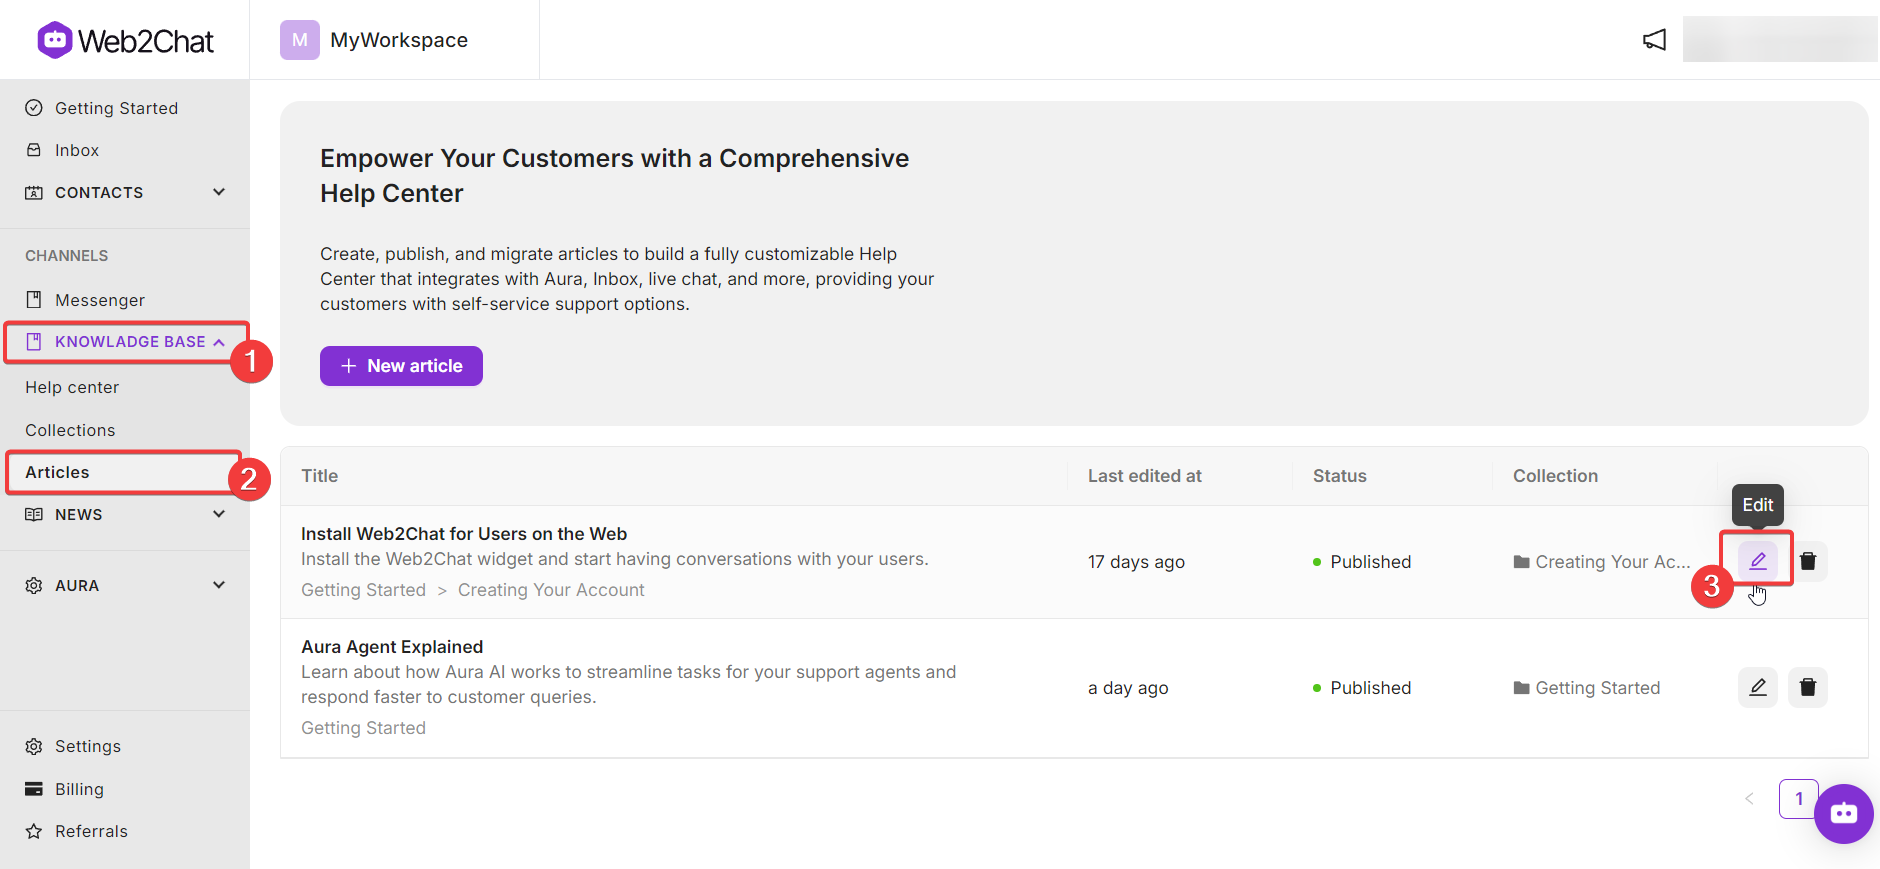
- Go to Knowledge Base from your dashboard.
- Navigate to the Articles.
- Click on the 'Edit' icon on the article you want to edit.
- Make the necessary changes to the article content, formatting, or metadata (e.g., title, description, tags).
- Click "Save" to update the article with the changes.
Move an Article to Draft or Archive
Adjust the article's status based on its readiness or relevance:
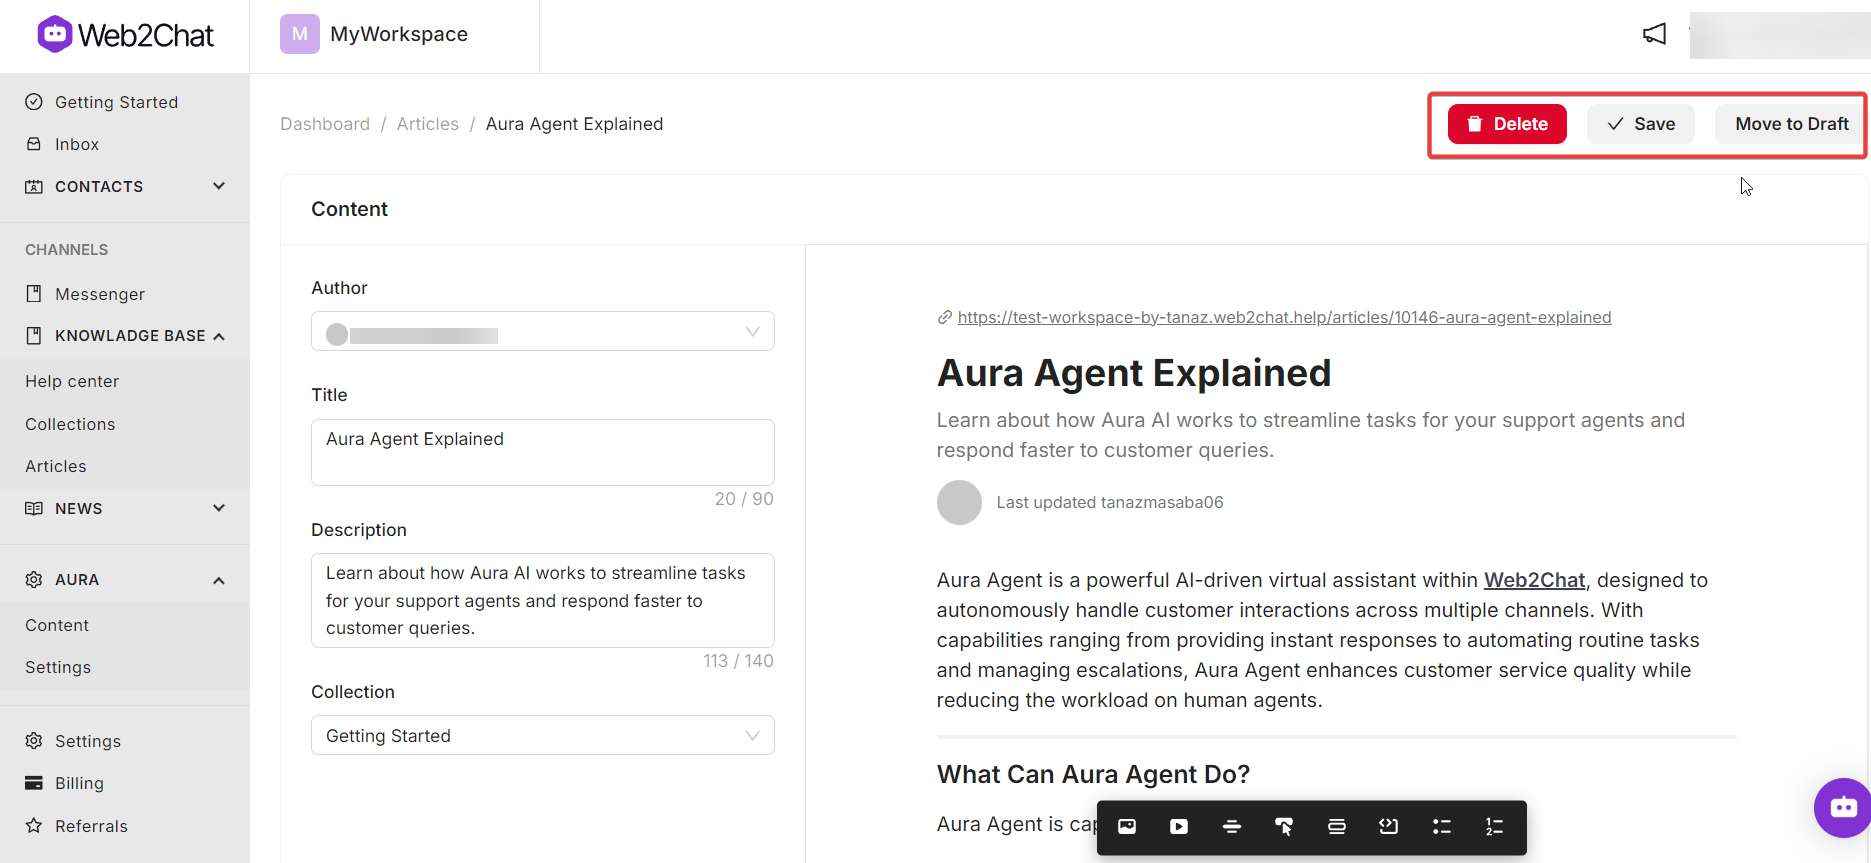
- Edit the article you wish to change.
- From within the editor, click on the 'Move to Draft' button. This will remove it from the published Help Center but keep it editable.
Delete an Article
If an article is no longer useful or relevant, you can delete it:
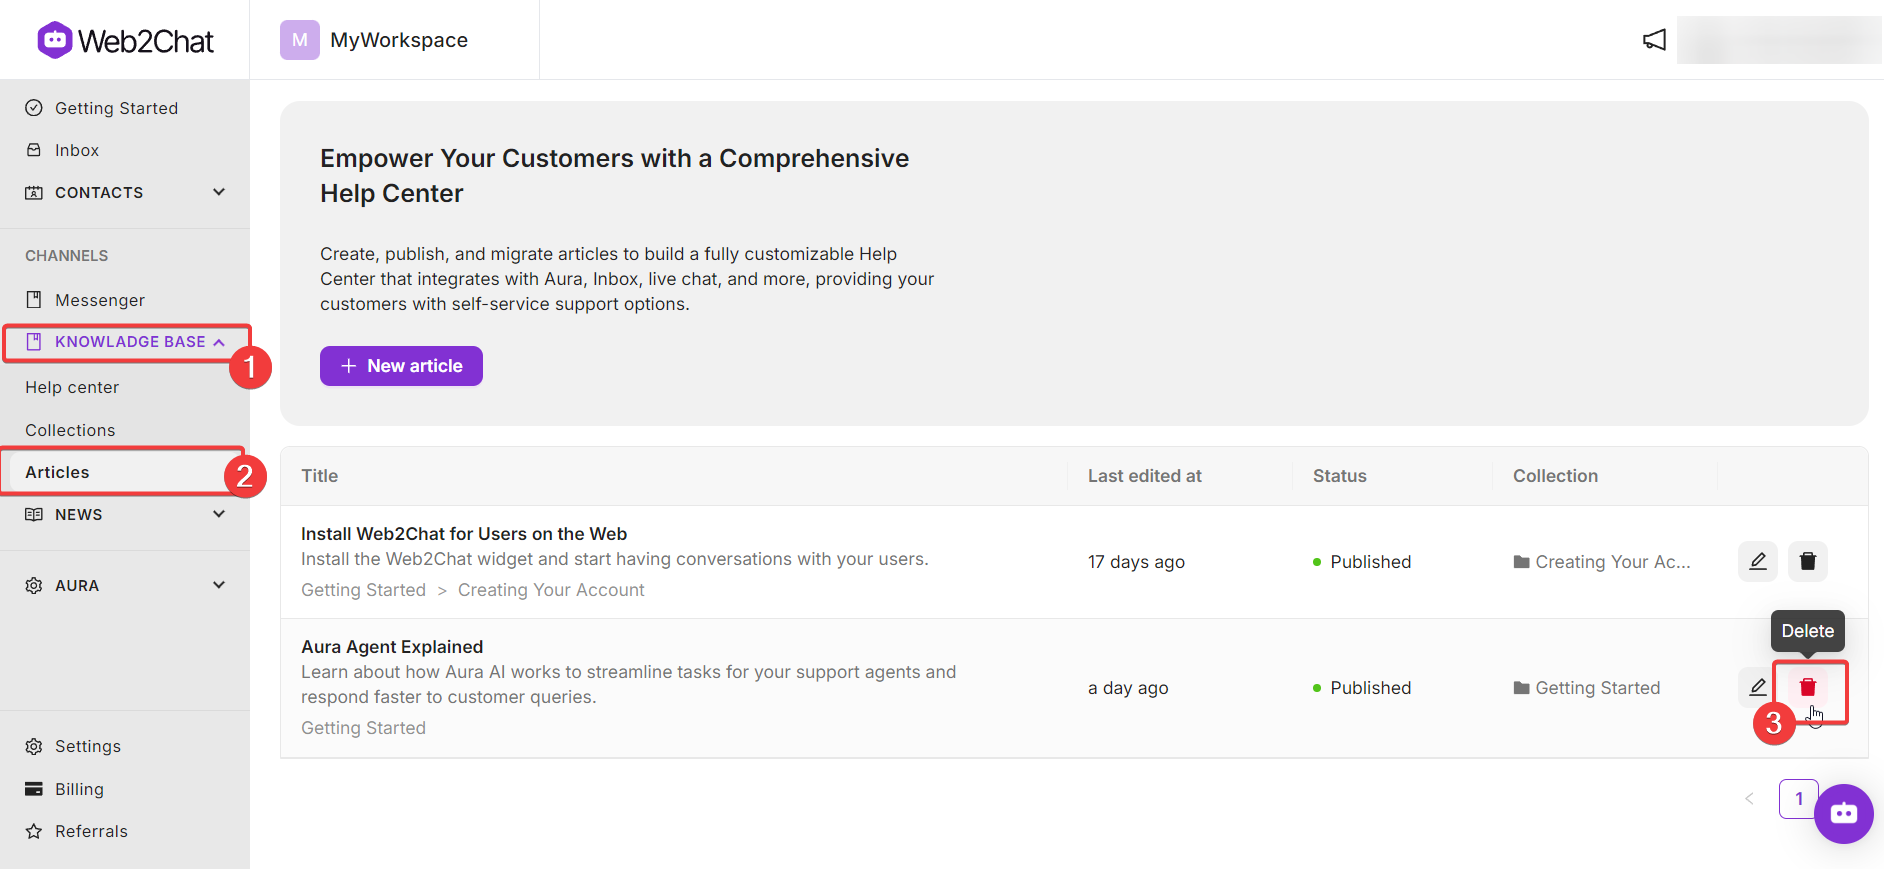
- Go to Knowledge Base from your dashboard.
- Navigate to the Articles.
- Click on the 'Delete' icon on the article you want to edit.
- Confirm the deletion to permanently remove the article.
Note: Deleting an article cannot be undone.
Move Articles Between Collections
You can reorganize your Help Center content by moving articles to different collections:
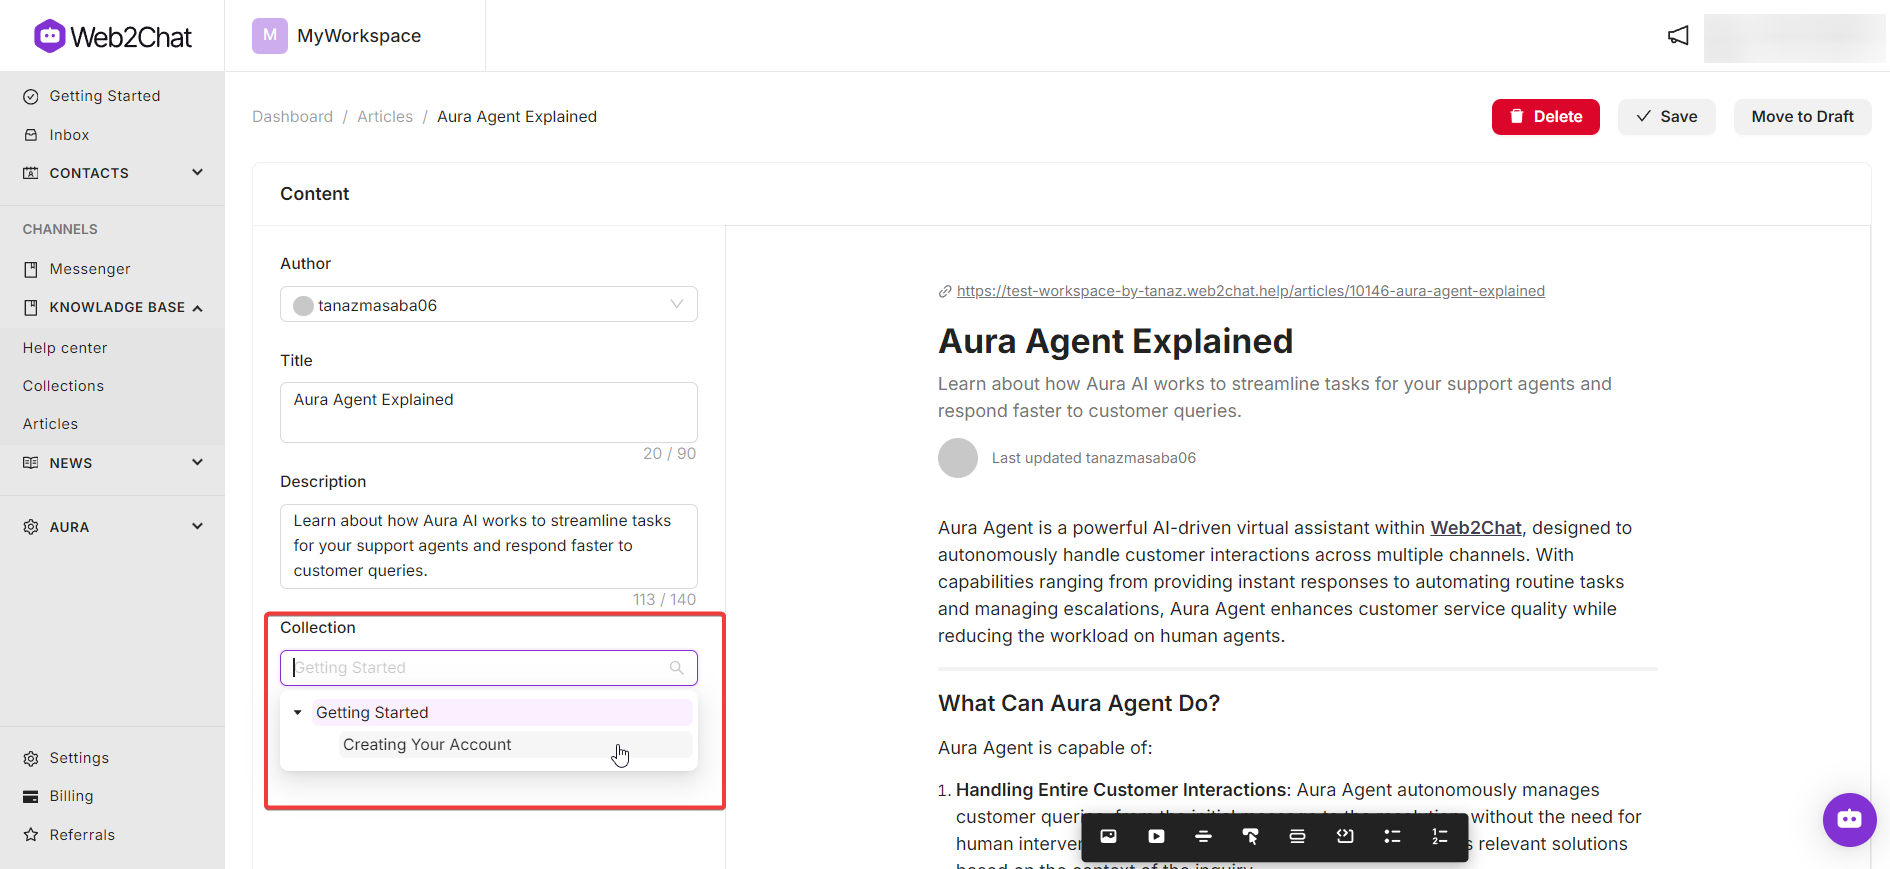
- Edit the article you wish to change.
- From within the editor, click on the 'Collections' dropdown.
- Choose the collection where you want to move the article to.
- Click 'Save' to update your changes.
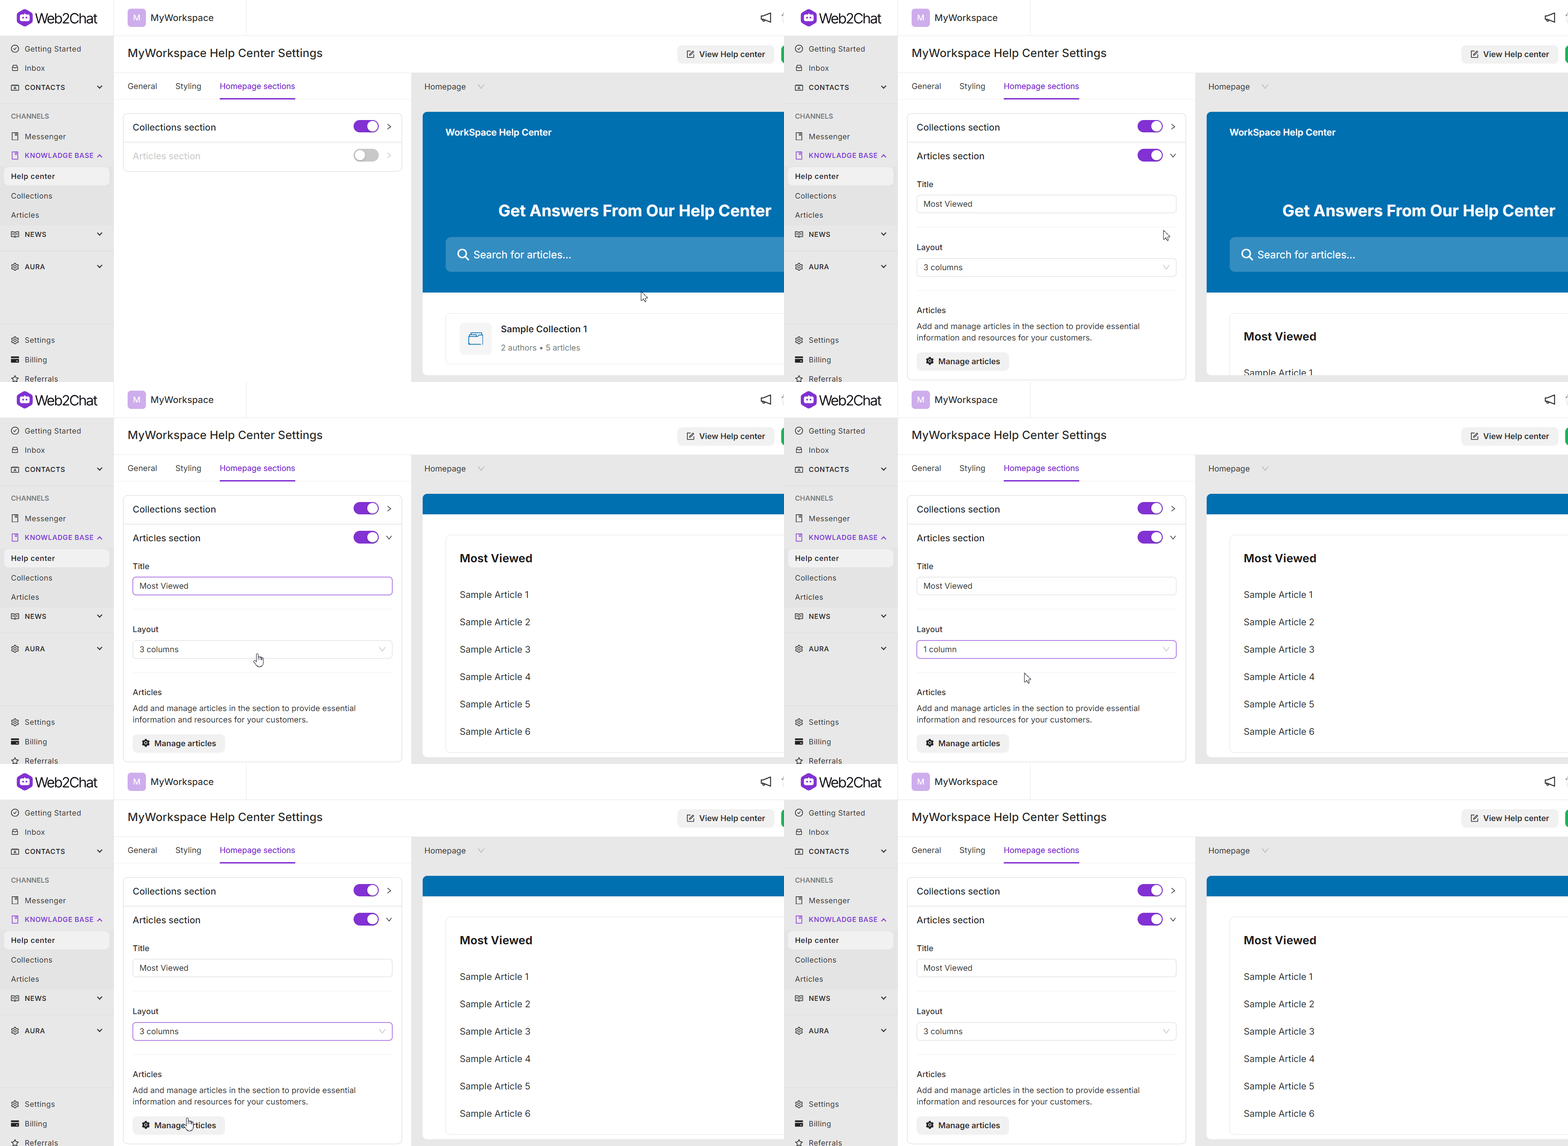
Managing Homepage Article Display
Customize which articles appear on your Help Center homepage:
- Navigate to Knowledge Base from your dashboard.
- Head over to Help Center--> Homepage Sections.
- Under the "Homepage Sections" settings, locate the "Articles Section" configuration.
- Toggle to enable the "Articles Section" to display your articles in the Help Center.
- Choose the display style and number of columns (up to 3) for showcasing the articles.
- Click on 'Manage articles' button at the bottom to select the articles you want to display in the homepage article section.
- Save the changes to update the homepage with the selected articles.
Managing your Help Center content effectively ensures a streamlined, organized, and relevant support experience for your users. Regularly editing, organizing, and customizing the display of articles helps keep your Help Center up-to-date.
If you need further assistance, contact our Customer Support.
Related Articles
Expand your knowledge on managing Help Center content:
