The Article Search feature in Web2Chat Messenger allows customers to easily find relevant help articles within the Messenger. This feature enhances the self-service experience by giving users direct access to support resources, reducing the need for live assistance and empowering customers to resolve questions on their own.
Step-by-Step Guide to Enable Article Search in Messenger
Follow these steps to enable and customize Article Search in your Web2Chat Messenger.
Step 1: Navigate to Content Settings
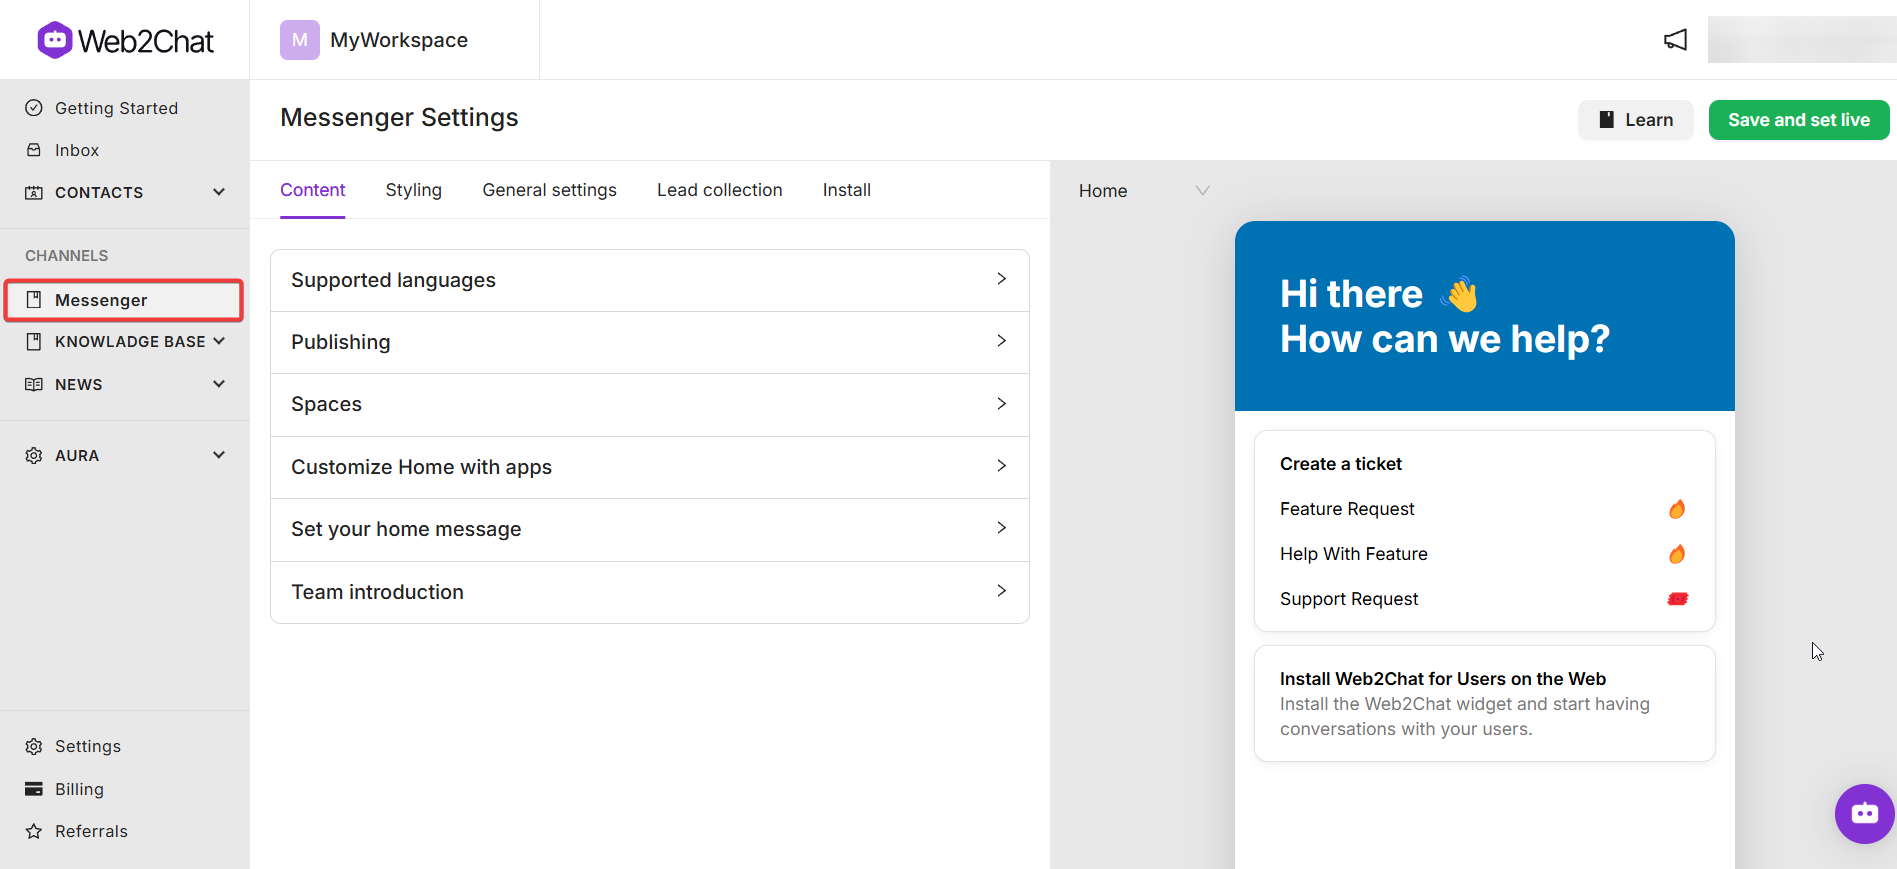
- From the left-hand menu of your Web2Chat dashboard, click on Channels--> Messenger.
- From the Messenger, navigate to the Content tab access customization options for the Messenger.

Step 2: Customize Home with Apps
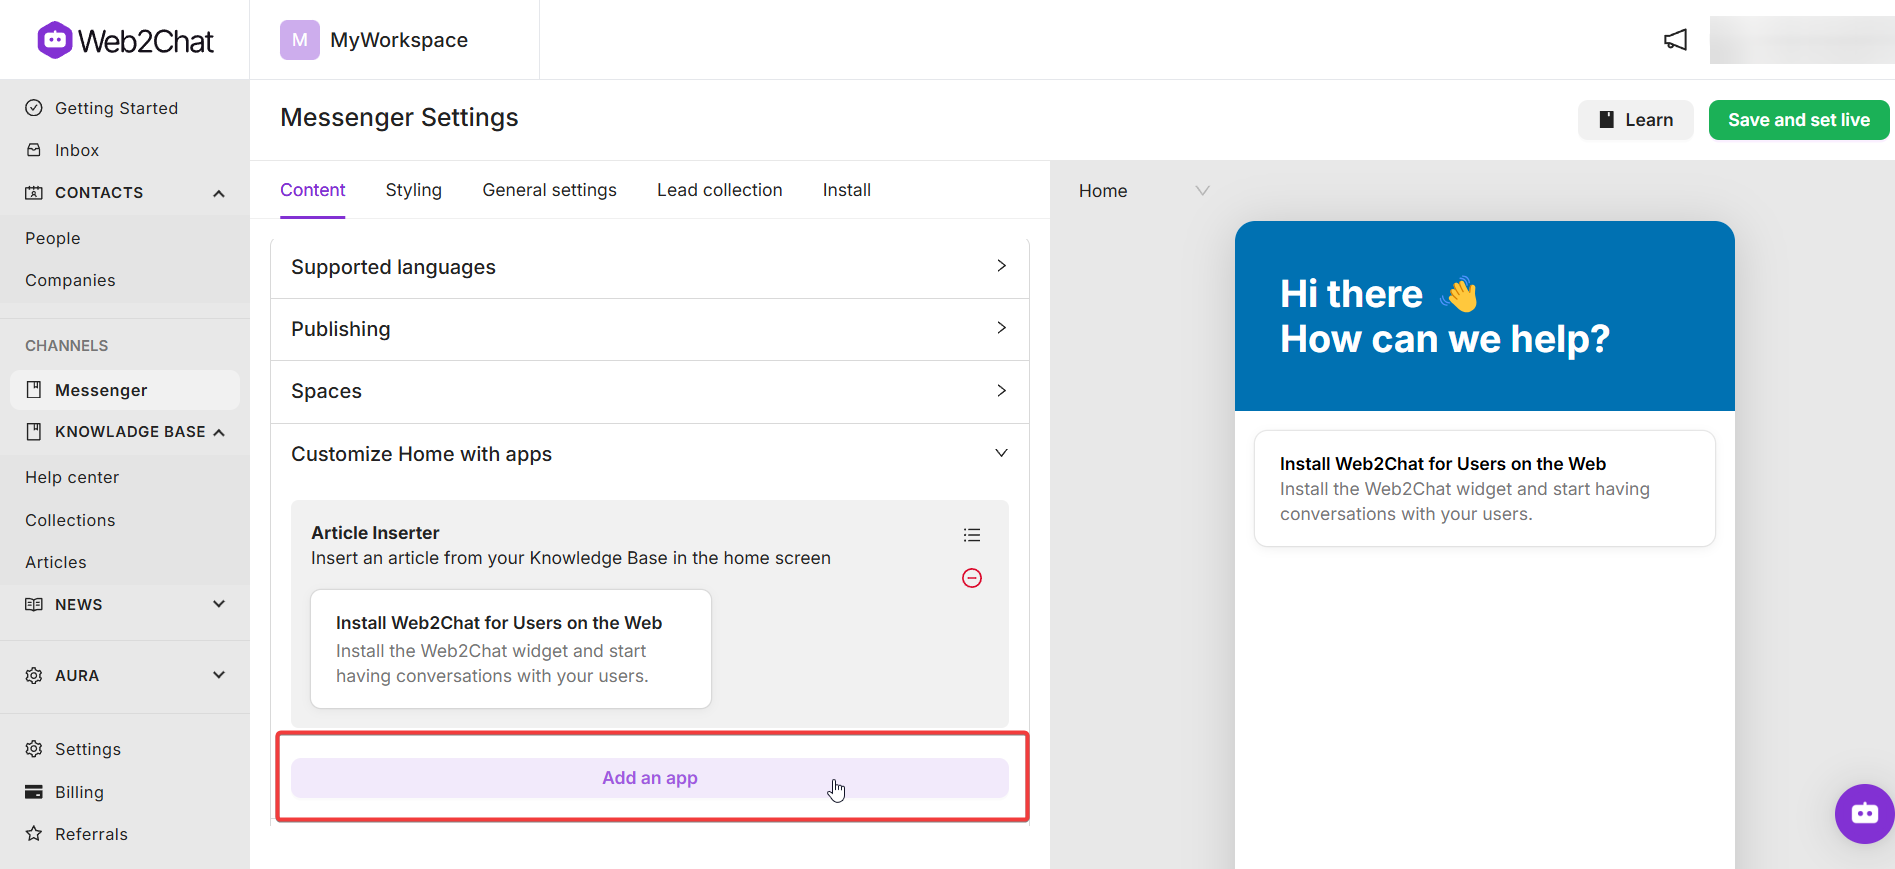
- Within the Content tab, locate the Customize Home with Apps section to manage the apps displayed in your Messenger Home.
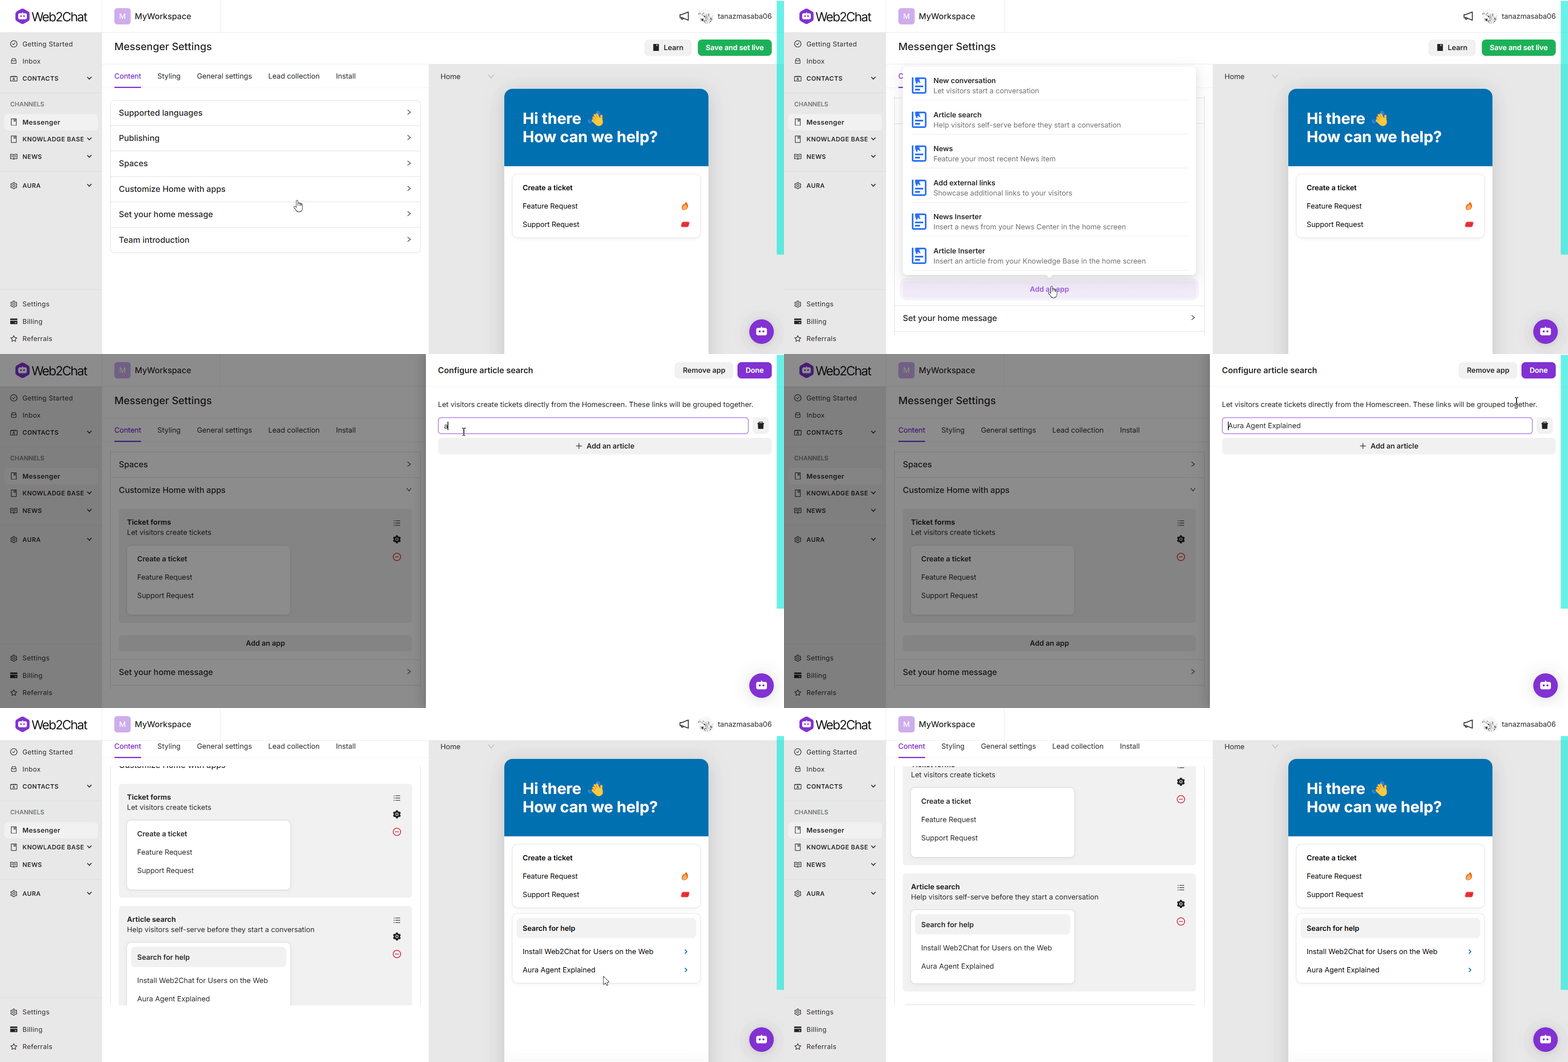
- Click on the Add an App button. This will open a list of available apps you can add to your Messenger Home.

Step 3: Insert the Article Search App
- From the list of apps, select Article Search to add it to your Messenger.
- When you select the Article Search app, a left sidebar will open. Here, you can configure how articles will appear.
- Use the search bar in the sidebar to locate relevant articles. Click on the articles you want to display by default in your Messenger.

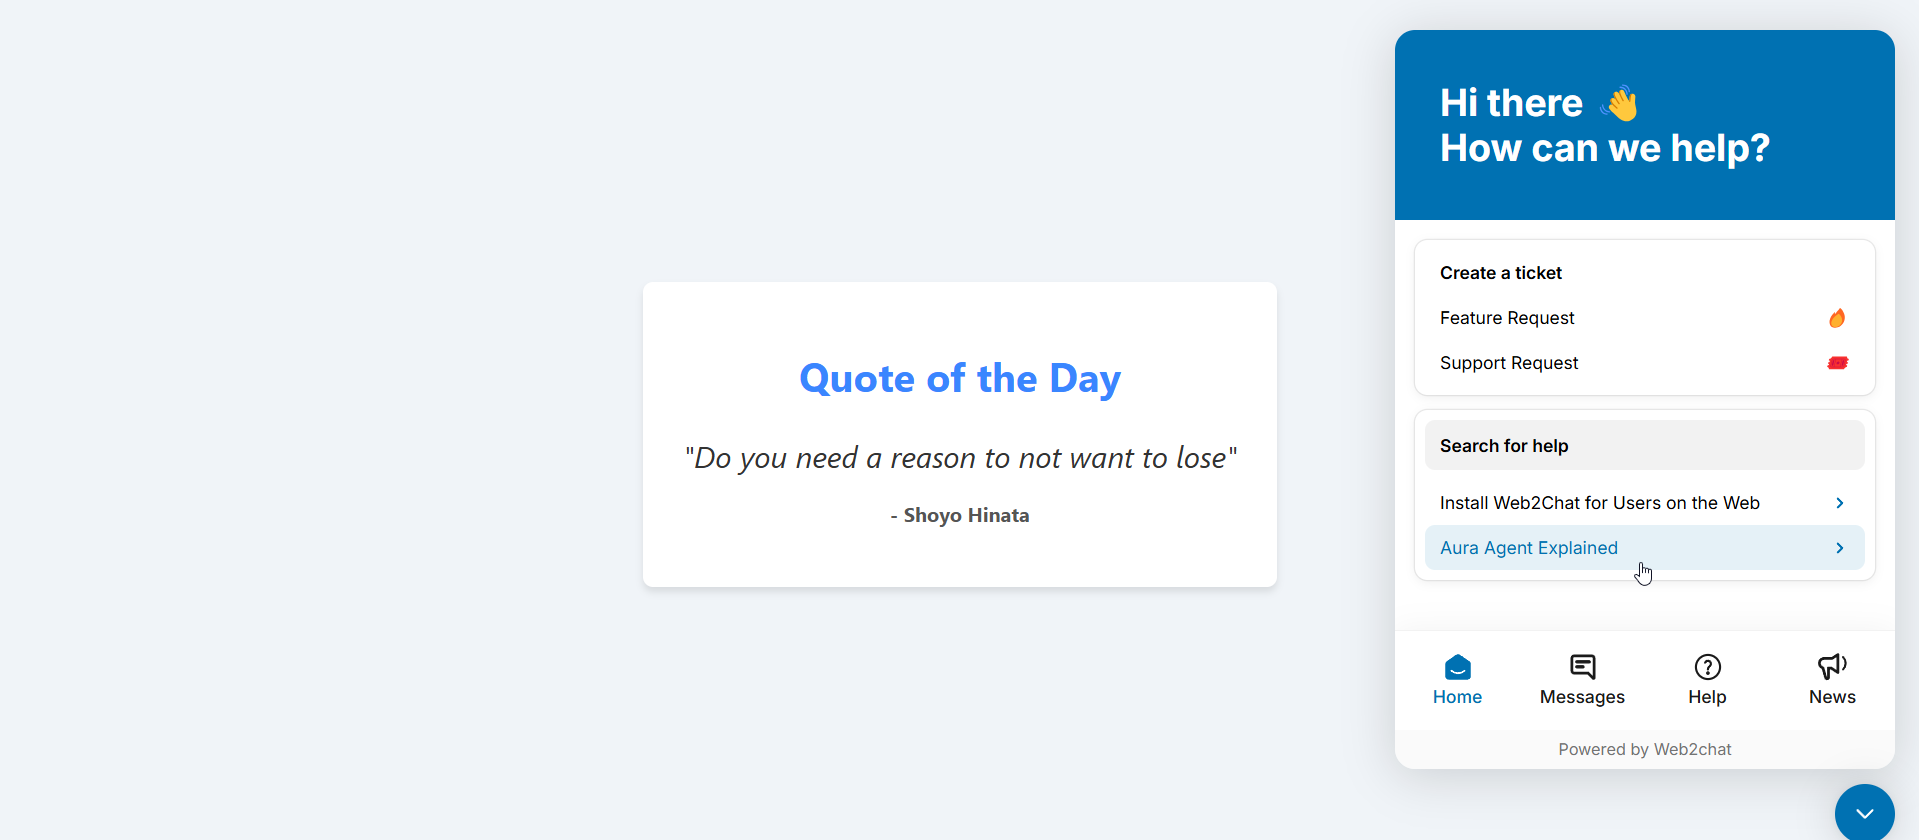
These articles will appear automatically when users open the Article Search, giving them a quick reference to popular or essential topics.
After selecting the articles you’d like to display, click on the Save and Set Live button to update your changes.

By enabling the Article Search app in Web2Chat Messenger, you provide customers with a direct, user-friendly way to access help resources. This setup helps users find answers independently, enhancing their experience while reducing the workload on your support team.
If you need further assistance, contact our Customer Support.
