In Web2Chat, tickets are essential for managing customer support queries that require more time or resources. This guide provides detailed instructions on setting up and managing tickets effectively to enhance your support process.
Getting Started
To manage tickets in Web2Chat, you first need to configure the ticket settings.
Step 1: Access Ticket Settings
- Navigate to Settings from the sidebar.
- Head over to Workspace Data--> Ticket Forms.

Step 2: Define Ticket Details
You can create a new ticket form here by:
- Click on the + Create ticket form button.
- A popup will appear where you can set up the new ticket form.
- Enter necessary details for your new ticket form.
- Click on the Save button to update your changes.
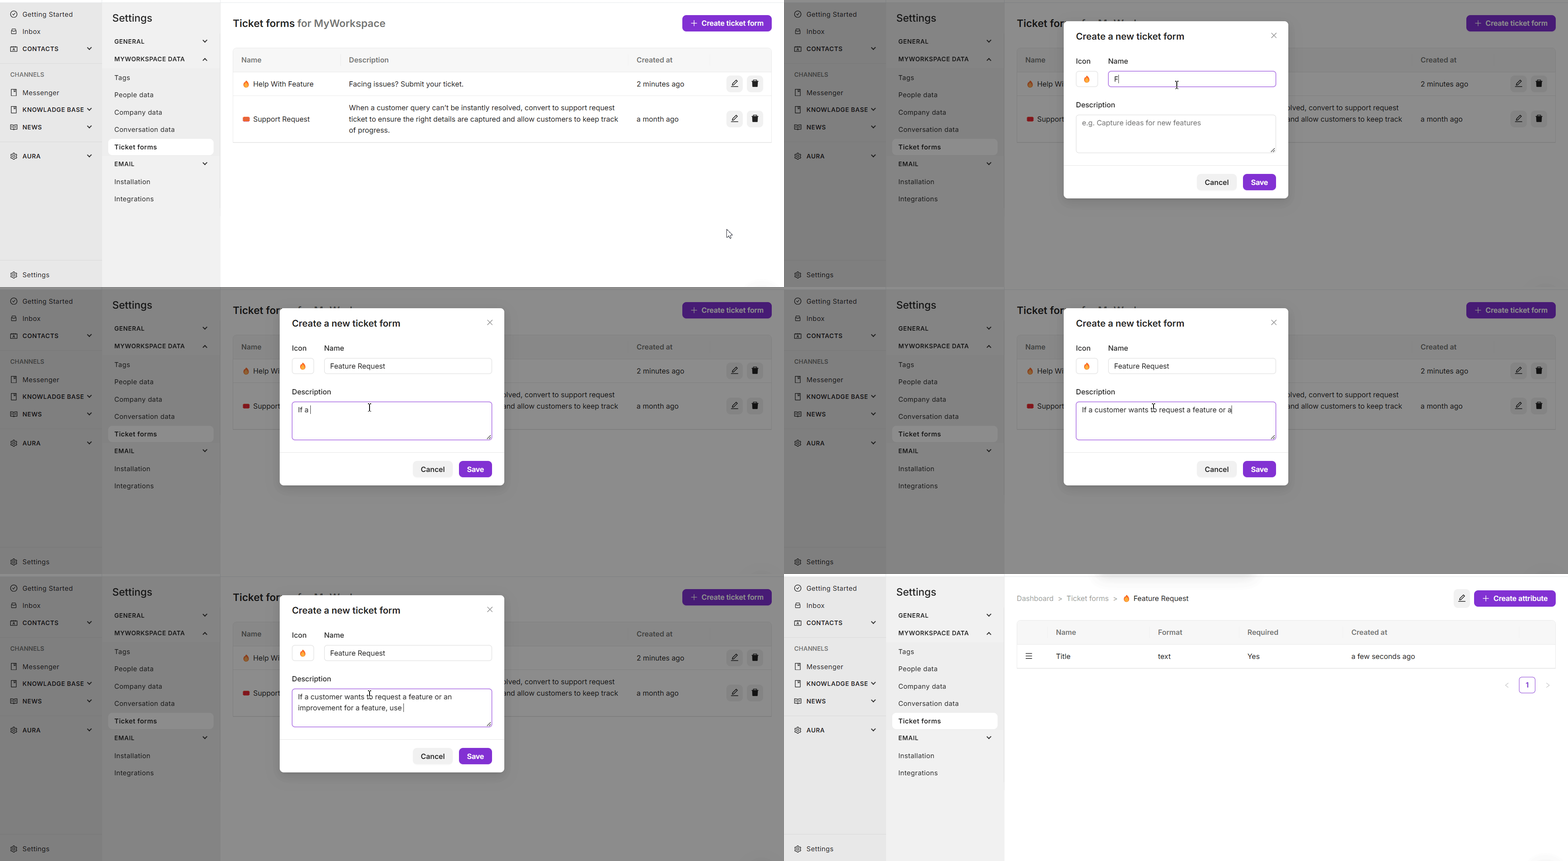
When setting up a ticket, you need to specify the following details:
- Icon: Choose an icon that visually represents the ticket.
- Name: Provide a clear and meaningful name for the ticket. This name will be visible to customers if the ticket is shared with them.
- Description: Write a description that explains the purpose of this ticket. This description is for internal use only and helps your team understand when to use this ticket.
Creating Ticket Attributes
Web2Chat comes with its own default ticket attributes. It also lets you set up custom ticket attributes.
Default Attributes
Web2Chat tickets come with two default attributes: Title and Description.
- Title: This is a brief summary of the ticket issue.
- Description: This field provides detailed information about the ticket issue.
Both attributes are visible when viewing a ticket via the Help Desk and can be searched by their content. You can adjust their visibility settings by clicking the edit icon next to each attribute.
Custom Attributes
In addition to the default attributes, you can create custom attributes to capture more specific information related to the ticket.
- Click on the specific ticket form for which you want to create custom attributes.
- Click on + Create attribute in the top right corner of the ticket settings page.
- Choose from various formats, including text, list, number, decimal, boolean, date/time, or file upload.
- Configure attribute details by providing a meaningful name and description for the attribute.
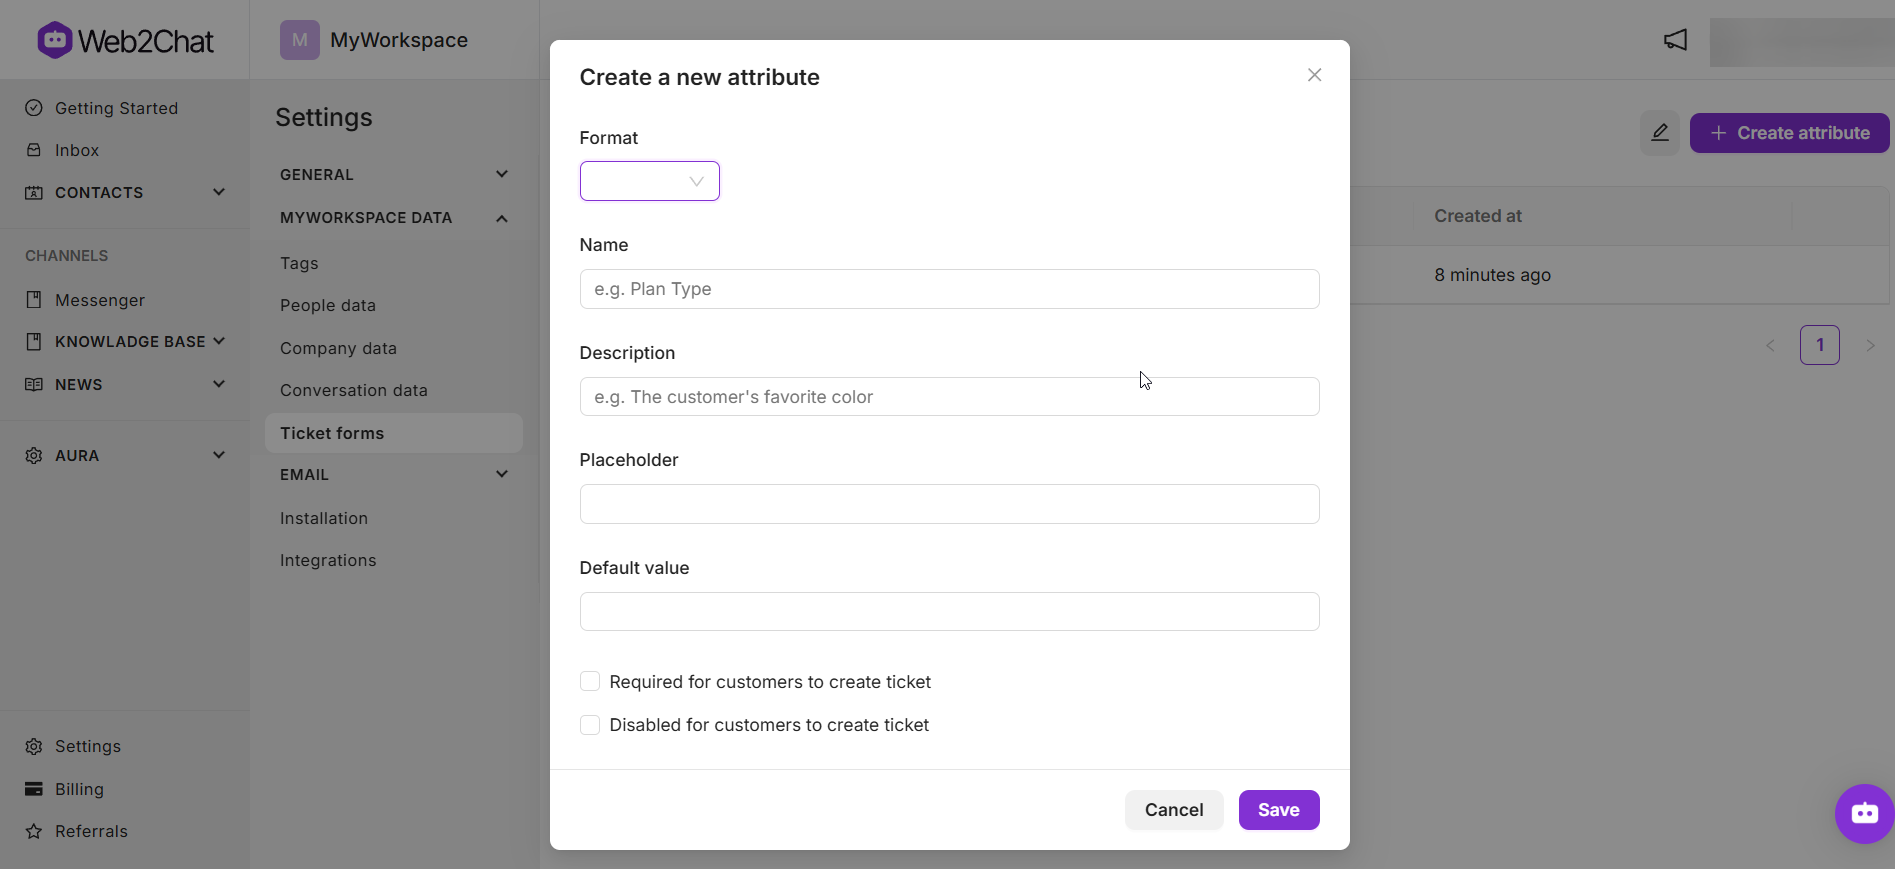
Note: If the attribute is set to be visible to customers, they will see its name in Messenger and via email. The description is internal and helps your team understand its purpose.
Editing Existing Tickets
To modify existing ticket details:
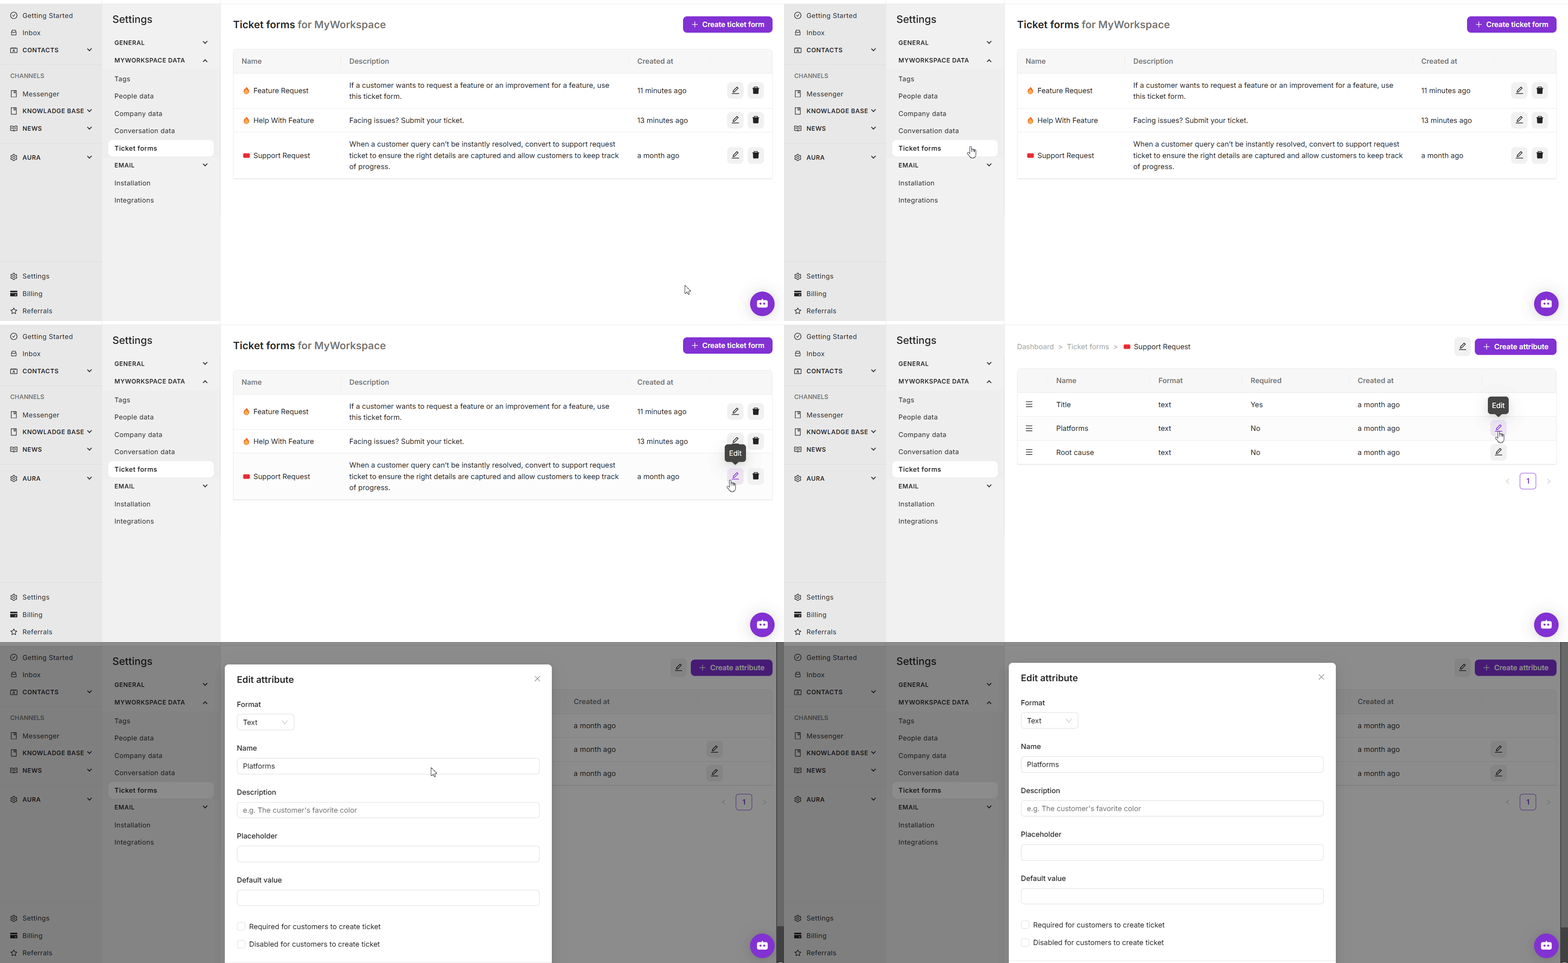
- Go to Settings--> MyWorkspace Data > Ticket Forms.
- Click the edit icon next to the ticket name to modify its category, icon, name, description, or customer sharing settings.
- To modify any attributes within the ticket, click the relevant edit icon. Note that you can update all attribute settings except the attribute format.
Archiving Tickets
If you need to archive a ticket:
- Go to Settings--> MyWorkspace Data > Ticket Forms.
- Select the ticket and click the Archive icon next to it.
- A popup confirmation will appear. Click on the Archive button to confirm arching the ticket.
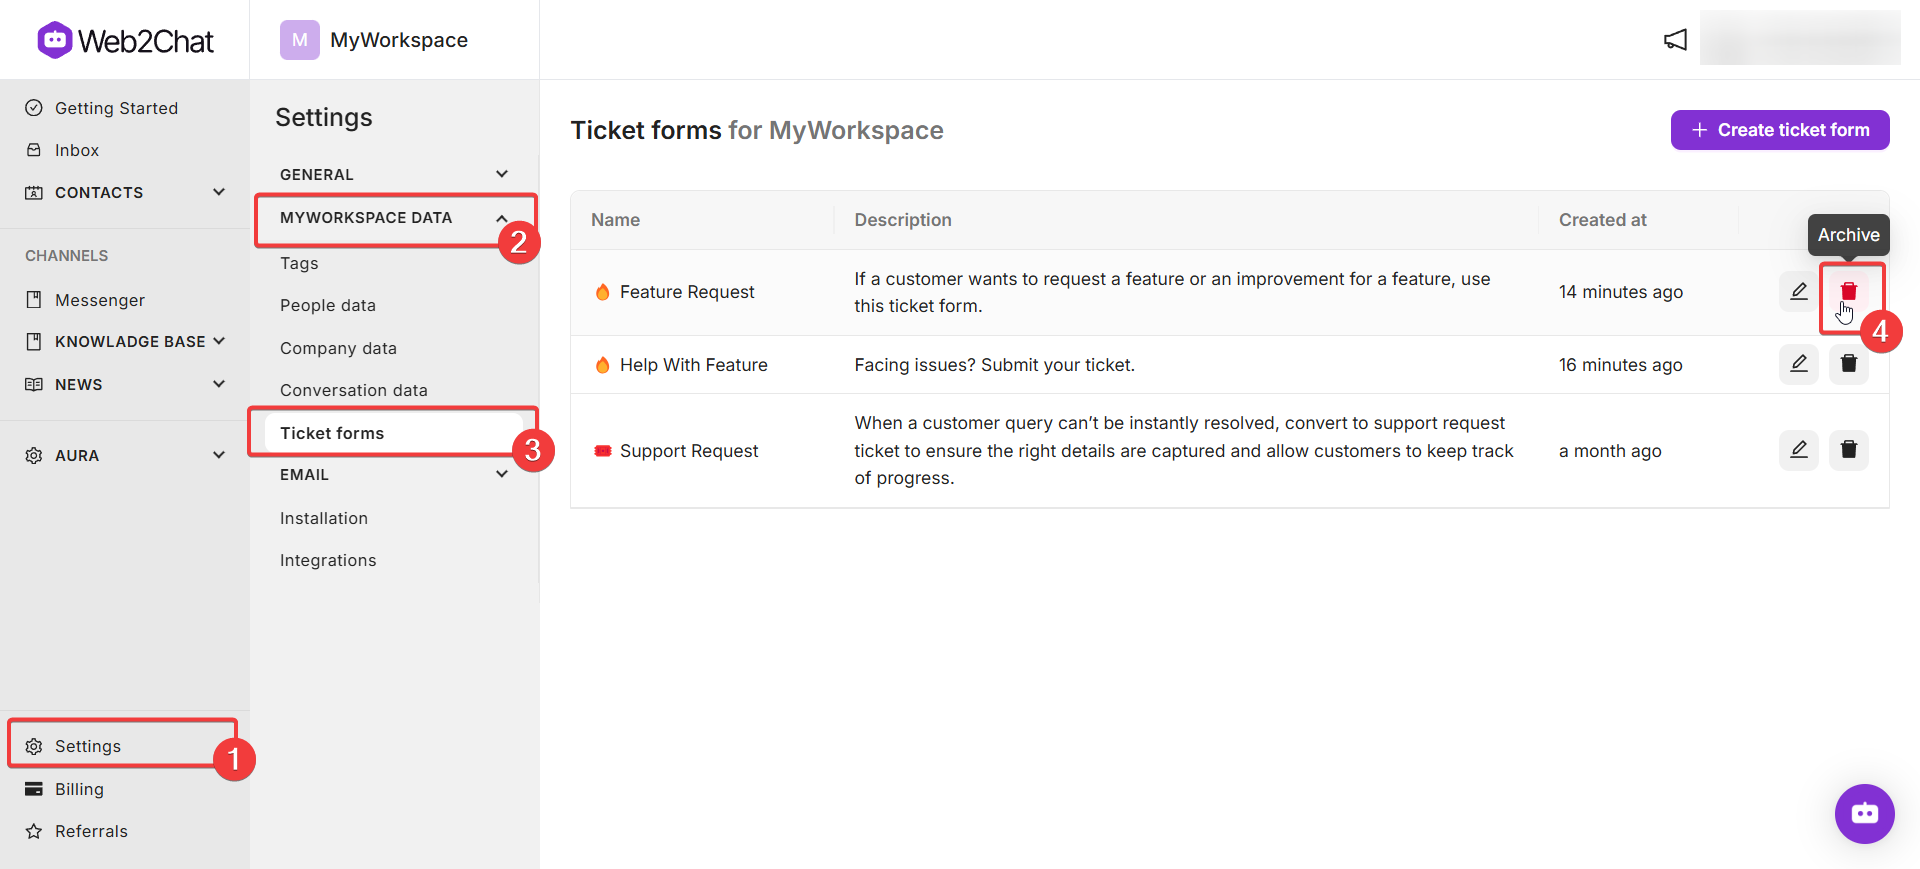
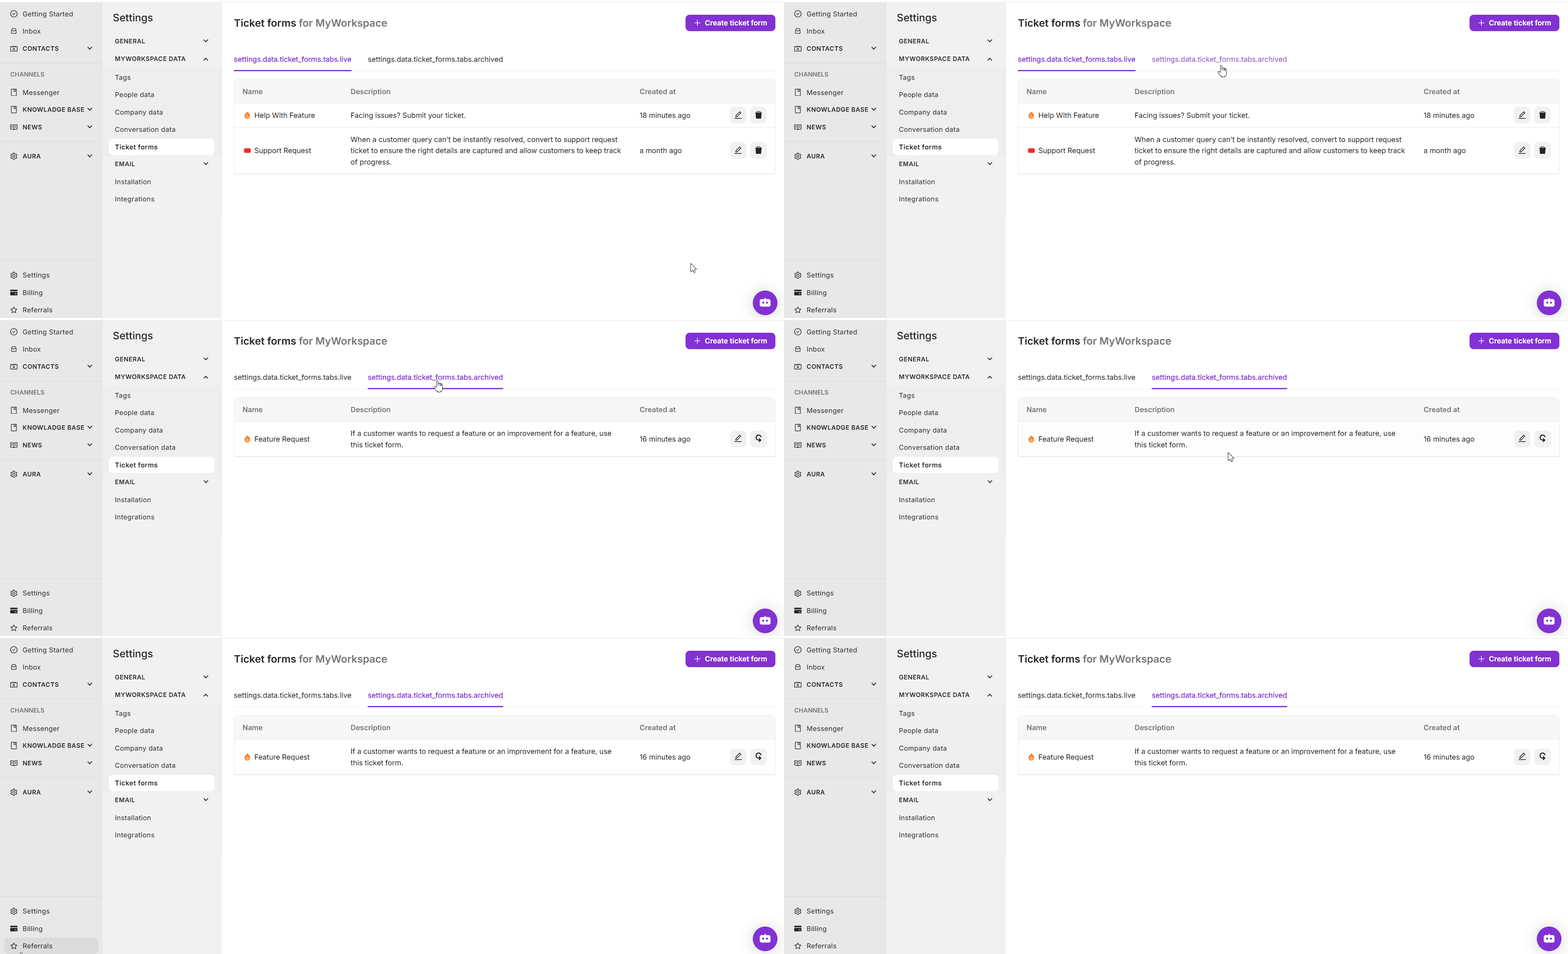
To view your archived tickets, simply click on the Archived tab in the Ticket forms page as shown below.
Restore Archived Tickets
To restore an archived ticket:
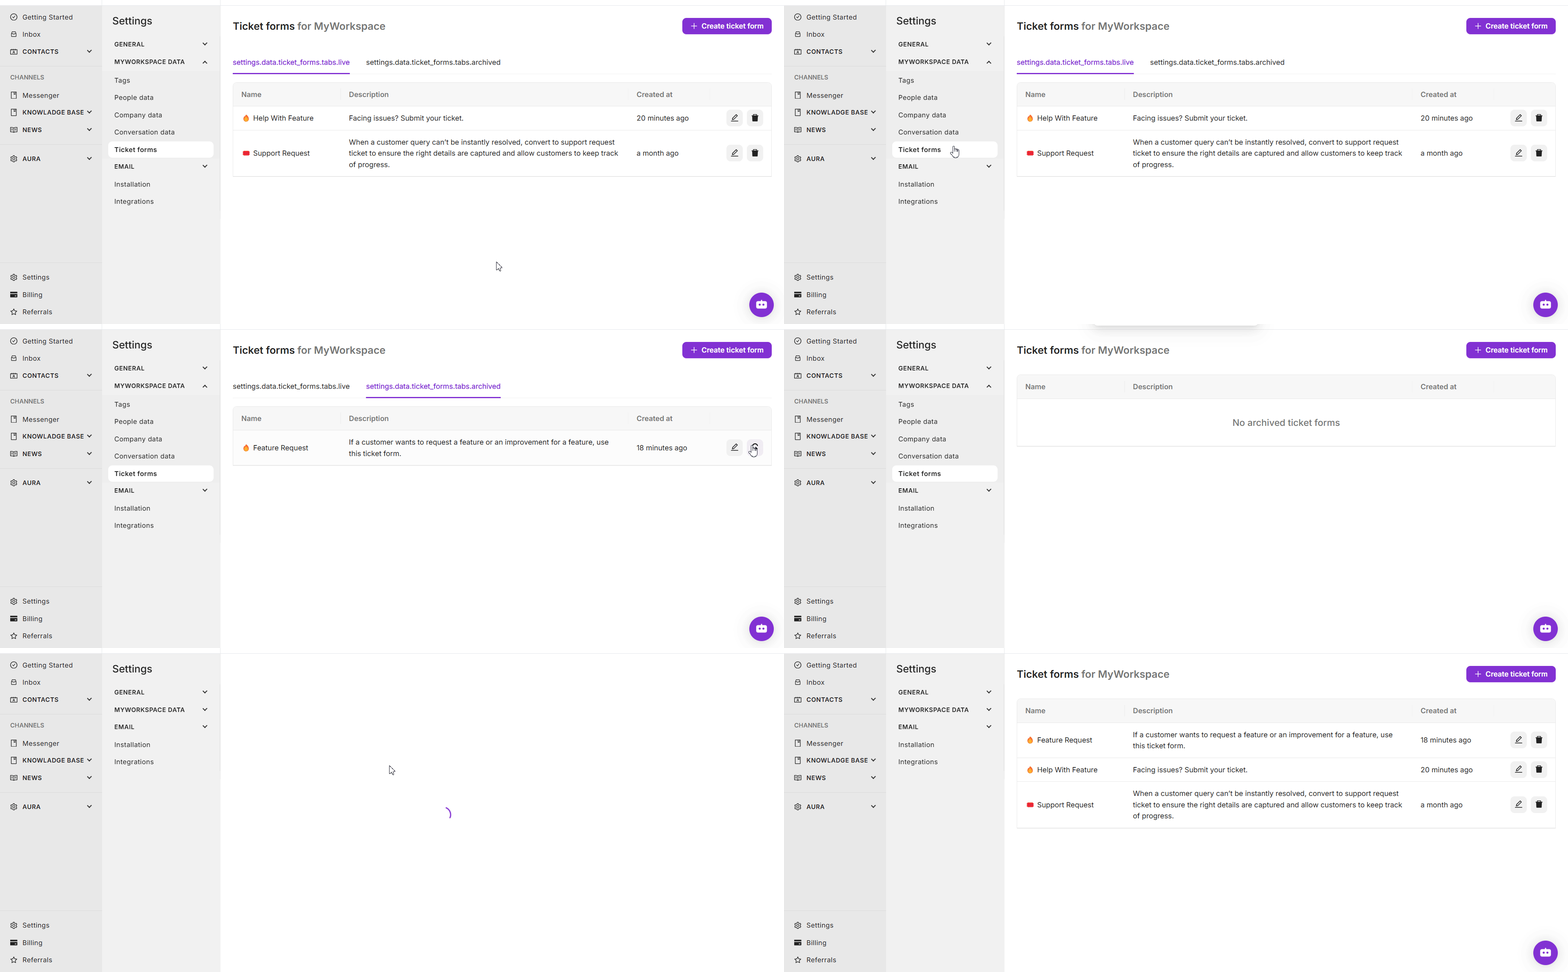
- Go to Settings--> MyWorkspace Data--> Ticket forms and head over to the Archived tab.
- Find the archived ticket and click the restore icon.
- Refresh your page and you should see that your archived ticket has now been restored.
By setting up and using tickets in Web2Chat, you can manage complex queries more efficiently, keep customers informed, and facilitate better team collaboration. This structured approach ensures timely issue resolution and improves the overall customer support experience.
If you need further assistance, contact our Customer Support.
