Setting up ticket links in Messenger allows customers to easily create tickets for their support inquiries. This guide provides step-by-step instructions for configuring ticket links, managing them, and enhancing the customer experience.
Setting Up Ticket Links in Web2Chat Messenger
In this section, you will learn how to configure ticket links in Messenger, enabling customers to create support tickets directly from the Messenger Home.
By following the steps outlined below, you can customize the ticket types available to customers, making it easier for them to submit their queries.
Step 1: Navigate to Ticket Links Configuration:
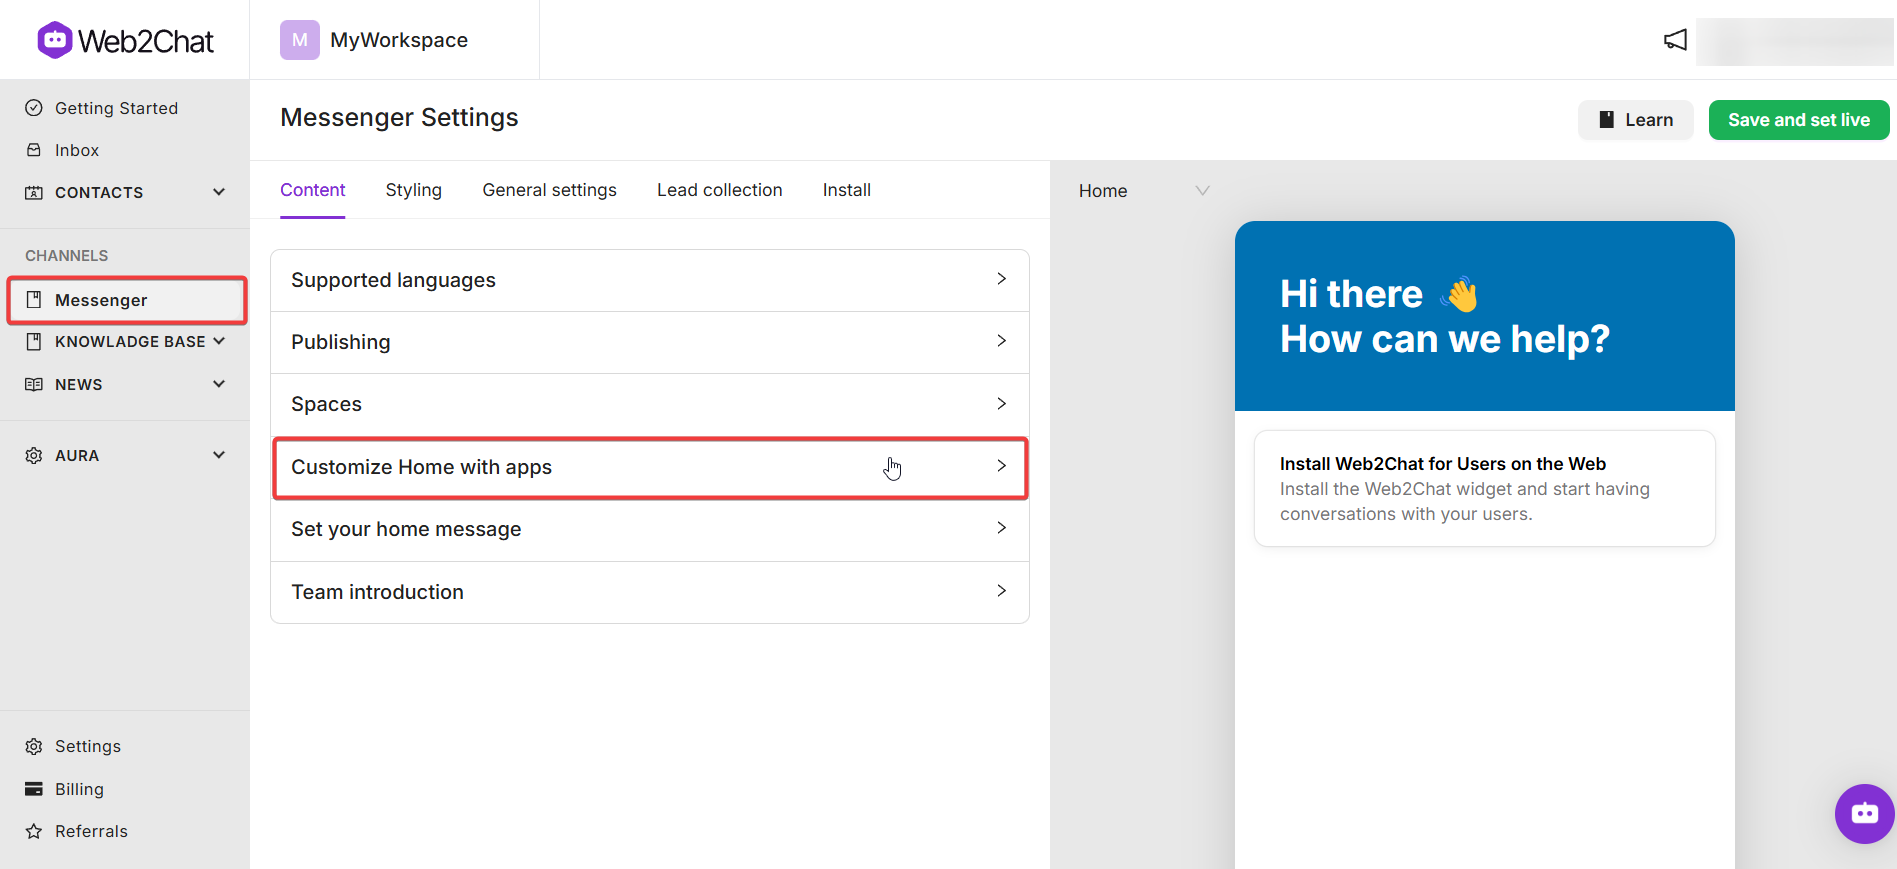
- Go to Channels > Messenger > Content from your Web2Chat dashboard.
- Click on Customize Home with apps.

Step 2: Add Ticket Links App:
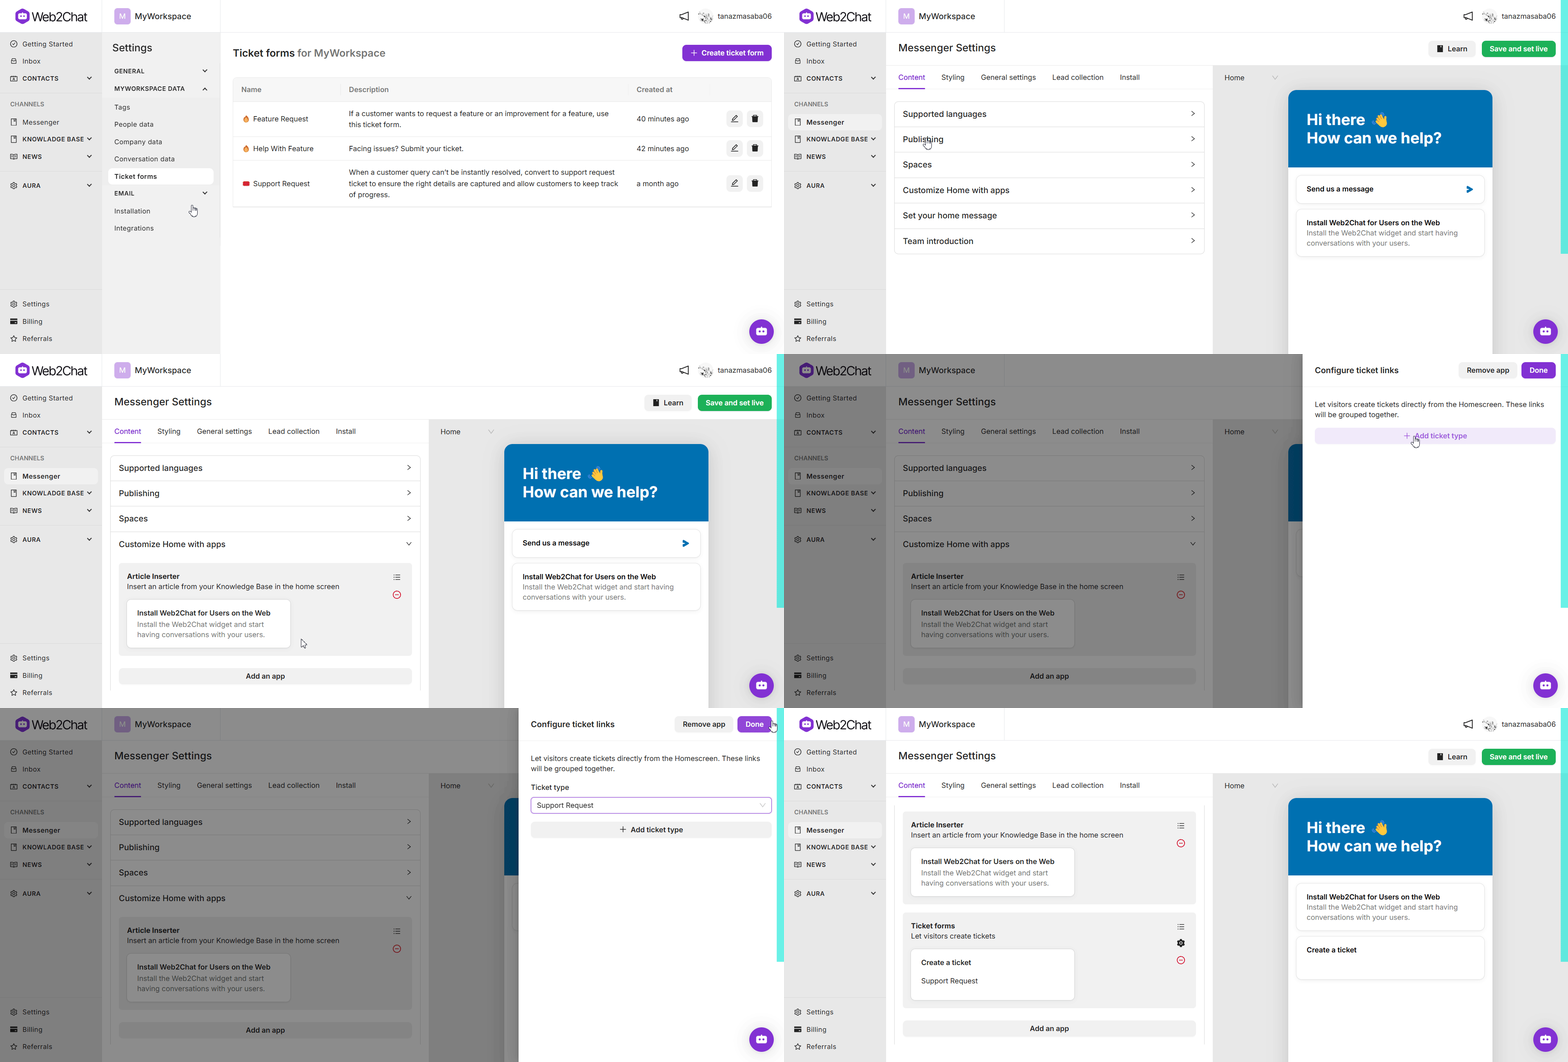
- Click on the Add an app button to insert the ticket app in your Messenger.
- A sidebar will appear on your right. From here, you can choose the Ticket Type from the drop down menu option.
- To allow multiple ticket types, click Add ticket type.
- After configuring the ticket types, click Done and save the settings.

Click Save and set live to make these changes effective in your Messenger, enabling customers to create tickets directly from the Messenger Home.
💡Tip: By carefully selecting ticket types and icons, you can create a more intuitive experience for customers, guiding them to the appropriate support channel.
Editing or Deleting Ticket Links
You can easily edit or delete ticket links in the Messenger app within Web2Chat at any time.
To modify or remove existing ticket links:
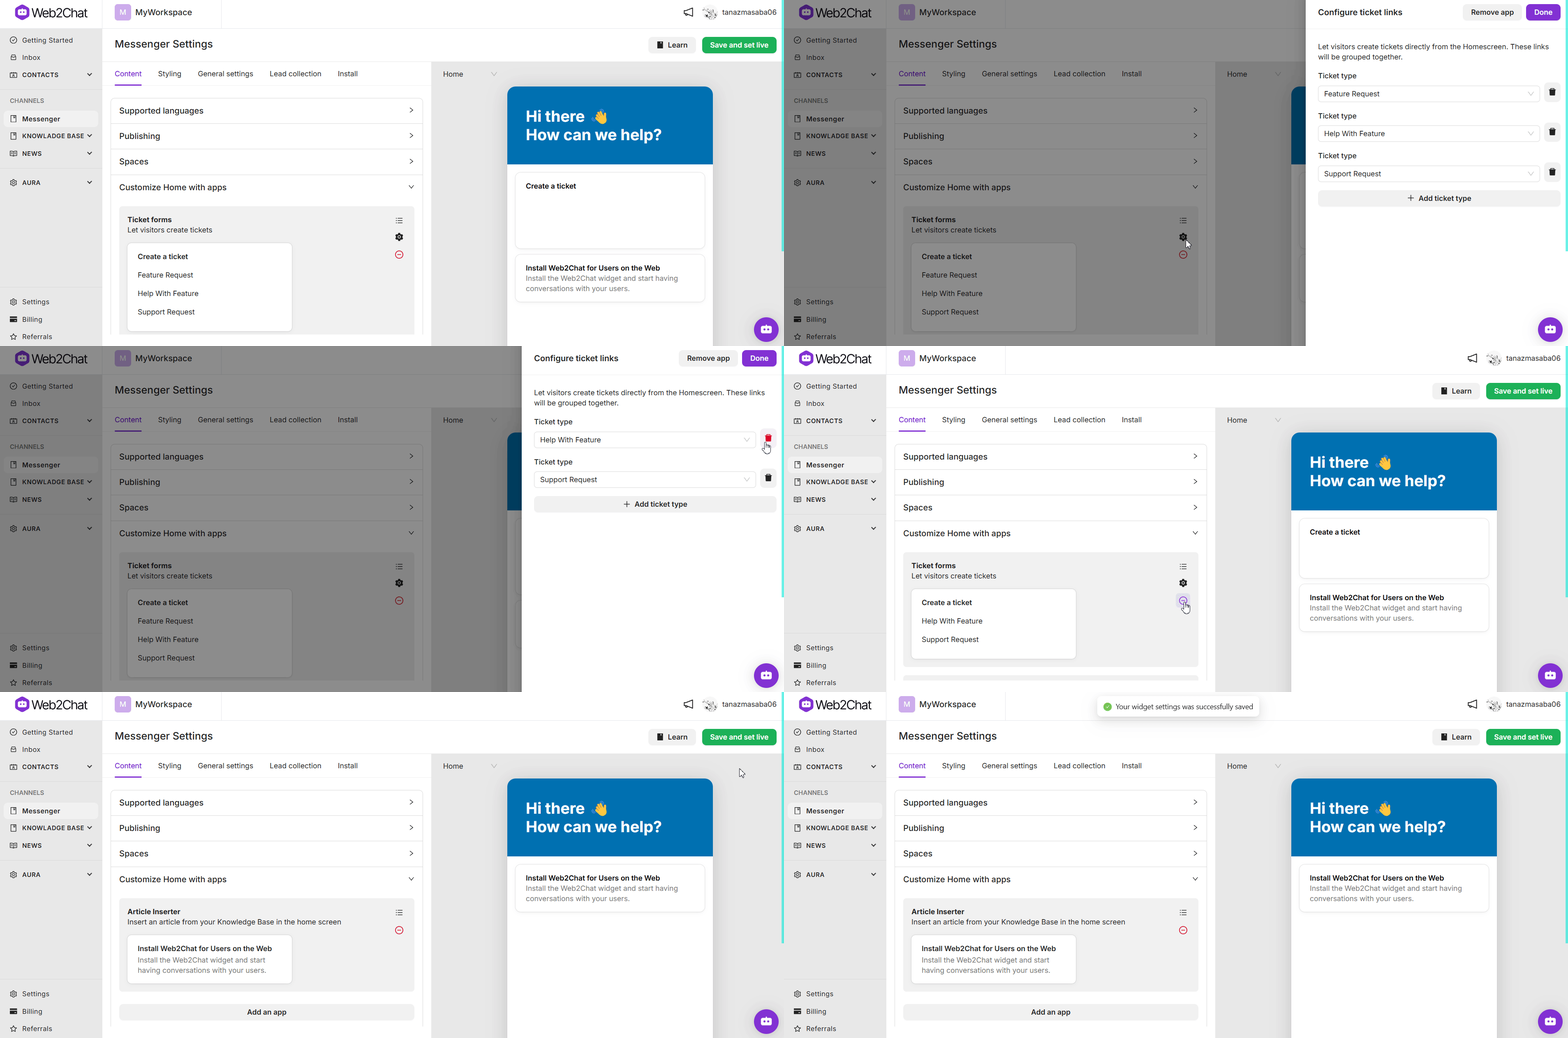
- Navigate to Channels > Messenger > Content and click Customize Home with apps.
- Click on the settings icon (⚙️) on the ticket links card to make any changes. You can remove specific ticket links from here. Click Done to update your ticket links.
- To remove the entire ticket app from the Messenger, click the delete icon (⛔️).
- After making edits or removing the ticket links card, click Save and set live to update your Messenger settings.

💡Tip: Regularly reviewing and updating ticket links can help ensure that customers have access to the most relevant support options.
Customer Experience
In this section, we will explore how customers interact with ticket links in Messenger. You will understand the ticket creation flow and how these links enhance the support experience by simplifying the process for customers.
Creating a Ticket
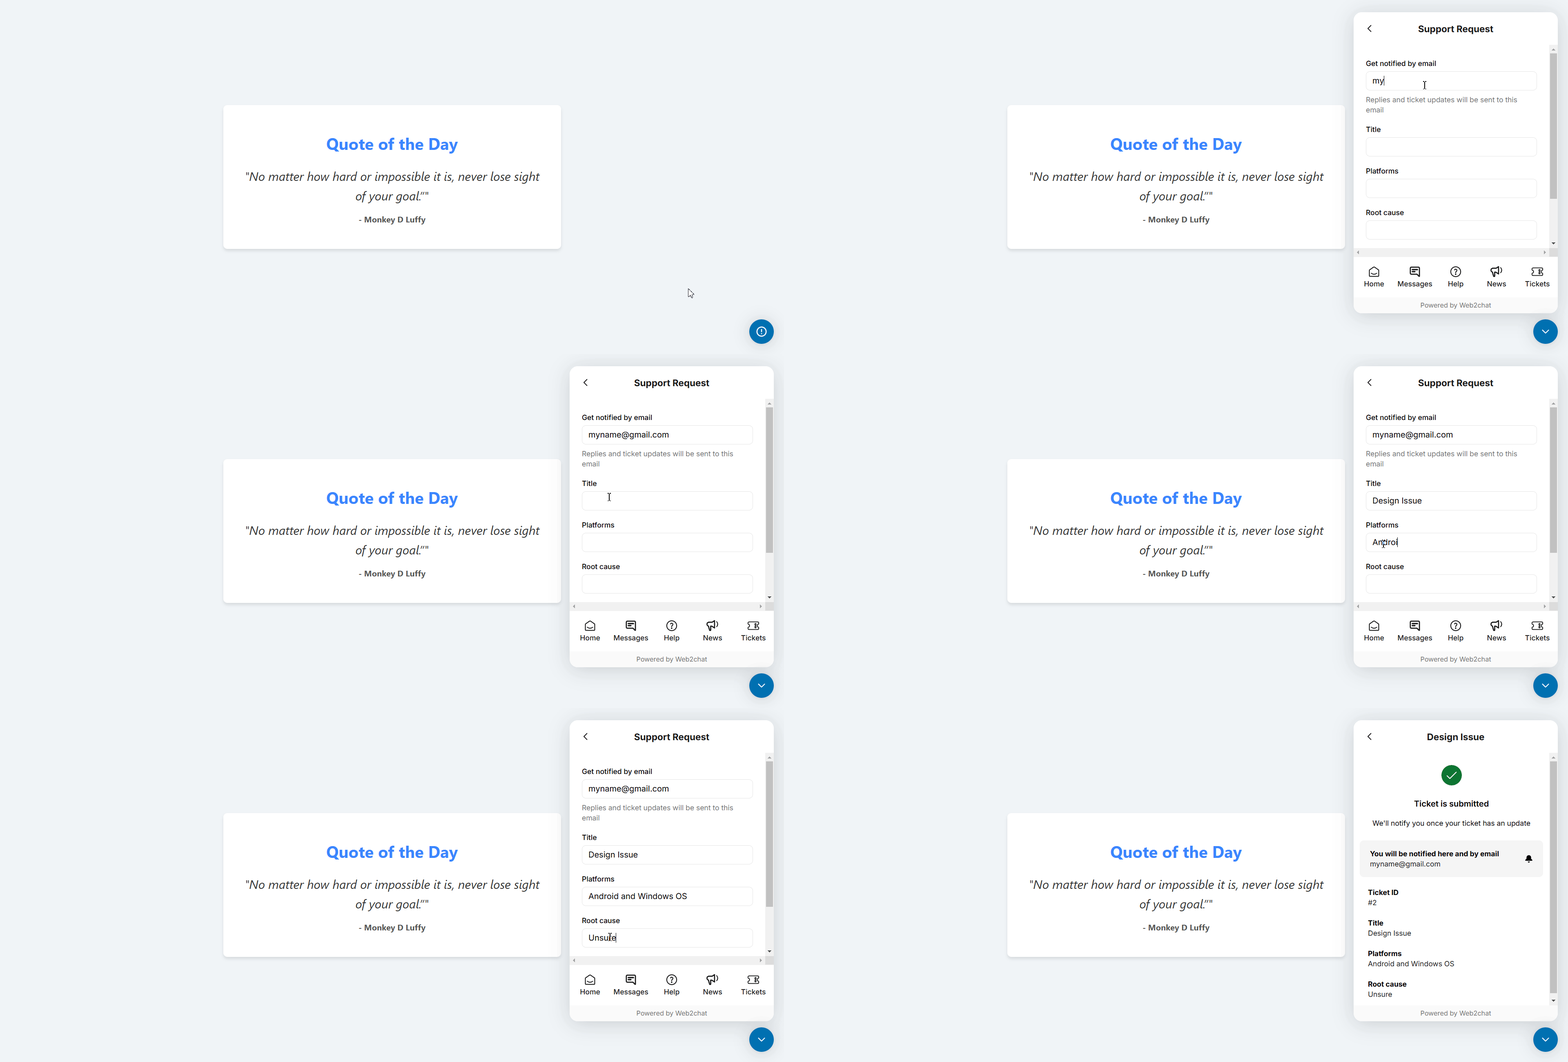
When a customer clicks on a ticket link in the Messenger Home, it opens a ticket form. The process is as follows:
- Customer Initiates Ticket Creation: The customer clicks on the ticket link from the Messenger Home.
- Customer Completes the Form: The customer fills out the ticket form with the necessary details.
- Ticket Successfully Created: Once submitted, the ticket is created and submitted successfully.

This streamlined process allows customers to report issues quickly, enhancing their overall experience and satisfaction.
Note: Visibility of Ticket Links
Ticket links will only be visible to customers on the Messenger Home if the ticket links card has been configured in your Messenger settings.
By setting up ticket links in the Messenger, you provide customers with a convenient way to create tickets independently, improving their support experience and reducing the load on your support team.
If you need further assistance, contact our Customer Support.
