Efficiently managing and assigning conversations ensures that customer inquiries are addressed by the right person within your company. Web2Chat allows you to manually or automatically assign specific conversations to teammates via the Help Desk.
Methods for Assigning Conversations
Here’s how to assign a conversation to a teammate in Web2Chat.
Method 1: Manually Assign Conversations:
Assign conversations directly to the best-suited teammate who can resolve the issue.
- From your Web2Chat dashboard, click on the Inbox tab to view all customer conversations.
- Click on the conversation you wish to assign to a teammate.
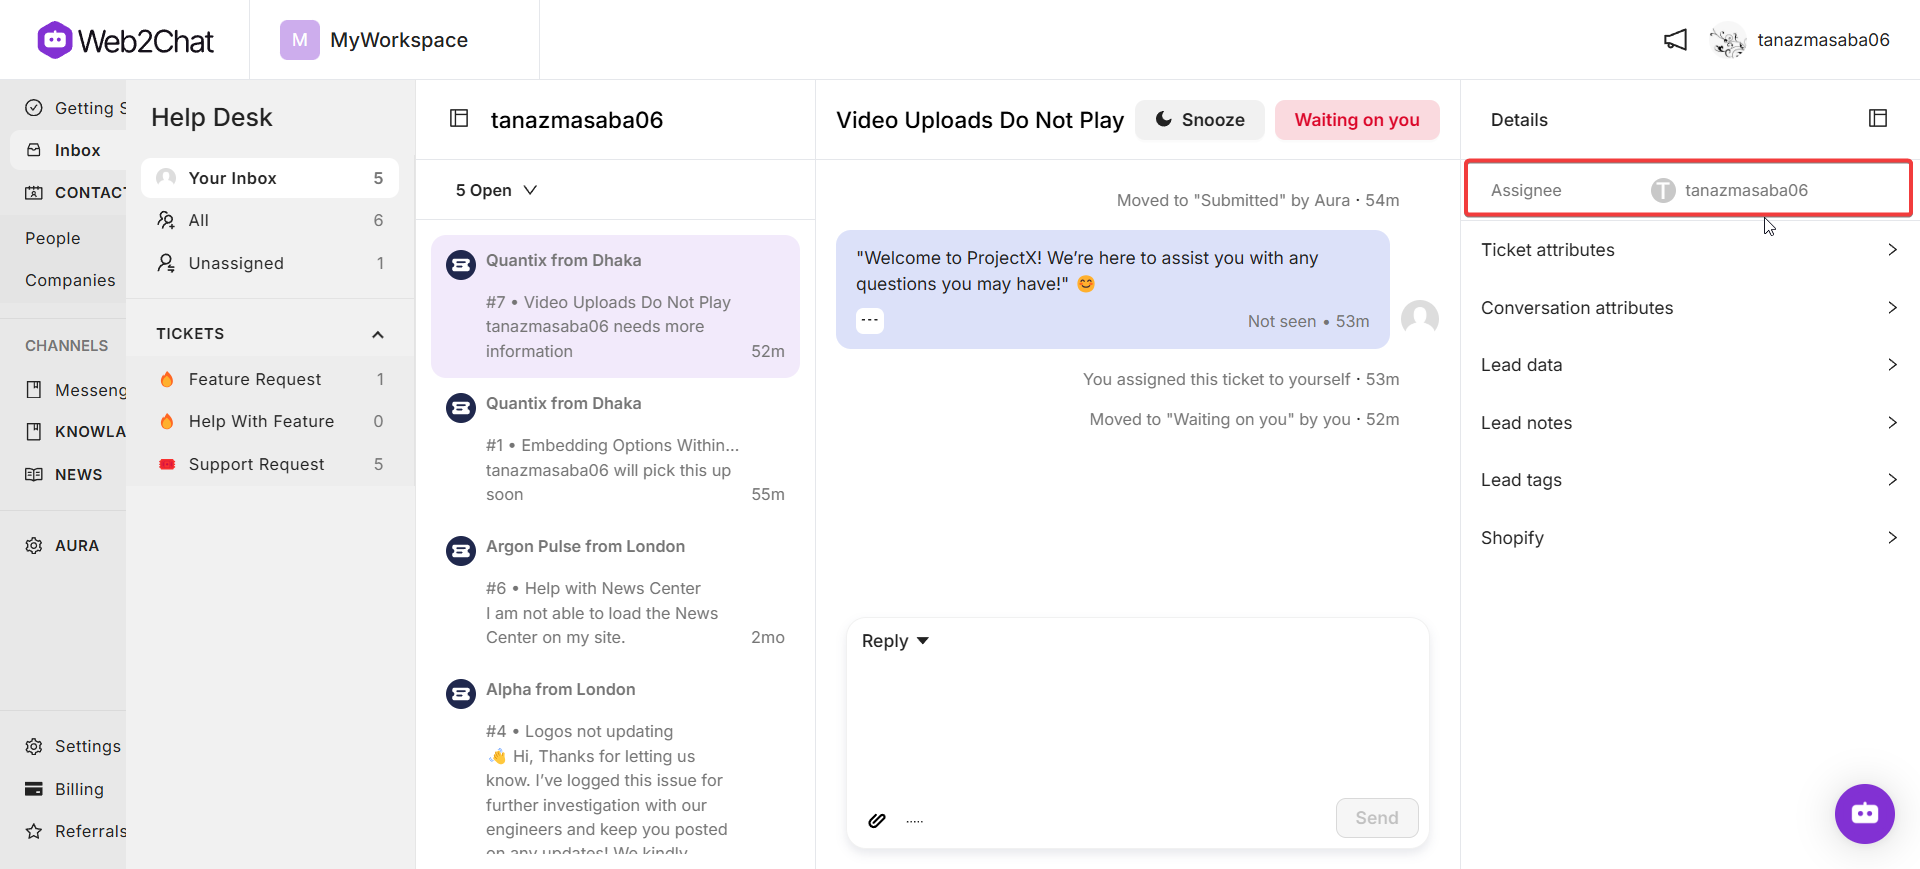
- In the conversation view, locate the Assignee section in the right sidebar. Click on it, and select the teammate you want to assign the conversation to from the dropdown list.

Method 2: Default Assignee:
Assign all conversations to one designated teammate if no other rules apply.
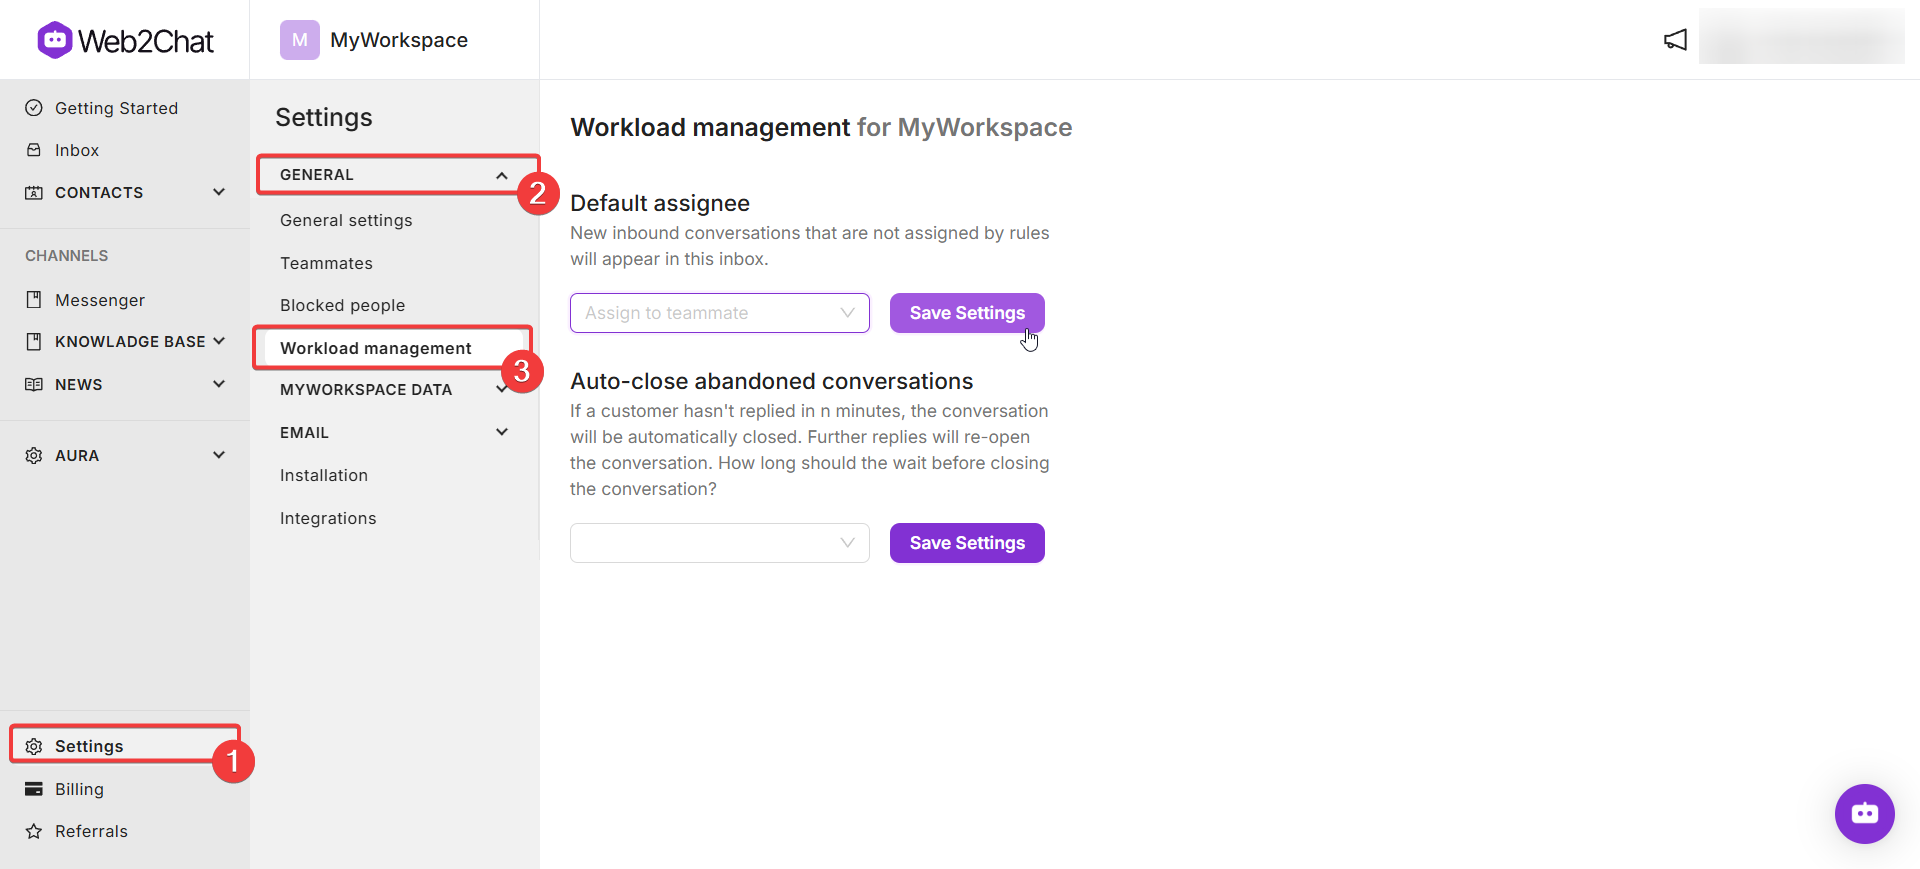
- From your Web2Chat dashboard, navigate to Settings--> General--> Workload management
- Locate the Default Assignee section. Click on it, and select the teammate you want to assign the conversation to from the dropdown list.

Viewing Assigned Conversations
To see which teammate a conversation is assigned to:
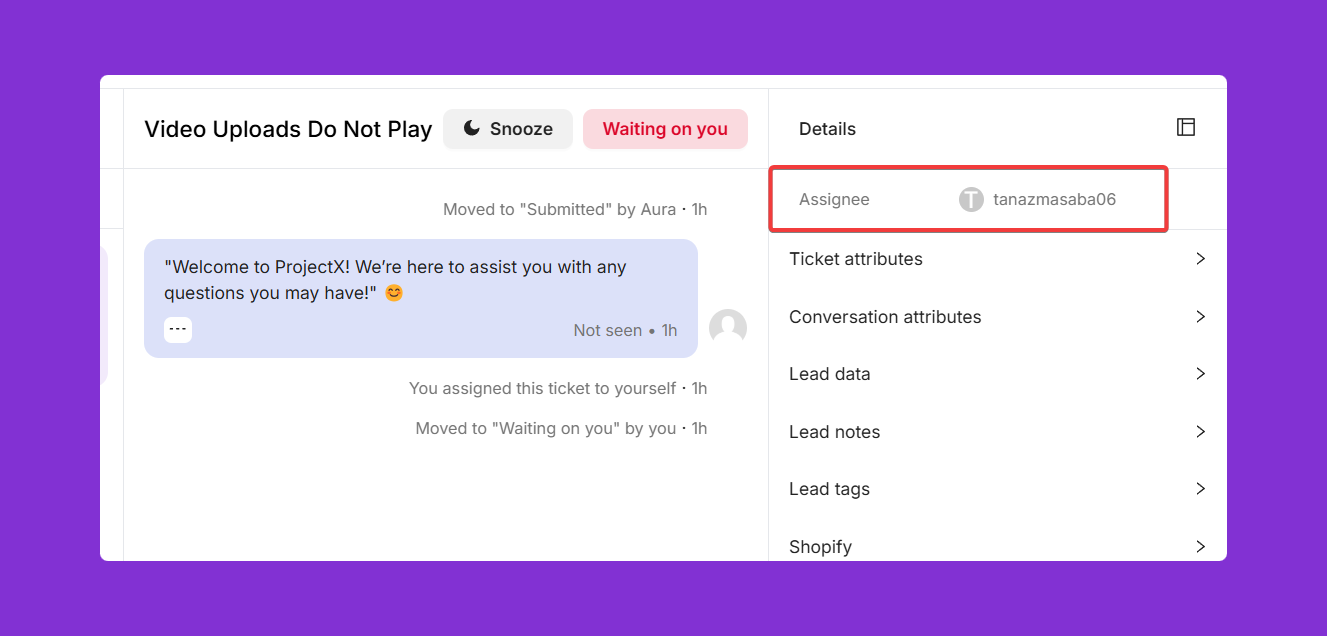
- In the Inbox, look at the Details section, which is permanently placed at the top right of the conversation view.
- The assigned teammate will be displayed here.

By using these assignment methods, you can ensure that conversations are directed to the right people, improving response times and customer satisfaction.
If you need further assistance, contact our Customer Support.
