Lead tags in Web2Chat let you categorize and organize conversations based on specific customer topics, needs, or interests. By creating and managing lead tags, you can streamline your support processes and improve the tracking of customer interactions.
How to Create Lead Tags
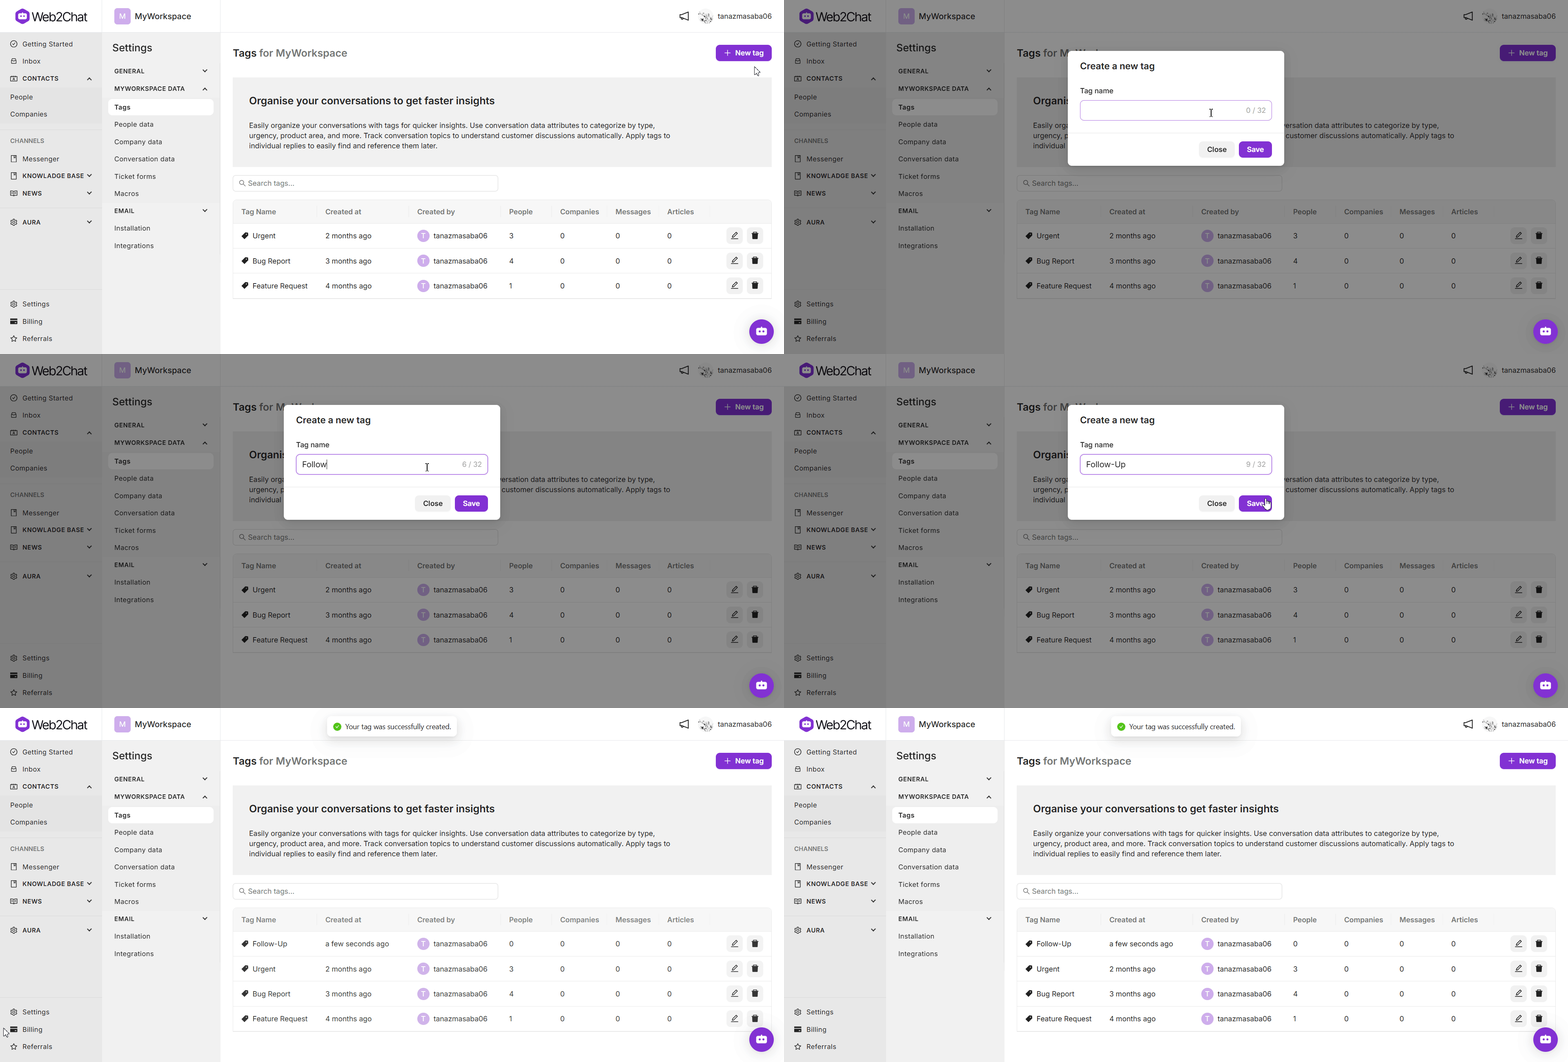
- From your Web2Chat dashboard, navigate to Settings.
- Go to My Workspace Data.
- Click on the Tags tab to view and manage existing tags.
- In the Tags tab, click the + New Tag button.
- Enter a name for your tag that clearly describes its purpose (e.g., "Product Inquiry," "Urgent Follow-Up," "Feedback").

How to Edit or Delete Lead Tags
To manage existing tags:
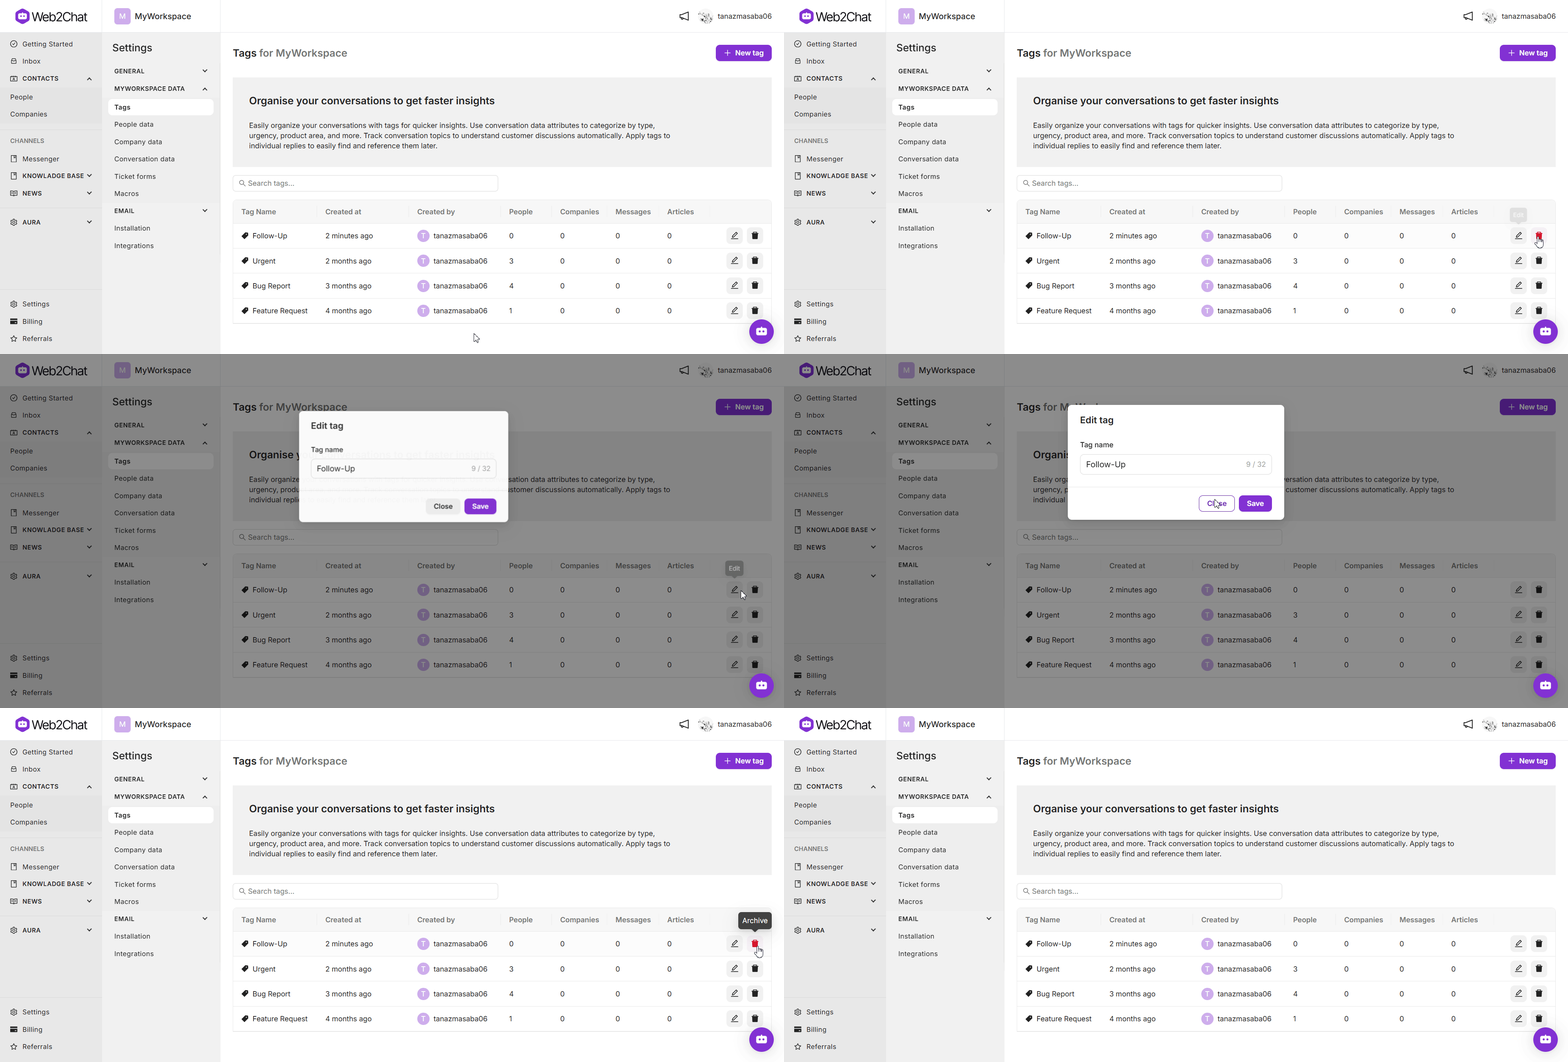
- Under the Tags tab in My Workspace Data, locate the tag you’d like to edit or delete.
- Click the Edit icon next to the tag to rename it or update its description.
- To remove a tag, click the Delete icon next to it.

Note: Deleting a tag will remove it from any conversations where it was previously used.
Best Practices for Using Lead Tags
- Keep Tags Relevant: Choose clear, descriptive tag names that will be easily understood by all team members.
- Limit the Number of Tags: Avoid creating too many tags to prevent clutter and maintain a streamlined tagging system.
- Review and Update Tags Regularly: As your team’s focus and customer needs evolve, adjust your tags accordingly.
By creating and managing lead tags effectively, you enable your team to provide more organized and responsive customer support. For guidance on applying tags to conversations, refer to our article Keep Track of Conversations with Lead Tags.
If you need further assistance, contact our Customer Support.
