In Web2Chat, effectively managing leads is crucial for providing personalized support and improving customer relationships. Two key features that facilitate this management are Lead Notes and Lead Tags. Each serves distinct purposes and can enhance your workflow when used appropriately.
Lead Notes
What Are Lead Notes?
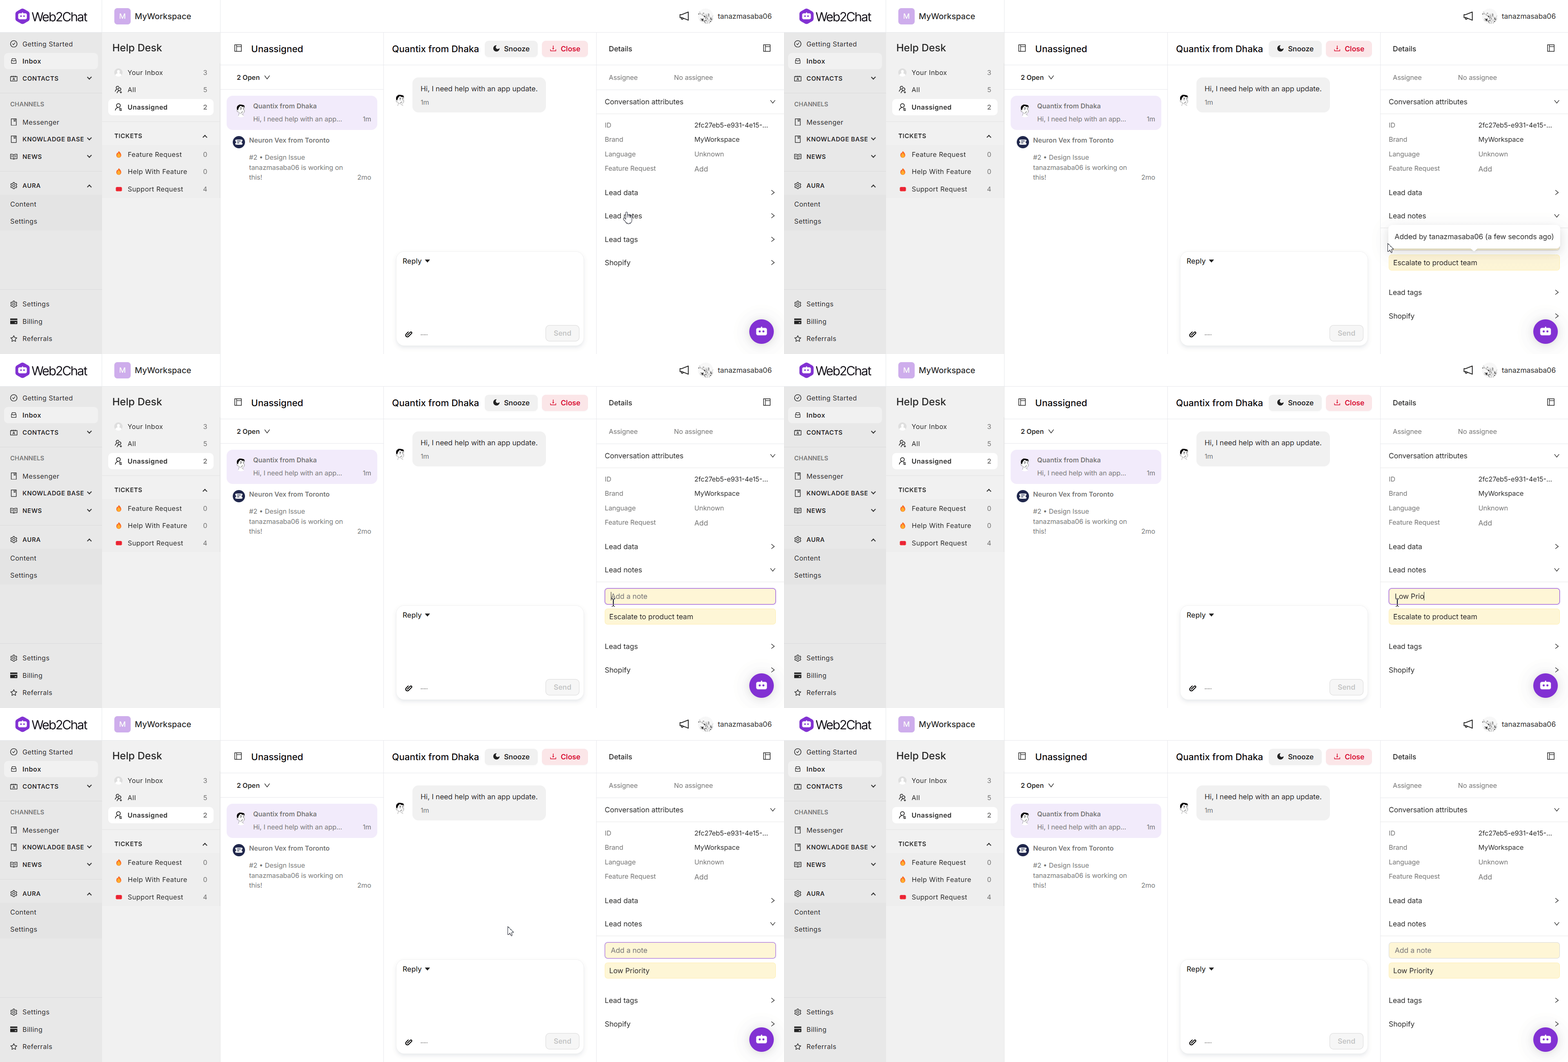
Lead Notes in Web2Chat allow you to add detailed information about customer interactions directly within conversations. This feature helps your team track specific details, follow up effectively, and provide a more personalized customer experience.
How to Add Lead Notes to a Conversation
- From your Web2Chat dashboard, navigate to the Inbox tab and open the conversation for which you’d like to add a lead note.
- In the right-hand sidebar of the conversation window, locate and click on the Lead Notes option.
- Enter the details you’d like to record about the lead, such as preferences, concerns, or follow-up reminders.

Use Cases for Lead Notes
- Personalization: By adding specific notes about customer interactions or preferences, team members can provide a more tailored experience in future communications.
- Tracking Progress: Notes serve as a historical record of interactions, allowing team members to see what has been discussed or decided upon in previous conversations.
- Collaboration: When multiple team members interact with the same lead, notes ensure that everyone is informed about the lead’s status and any prior communications.
- Action Items: Notes can capture tasks or follow-up actions that need to be taken for a lead, streamlining workflows and ensuring accountability.
Lead Tags
What Are Lead Tags?
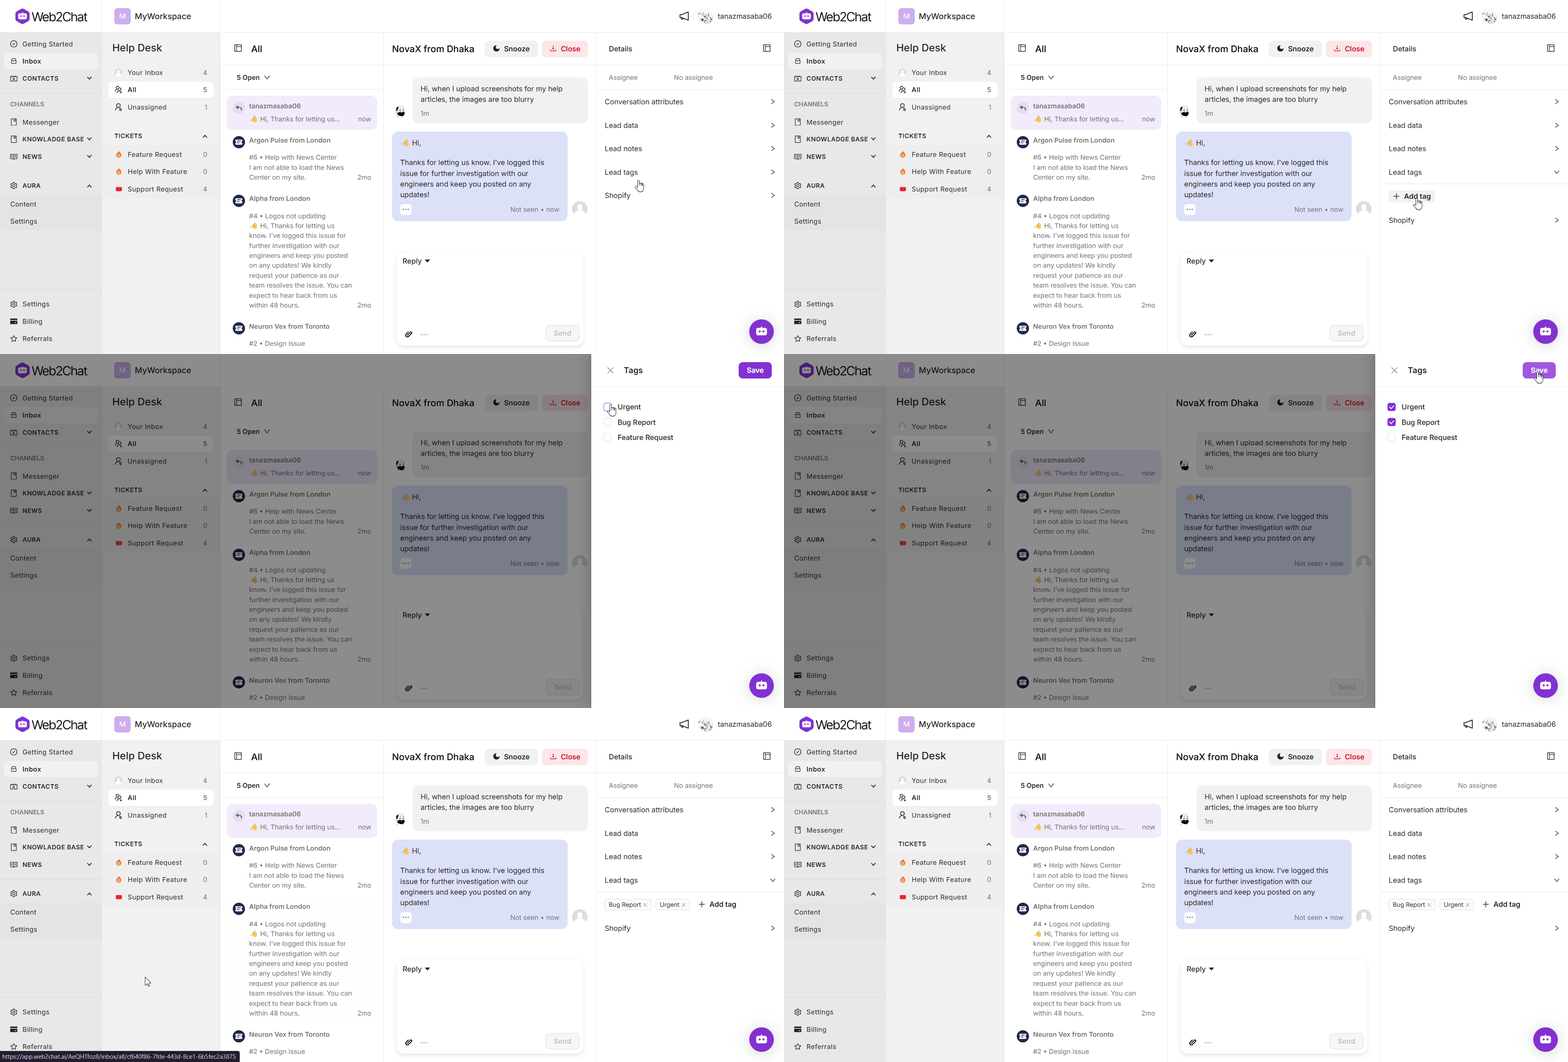
Lead Tags in Web2Chat let you categorize and organize conversations based on specific customer topics, needs, or interests. By creating and managing lead tags, you can streamline your support processes and improve the tracking of customer interactions.
How to Create Lead Tags
- From your Web2Chat dashboard, navigate to Settings.
- Go to My Workspace Data.
- Click on the Tags tab to view and manage existing tags.
- In the Tags tab, click the + New Tag button.
- Enter a name for your tag that clearly describes its purpose (e.g., "Product Inquiry," "Urgent Follow-Up," "Feedback").

Use Cases for Lead Tags
- Categorization: Tags allow you to categorize leads based on various factors, such as their interest level or type of inquiry.
- Organization: By tagging leads, you can keep conversations organized, making it easier for team members to access relevant discussions quickly.
Viewing Lead Notes & Tags From Your Contacts
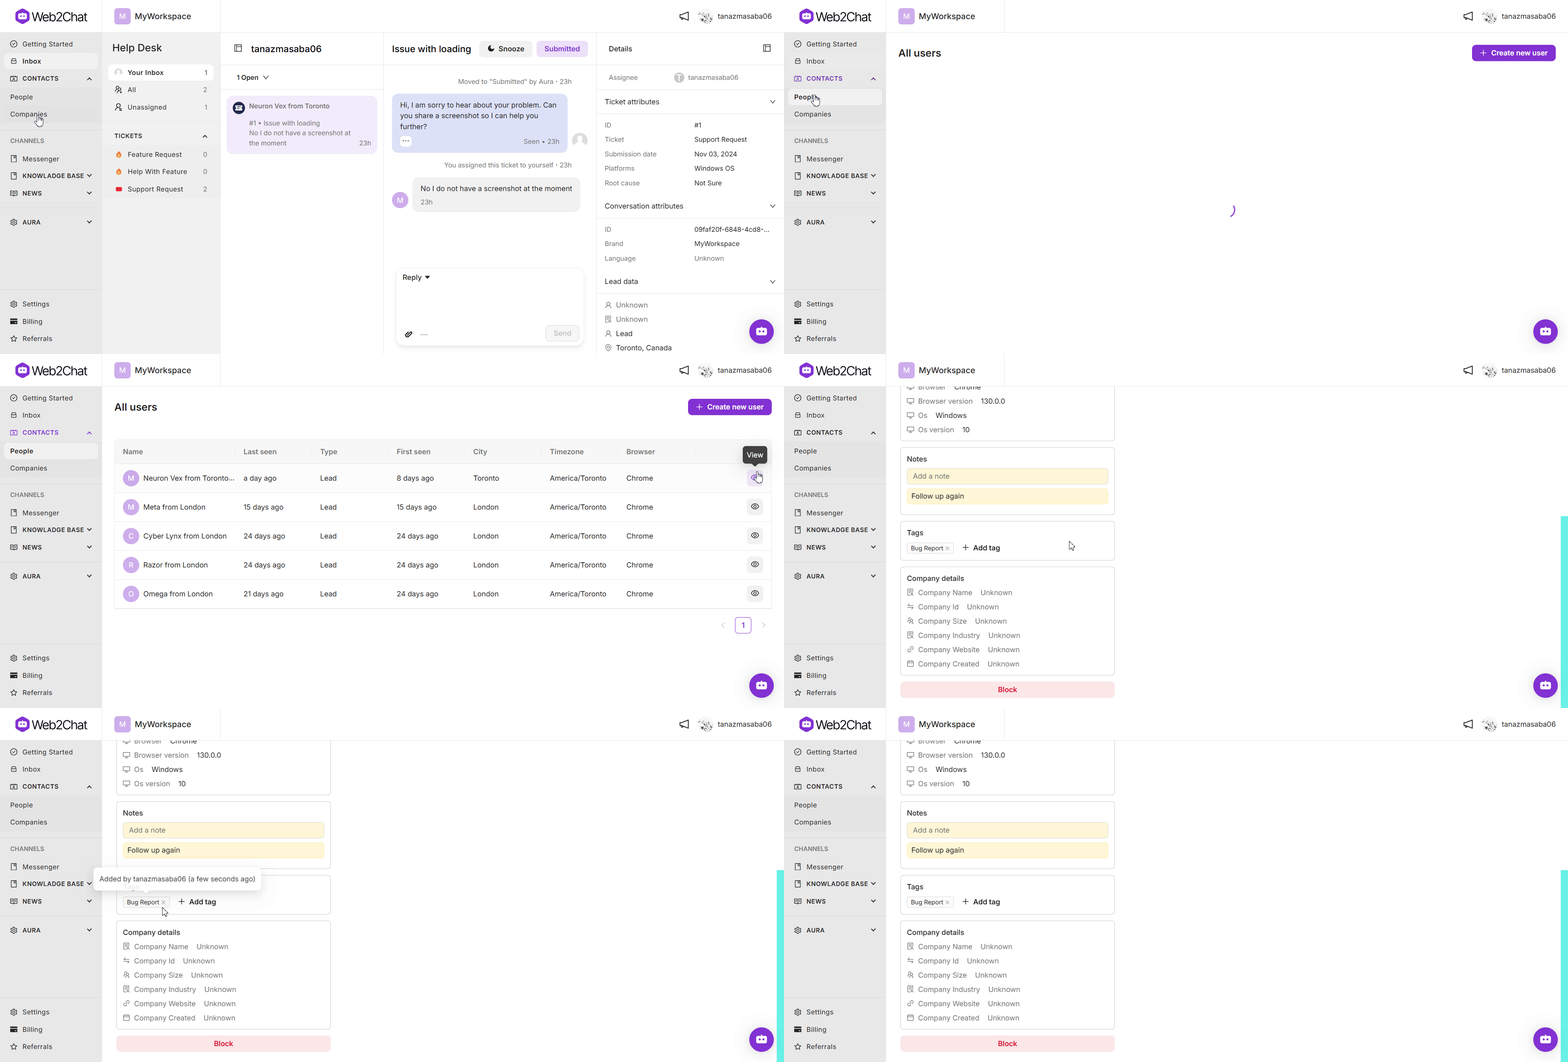
In addition to assigning lead notes and tags from the Help Desk, you can also view and add lead notes and tags directly to a customer from the Contacts tab in Web2Chat.
- Navigate to Contacts--> People from your dashboard.
- Click on the customer whose information you want to view.
- For adding lead notes: scroll down to the Lead notes section and the notes you want to assign.
- For adding lead tags: scroll down to the Lead tags section and add the tags you want to assign.

Understanding the roles of Lead Notes and Lead Tags—and leveraging both features effectively—can significantly enhance your team's ability to manage leads.
While Lead Notes provide detailed insights and context about individual leads, Lead Tags offer a streamlined way to categorize and organize your conversations. By utilizing both, you can improve collaboration within your team and create a more tailored experience for your customers.
If you need further assistance, contact our Customer Support.
