Creating a test workspace in Web2Chat is a great way to experiment with settings, workflows, and features without impacting your live customer environment. This guide will walk you through the steps to set up a separate environment for testing, allowing you to refine your configurations and test new strategies safely.
Why Use a Test Workspace?
A test workspace is a sandbox environment where you can:
- Experiment with new settings or configurations.
- Test workflows without affecting real data.
- Preview changes before implementing them in your live workspace.
- Train new team members without impacting customer interactions.
Creating a test workspace can prevent unintended disruptions in your main customer-facing environment.
How to Create a Test Workspace
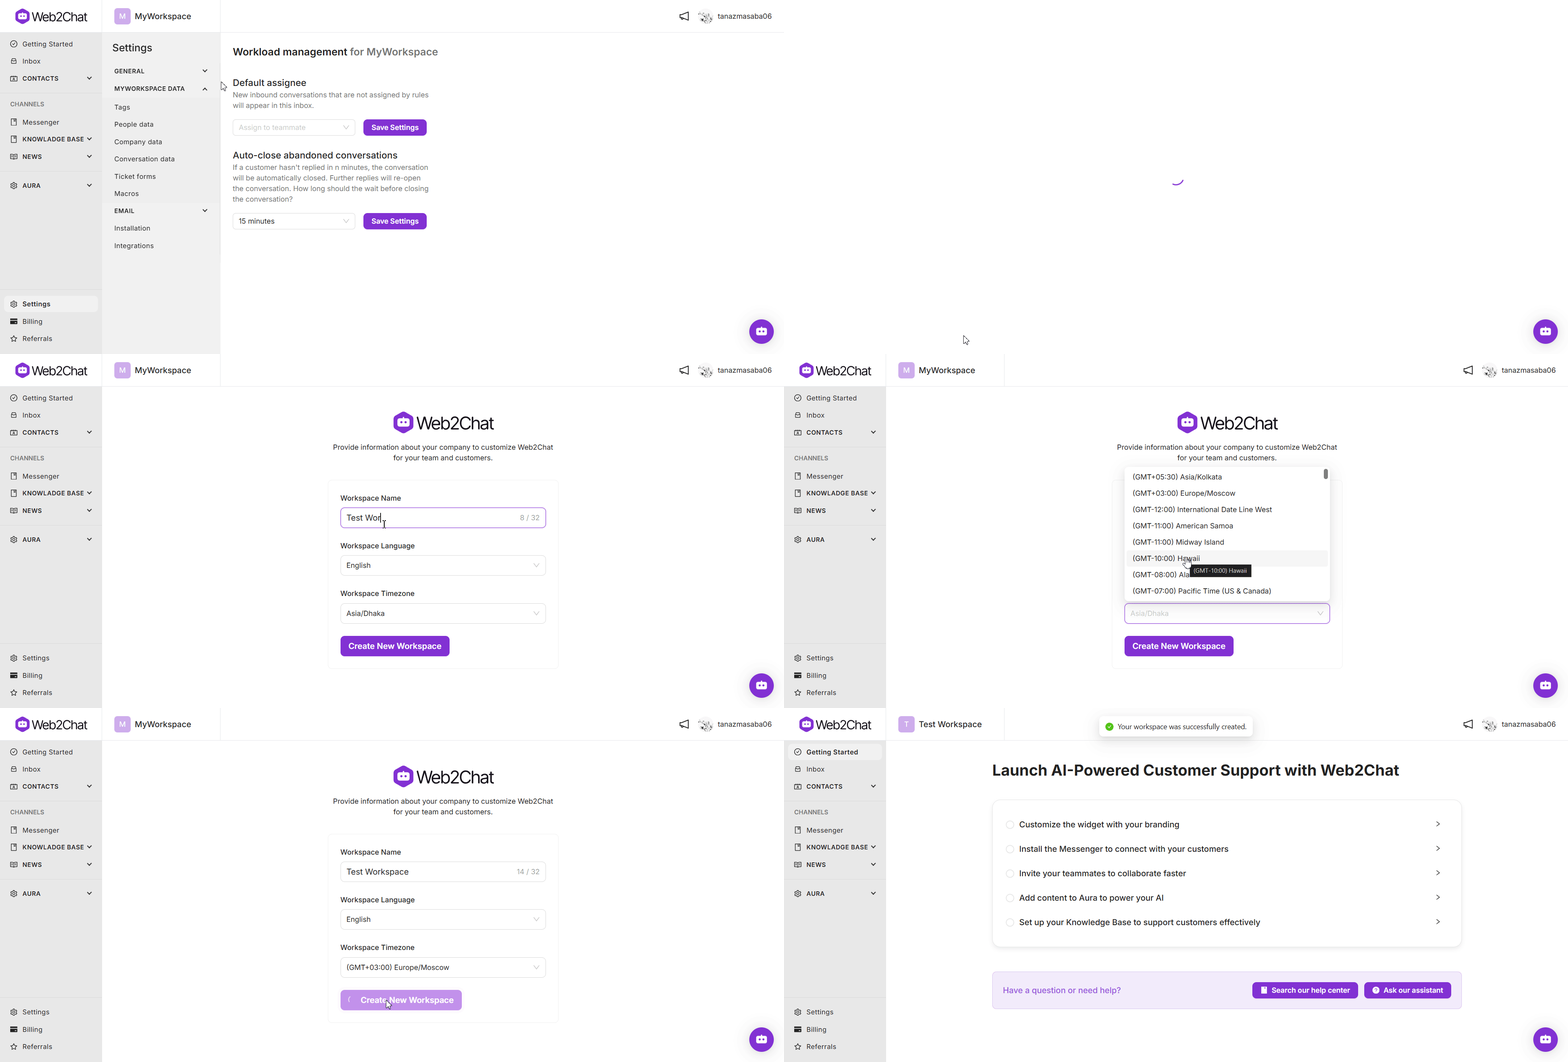
The process of creating a test workspace in Web2Chat is the same as creating any additional workspace.
To guide you through this, please follow the steps outlined in our article: Creating Additional Workspaces in Web2Chat.
Here’s a quick summary of the steps:
- Navigate to your Web2Chat dashboard.
- In the top bar, click on the Workspace option.
- Click the Add Workspace button.
- Fill in Workspace Details:
- Enter a unique name for your test workspace (e.g., “Test Environment”).
- Choose the preferred Language and Timezone.
- Click on Create New Workspace to finalize the setup.

Now, you have a test workspace ready to use for experimentation and training.
Tips for Using a Test Workspace Effectively
To get the most out of your test workspace, consider the following best practices:
1. Label Your Test Workspace Clearly
Choose a name that makes it easy to identify your test environment at a glance. This will help prevent confusion between your live and test environments, especially if multiple team members have access.
2. Limit Access to Essential Team Members
Restrict access to your test workspace to only those who need it. This can prevent unnecessary changes and ensure that only trained members are making adjustments.
3. Keep Your Test Workspace Updated
Periodically sync your test workspace with your live workspace's configurations. This ensures that you're testing against the most current settings and replicates your actual environment as closely as possible.
4. Use Test Data
If you're experimenting with workflows or automation, use dummy data instead of actual customer information. This keeps customer data secure and prevents any unintended leaks.
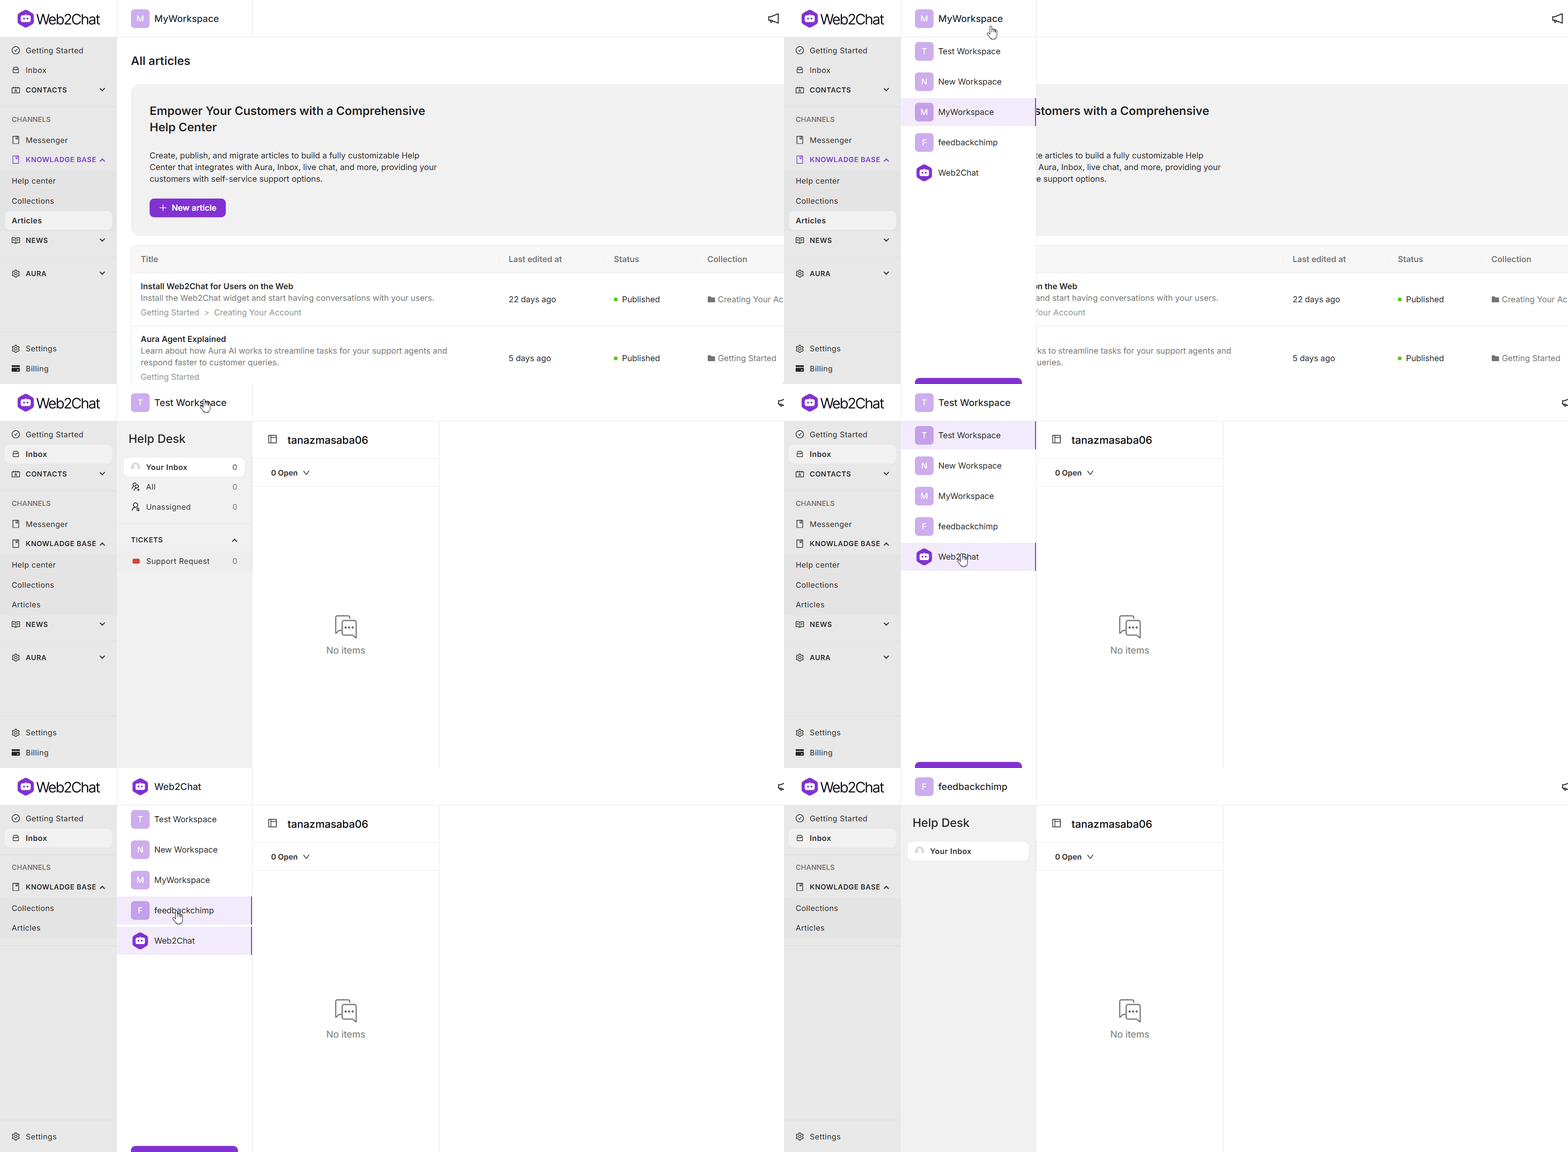
Switching Between Workspaces
To switch between your test and live environments:
- Go to the Workspace option in the top bar of your dashboard.
- Click on the name of the workspace you want to access.
Remember to double-check that you’re in the correct workspace before making changes, especially if your live workspace is active.

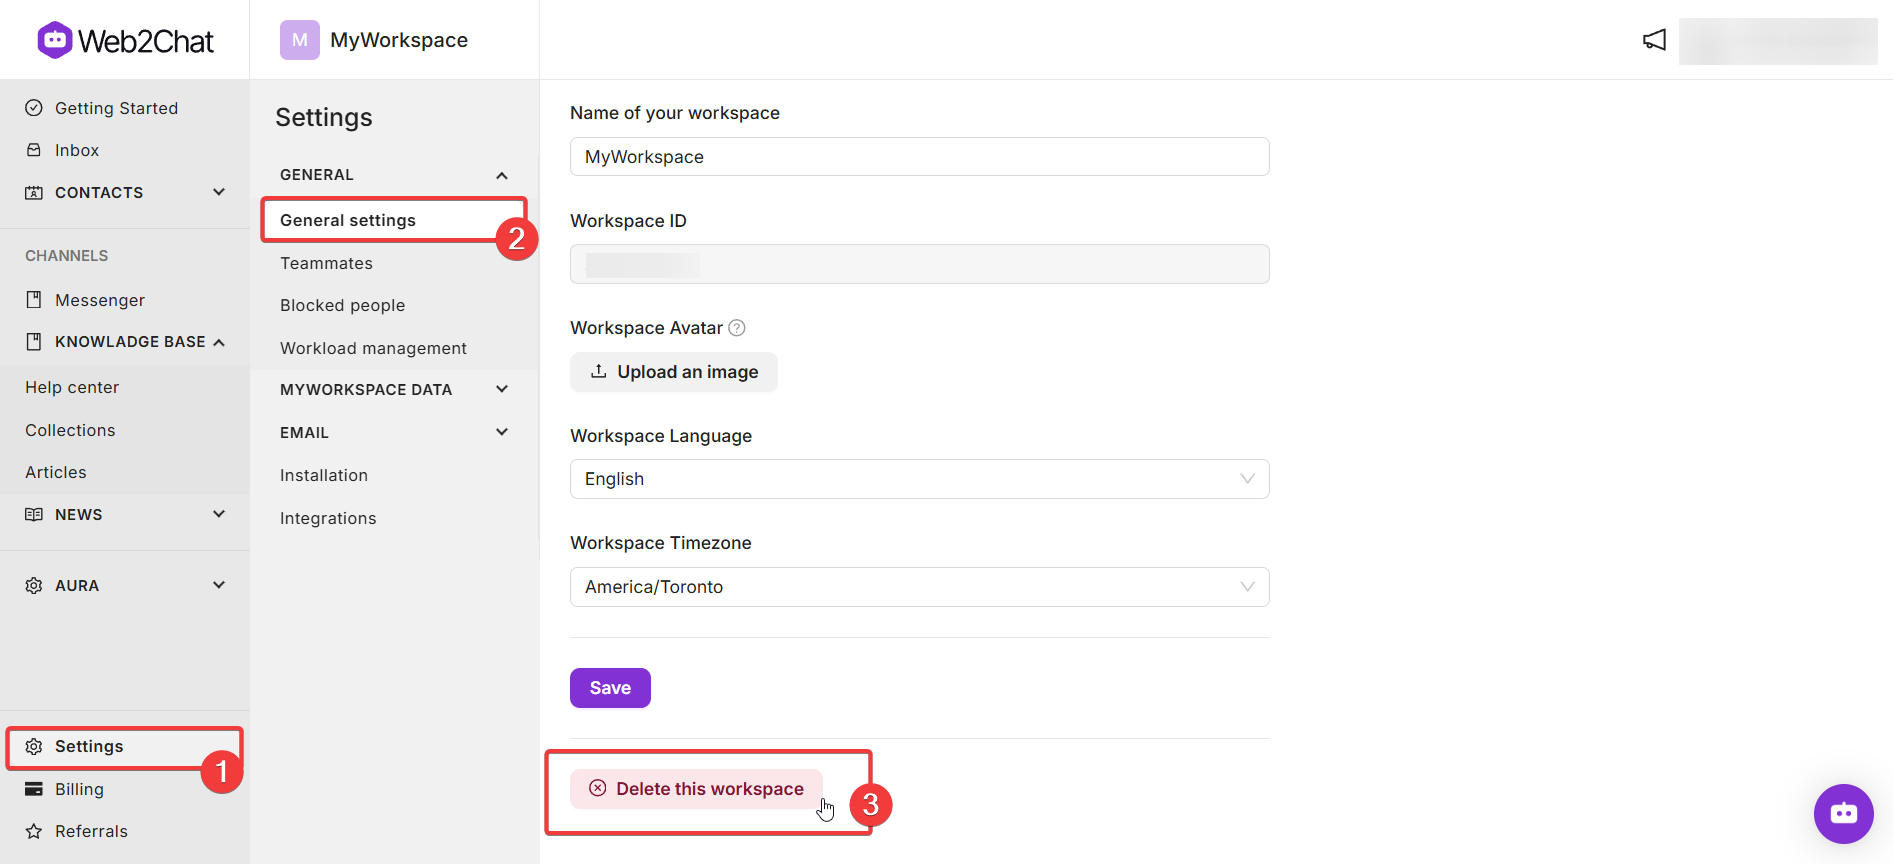
Deleting a Test Workspace
If you no longer need your test workspace, you can delete it by following these steps:
- Navigate to Settings-->General Settings for your test environment.
- Click on the Delete Workspace option at the bottom.
- Confirm the deletion to remove the workspace from your account.
Deleting a workspace will remove all associated data permanently, so make sure to back up any information you want to retain before proceeding.

Creating a test workspace in Web2Chat allows you to experiment and perfect your configurations in a safe environment. Whether you are training new team members or testing a new feature, a dedicated test workspace can help you fine-tune your setup before going live.
If you need further assistance, contact our Customer Support.
