Custom Data Attributes (CDAs) in Web2Chat allow you to store and track unique information about your users, conversations, tickets, or companies. With CDAs, you can personalize support, tailor marketing efforts, and analyze performance metrics to better meet your customers' needs.
What Are Custom Data Attributes (CDAs)?
CDAs are flexible data fields that you define to capture specific information about your users, conversations, tickets, or companies. These attributes help you:
- Personalize interactions (e.g., greeting customers by their subscription plan).
- Track metrics for reporting (e.g., ticket priority or product tier).
- Filter and segment users or companies for targeted communication.
Examples of CDAs include:
- User subscription level (e.g., Free, Premium, Enterprise).
- Account creation date.
- Renewal date for a company’s contract.
- Conversation sentiment score.
How to Create Custom Data Attributes in Web2Chat
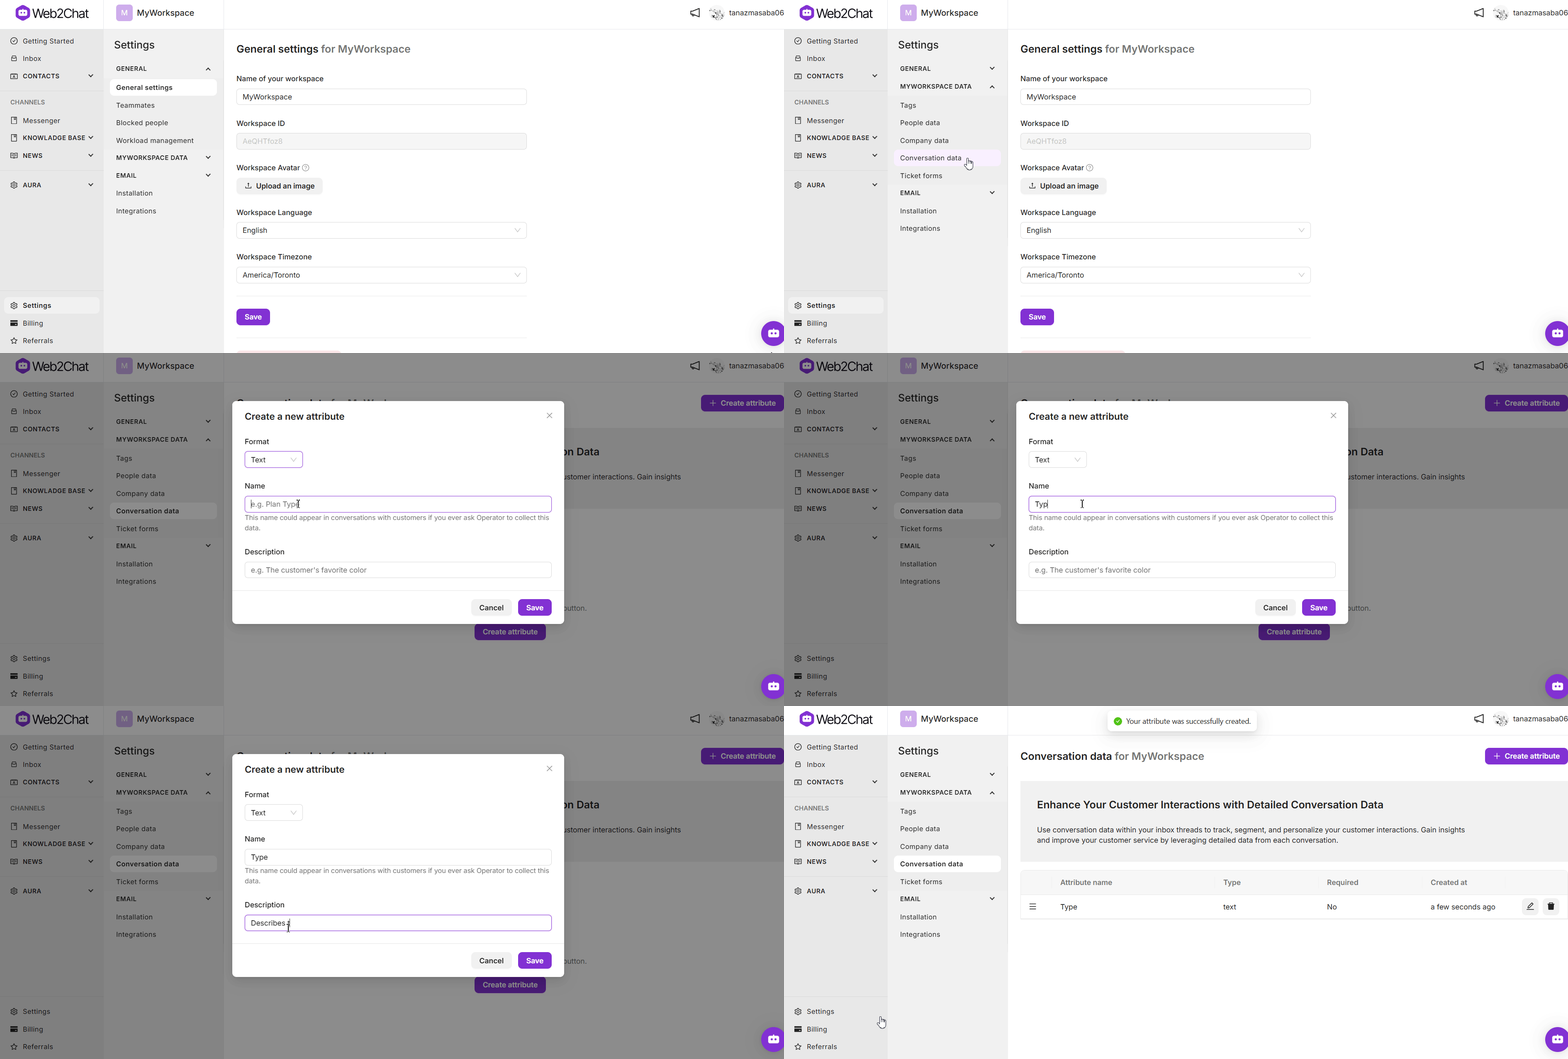
- Go to Settings--> [My Workspace] Data.
- Select Conversation Data.
- Click on the + Create Attribute button.
- Enter the Name for your attribute (e.g., "Subscription Plan").
- Choose the Data Type from the following options:
- Text
- Multiline
- List
- Number
- Datetime
- Name: Enter a name for your custom attribute.
- Description: Provide a brief description of the attribute's purpose.
- After filling in the details, click Save to create the attribute.

How to Track and Manage CDAs
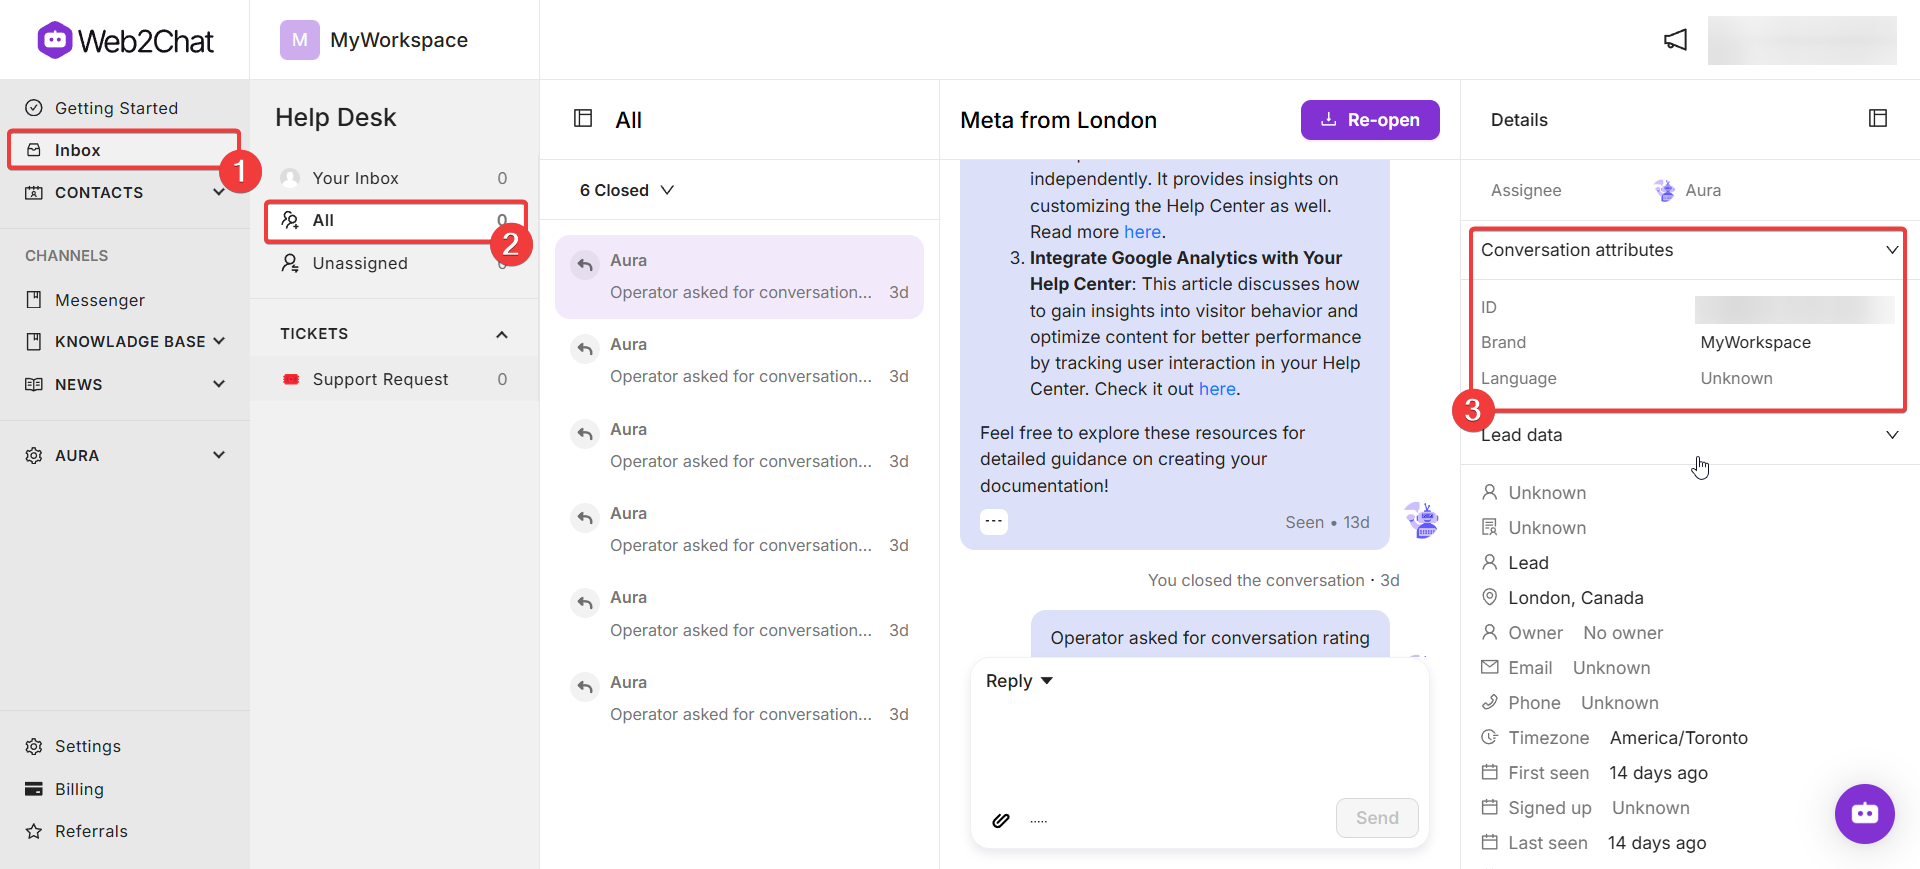
1. Assign Attributes to Users, Conversations, Tickets, or Companies
- Open the profile or conversation where you want to add the attribute.
- Locate the Custom Attributes section in the sidebar.
- Select the attribute and fill in the value (e.g., set "Subscription Plan" to "Premium").
- Save the changes.

2. Update Attributes
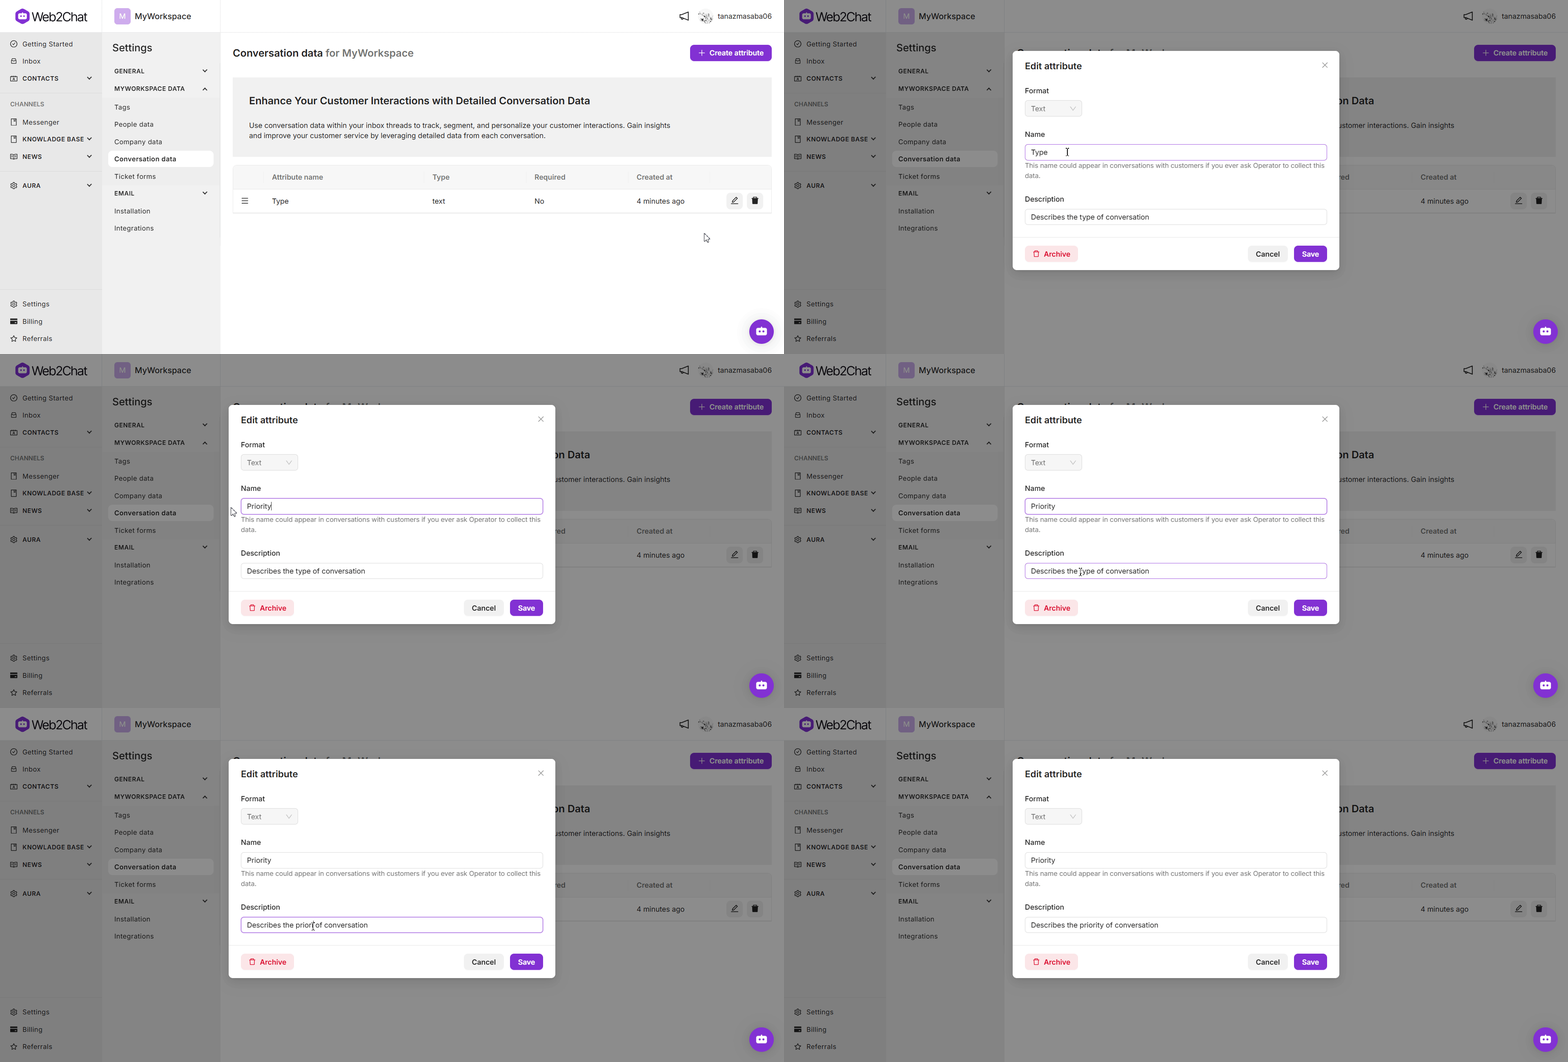
To edit an existing custom conversation attribute, follow these steps:
- Go to Settings--> My Workspace Data.
- Select Conversation Data.
- Locate the attribute you want to update. Click on the Edit icon next to the attribute.
- A popup will open, allowing you to update the Name and Description of the attribute.

Best Practices for Using CDAs
- Be Descriptive: Use clear names for your attributes to ensure they’re easy to understand.
- Keep it Relevant: Only create attributes that add value to your workflows or reporting.
- Standardize Data: Use dropdowns or predefined options for consistent data entry.
- Monitor Regularly: Update and maintain attributes to ensure accuracy.
If you need further assistance, contact our Customer Support.
