Web2Chat offers the flexibility to create and manage custom conversation attributes, allowing you to tailor the conversation data to better suit your business needs. Custom attributes enable you to track specific information during interactions with customers, enhancing your ability to provide personalized support.
This documentation will guide you through the process of creating, editing, archiving, and restoring custom conversation attributes in Web2Chat.
Default Conversation Attributes
By default, Web2Chat provides the following conversation attributes:
- ID: A unique identifier for each conversation.
- Brand: The brand associated with the conversation.
- Language: The language used in the conversation.
Creating Custom Conversation Attributes
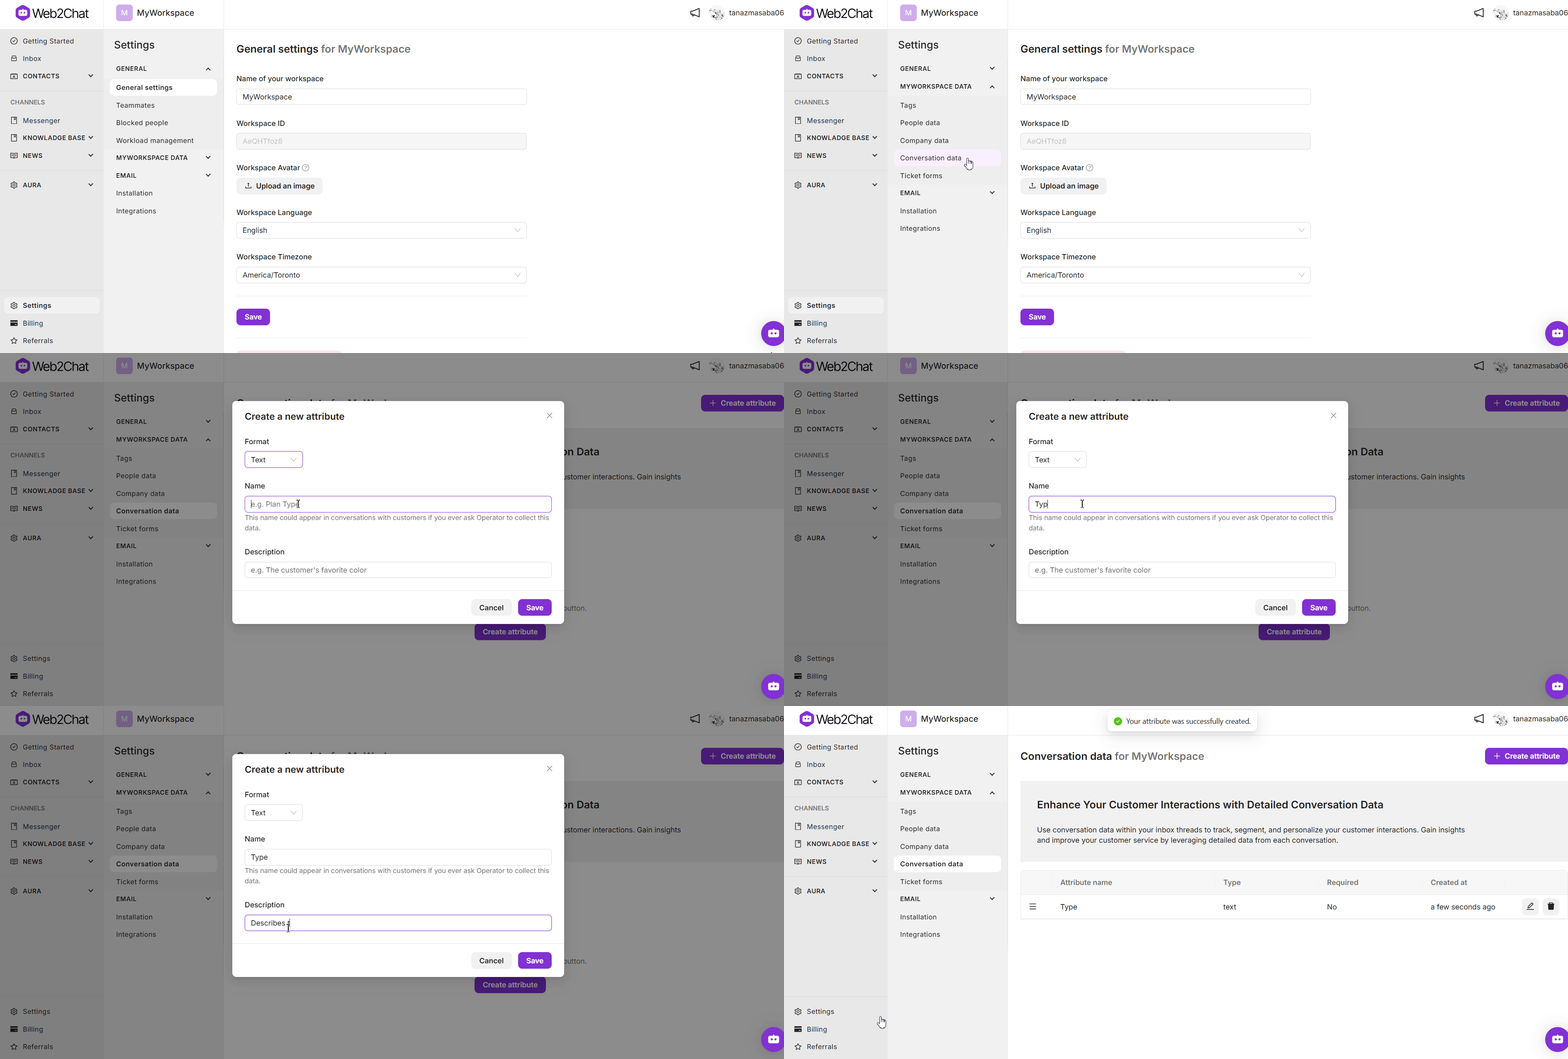
To create custom conversation attributes, follow these steps:
- Go to Settings--> My Workspace Data.
- Select Conversation Data.
- Click on the + Create Attribute button.
- A popup will appear where you can specify the details for your new attribute.
- Format: Choose the type of attribute you want to create from the following options:
- Text
- Multiline
- List
- Number
- Datetime
- Name: Enter a name for your custom attribute.
- Description: Provide a brief description of the attribute's purpose.
- After filling in the details, click Save to create the attribute.

Editing Custom Conversation Attributes
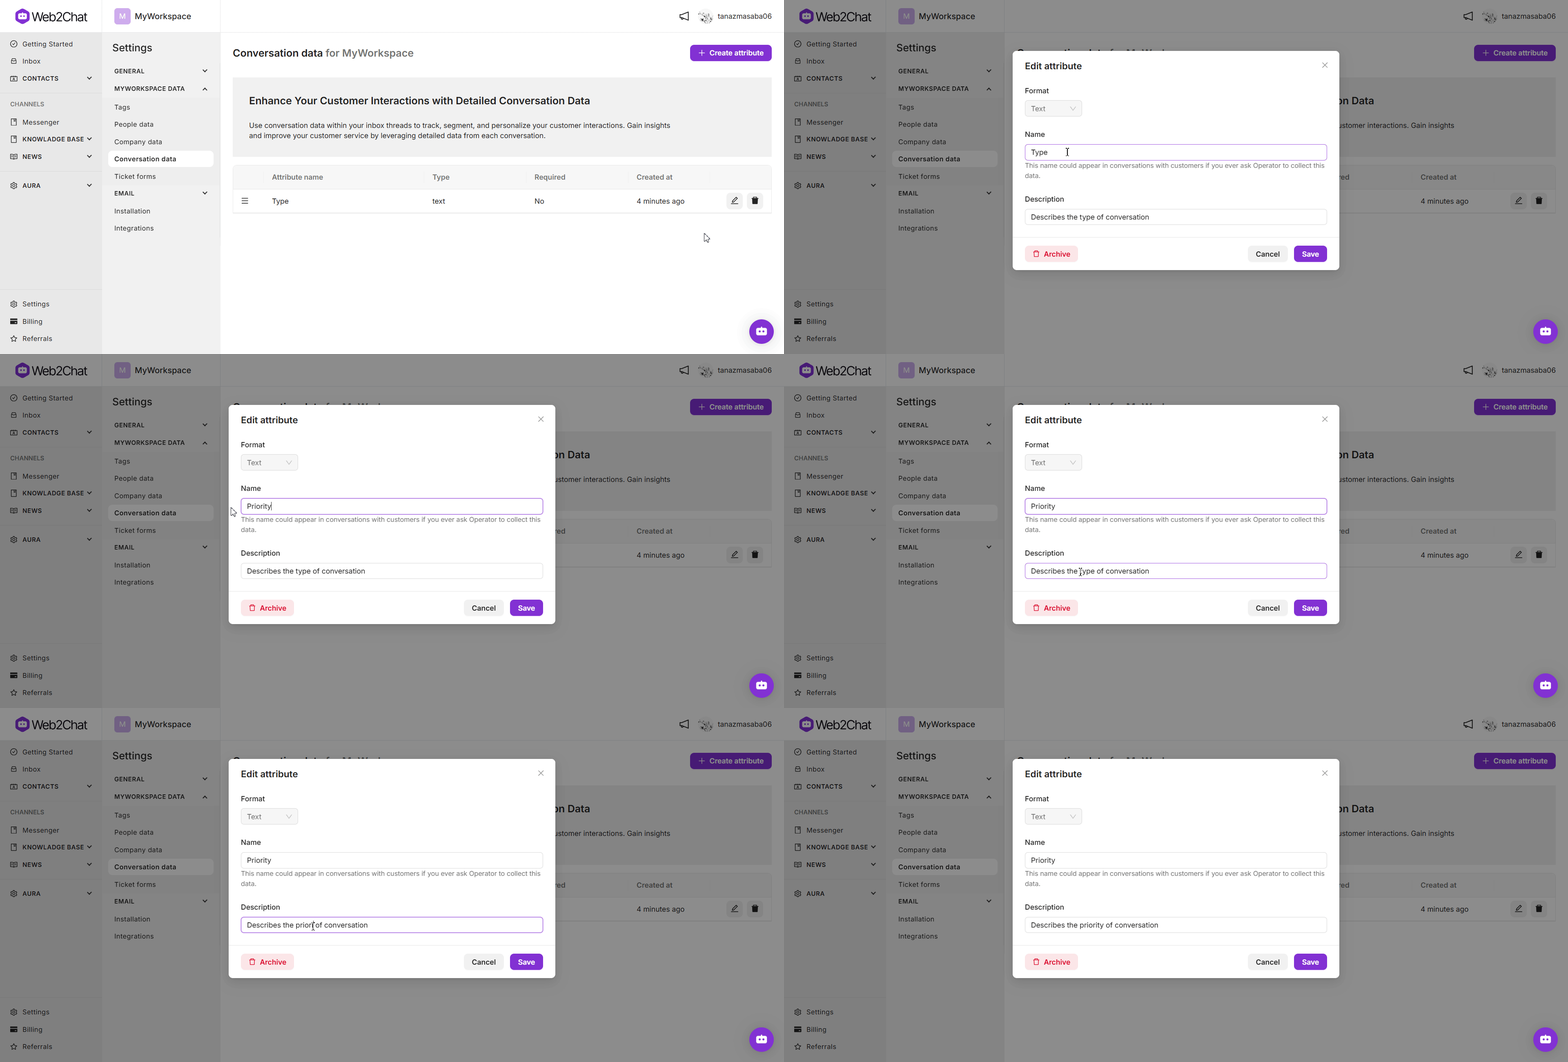
To edit an existing custom conversation attribute, follow these steps:
- Go to Settings--> My Workspace Data.
- Select Conversation Data.
- Locate the attribute you want to update. Click on the Edit icon next to the attribute.
- A popup will open, allowing you to update the Name and Description of the attribute.

Note: You cannot change the attribute type. You can only change the name and description.
Archiving Custom Conversation Attributes
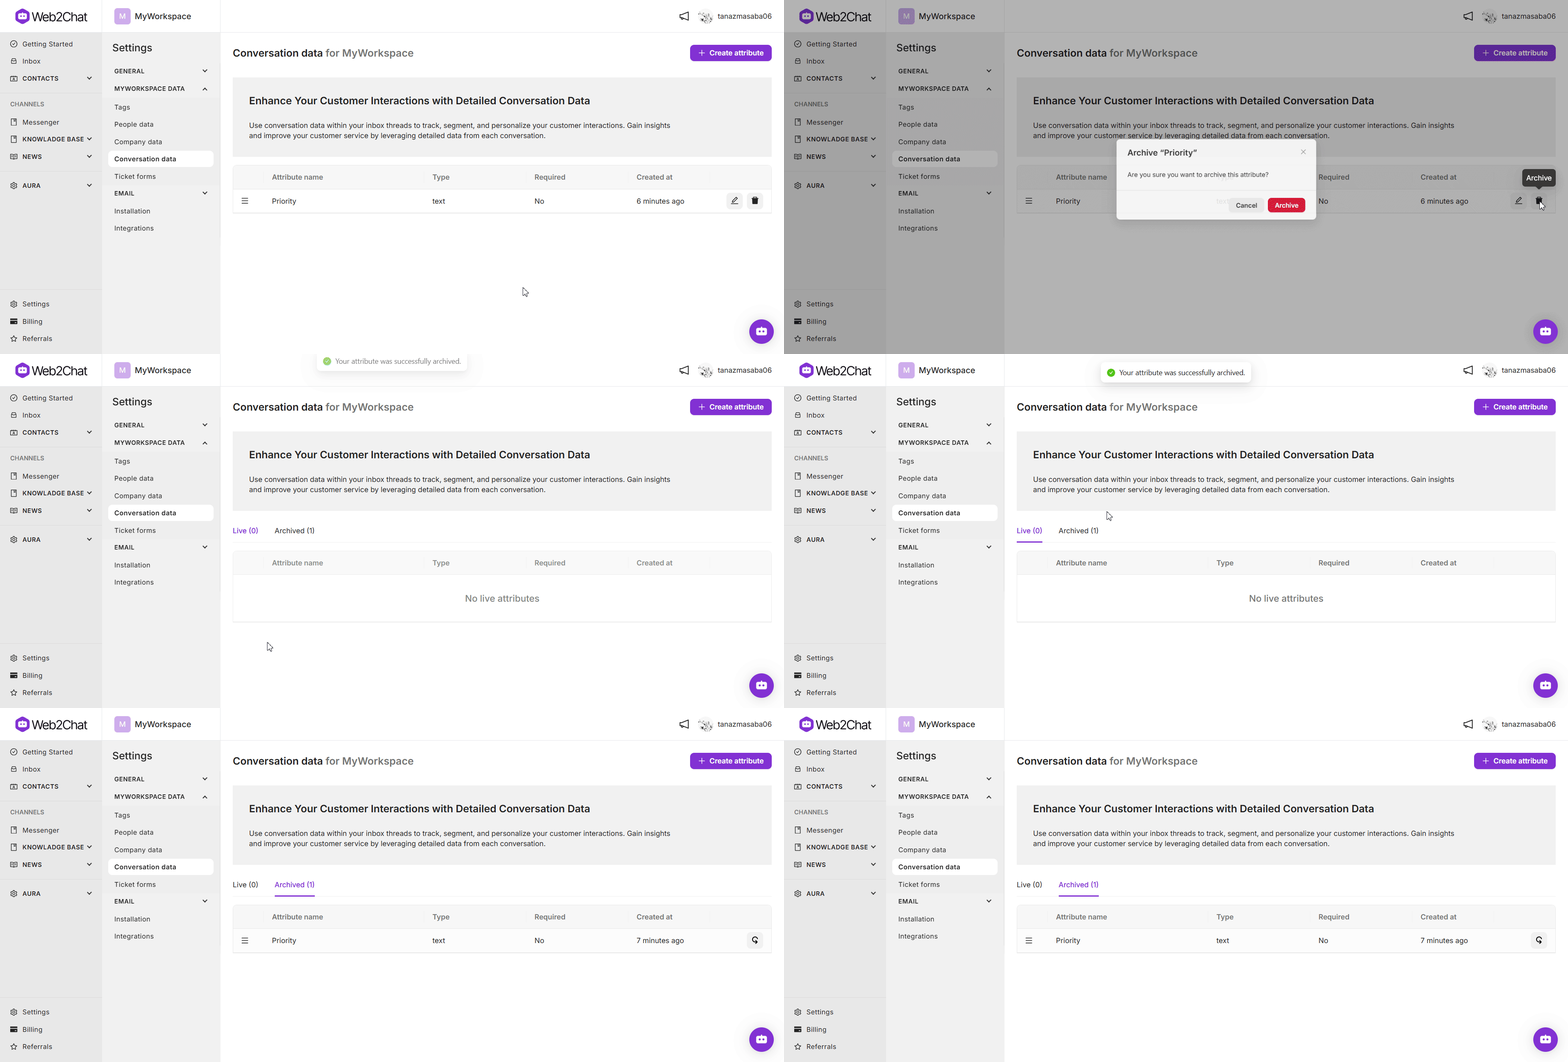
If you no longer need a custom conversation attribute, you can archive it:
- Go to Settings--> My Workspace Data.
- Select Conversation Data.
- Find the attribute you wish to archive. Click on the Delete icon next to the attribute.

Once the conversation attribute has been archived, you can view it by going to the Archived tab.
Restoring Archived Conversation Attributes
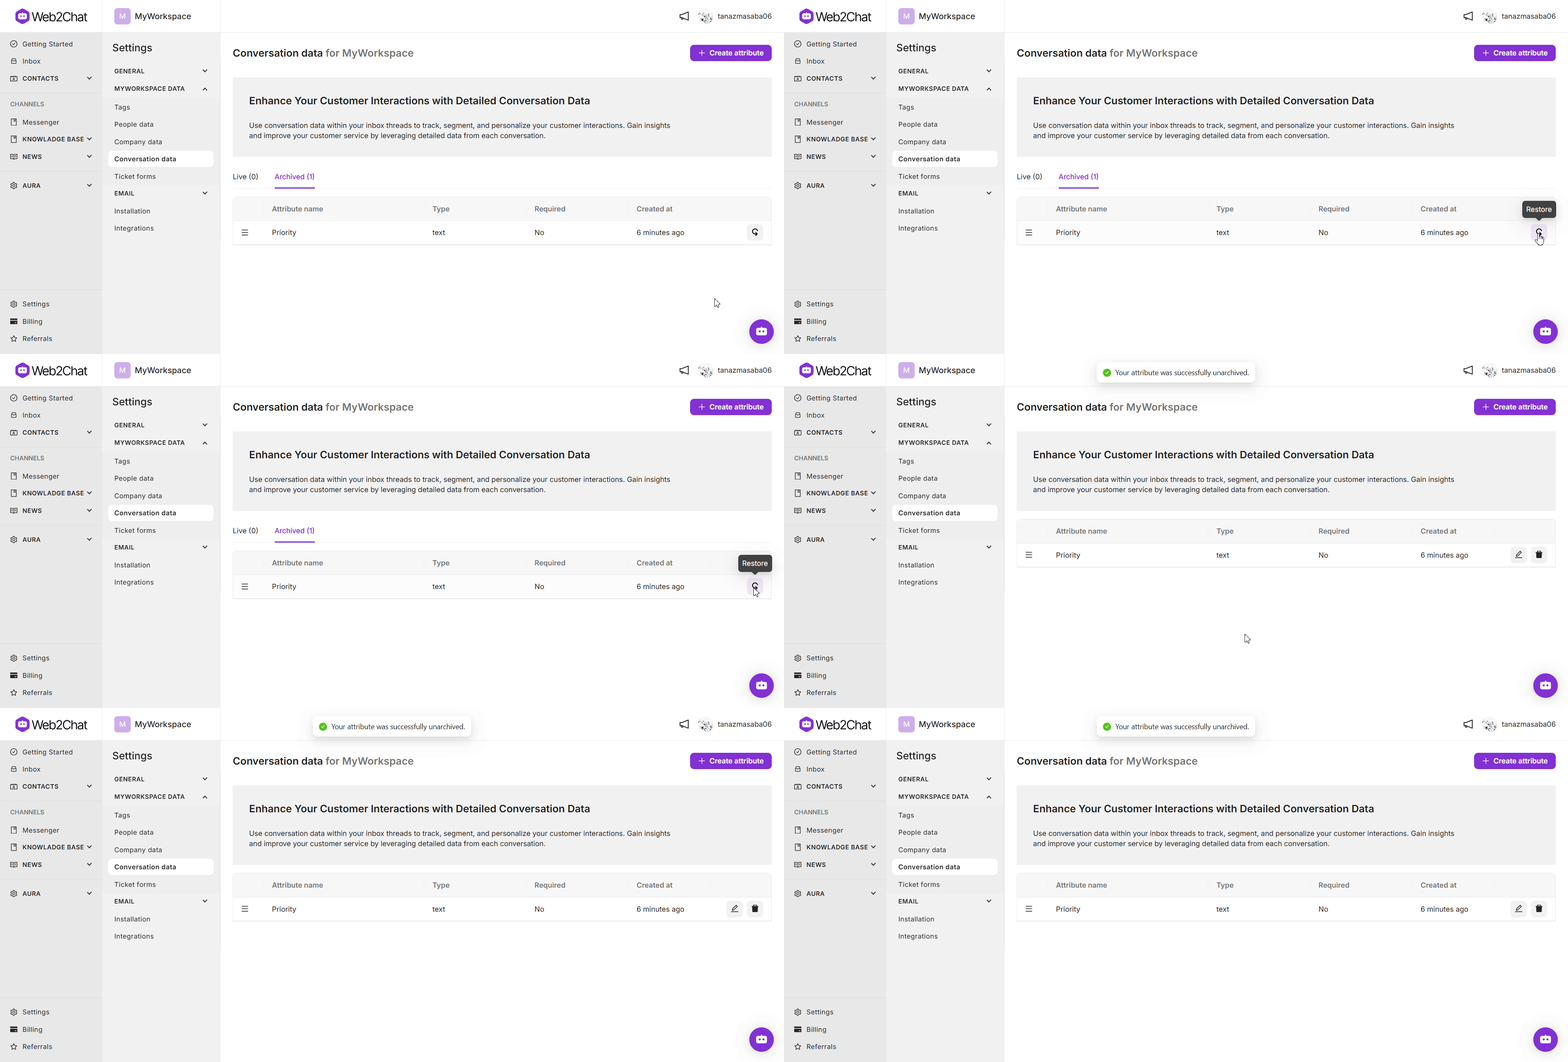
To restore an archived conversation attribute, follow these steps:
- Go to Settings--> My Workspace Data.
- Select Conversation Data.
- Click on the Archive tab.
- Locate the archived attribute you want to restore. Click on the Restore icon next to the attribute.

The attribute will be restored and will appear in the main conversation data list.
By following these instructions, you can effectively create, manage, archive, and restore custom conversation attributes in Web2Chat, ensuring that your conversation data is well-organized and tailored to your needs.
If you need further assistance, contact our Customer Support.
