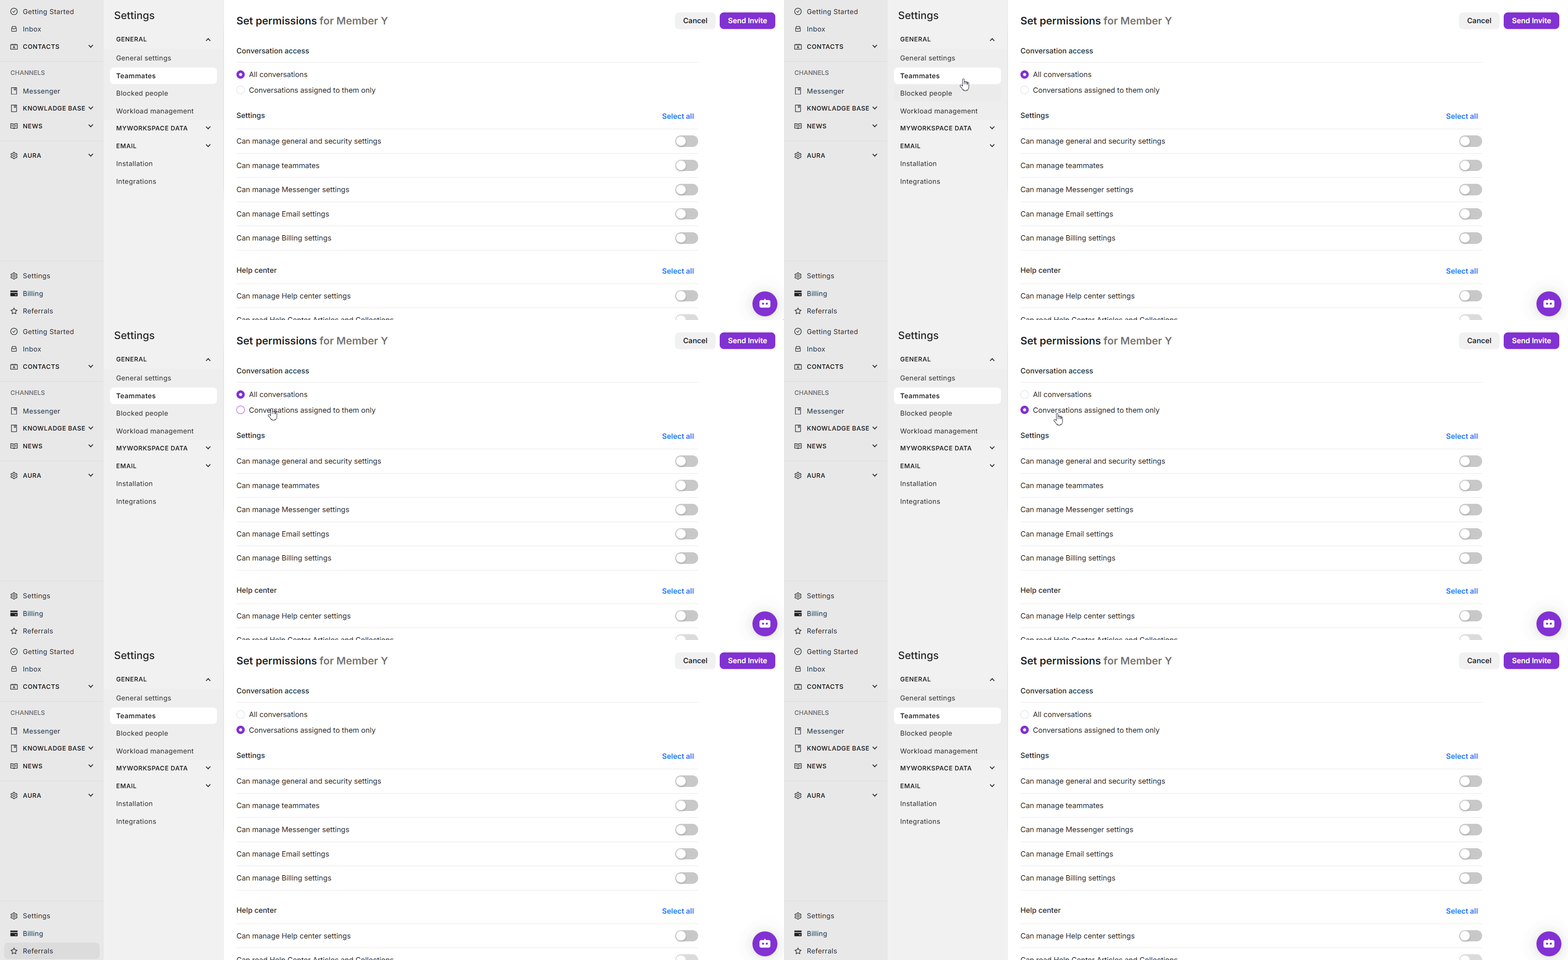
In Web2Chat, you can control the level of access each teammate has to your workspace, including restricting conversation access to ensure they only view and manage specific messages. This setup is beneficial for maintaining security and efficiency within your support team.
Set Up Roles and Permissions for Teammates
To begin setting up roles and permissions, navigate to Settings > General > Teammates in your Web2Chat dashboard.
- Add a new teammate by clicking the Add new teammates button and entering their email address.
- Set Permissions – After adding a teammate, you’ll be directed to a permissions setup page where you can assign them various permissions, including:
- Managing general & security settings
- Team member management
- Email & billing settings
- Messenger, News & Help Center settings
- Aura AI settings
For more information on adding teammates and configuring these permissions, refer to Setting Up Roles & Permissions in Web2Chat.
Limiting Access to Conversations
To further control conversation access, you can limit teammates to view only the conversations assigned to them:
- In the Conversation Access section under permissions, toggle the option labeled Conversations assigned to them only.
- When enabled, this option restricts the teammate's access, allowing them to view and interact only with conversations assigned to them directly.

This feature is useful for larger teams and segmented workflows, ensuring teammates only manage the conversations relevant to their responsibilities.
If you need further assistance, contact our Customer Support.
