Efficiently manage access and responsibilities within Web2Chat by setting up roles and permissions for each team member. Here’s a step-by-step guide to inviting new teammates and defining their roles to ensure secure and streamlined operations in your workspace.
How to Set Up Permissions
In Web2Chat, you can set up permissions for a new teammate when you invite them to your workspace.
Step 1: Invite a New Teammate
To start adding a new team member, follow these steps:
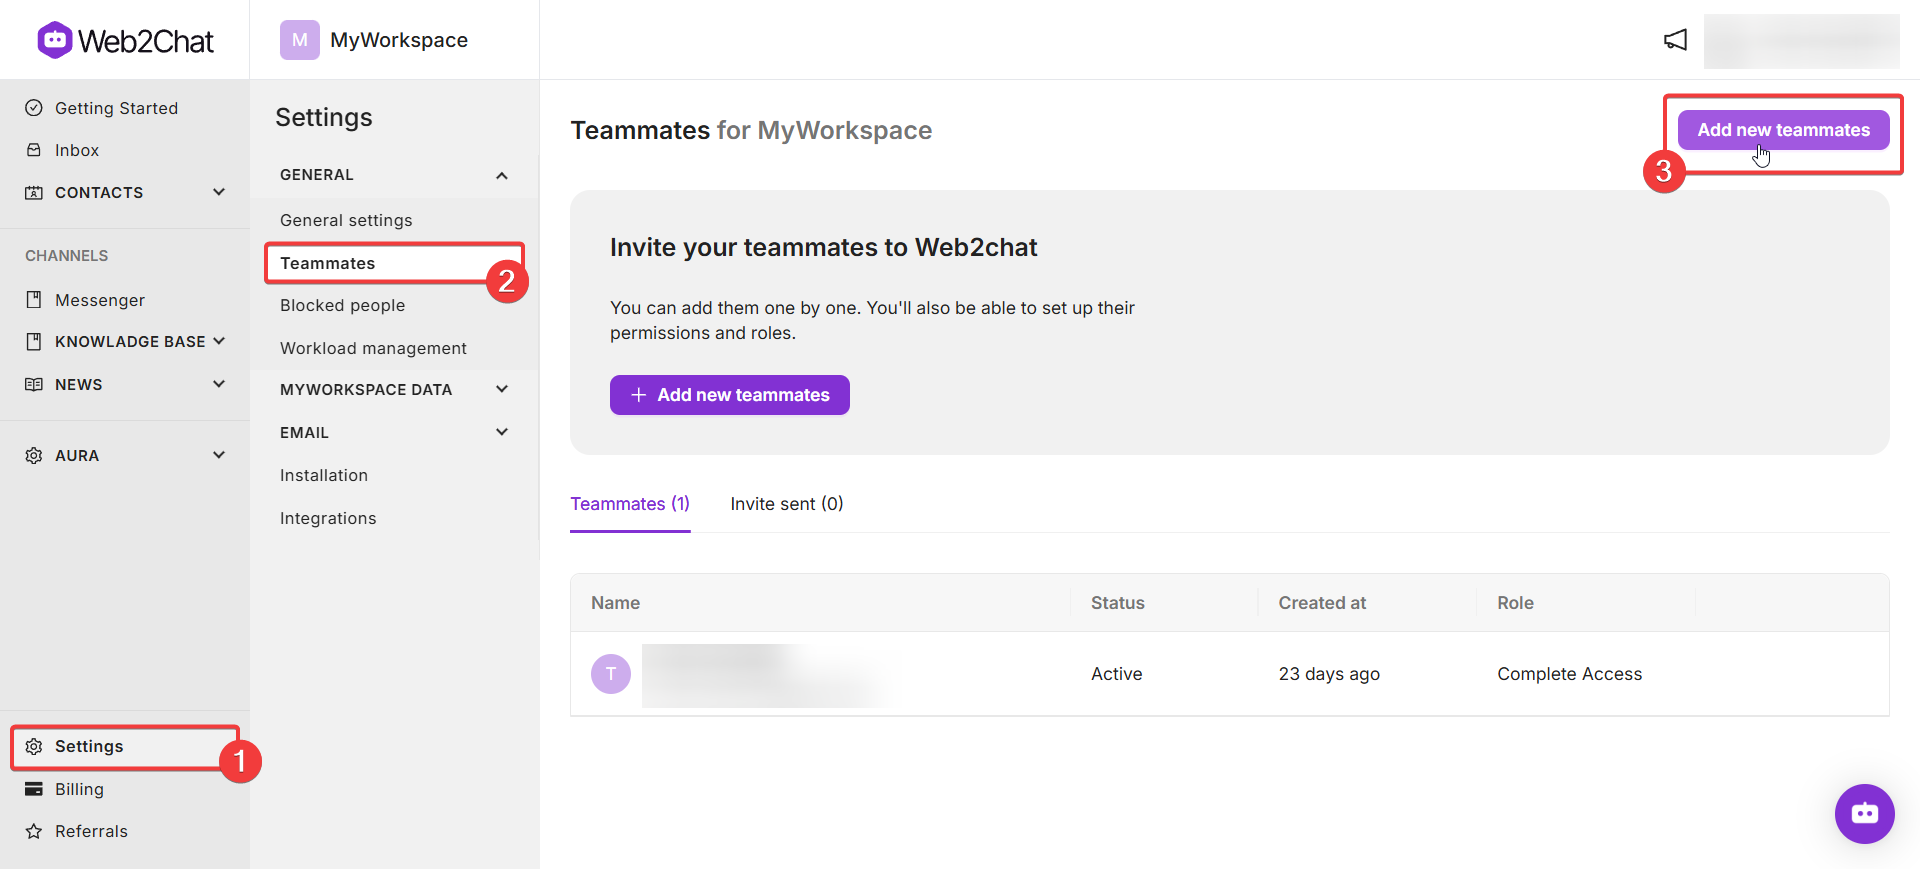
- From your Web2Chat dashboard, go to Settings > General > Teammates.
- On the Teammates page, select the Add new teammates button.

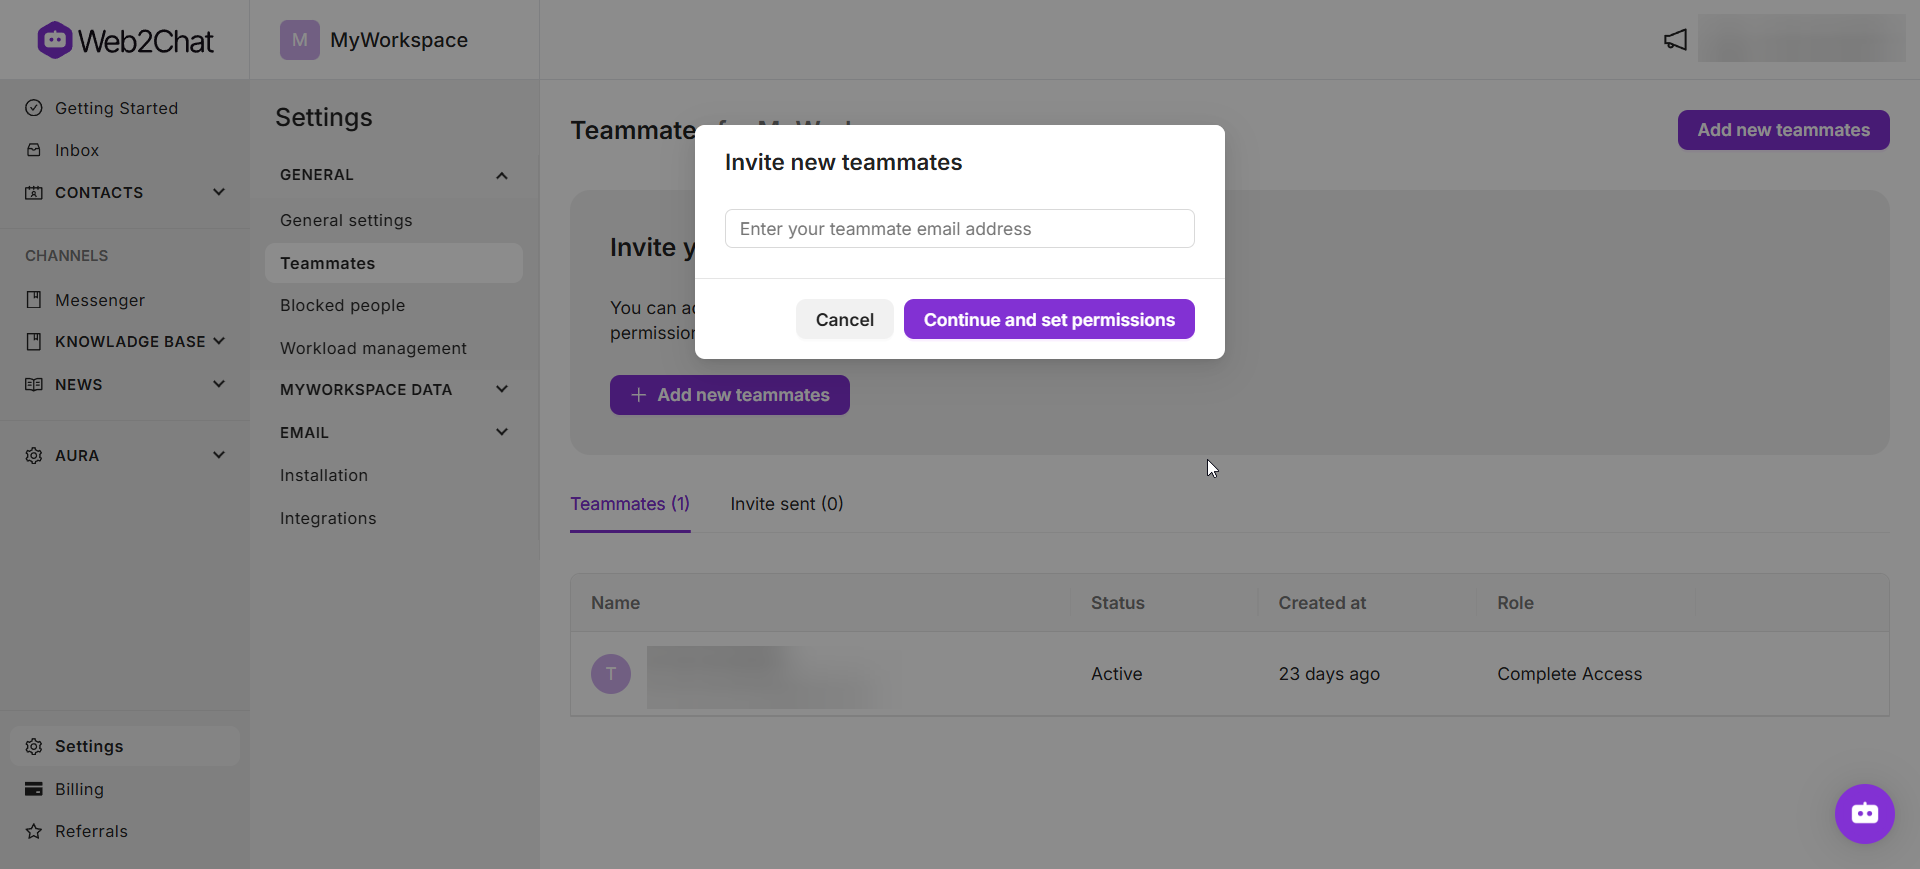
In the popup, type in the email address of the person you wish to invite. Click Continue and set permissions to proceed.

Step 2: Set Permissions for the New Team Member
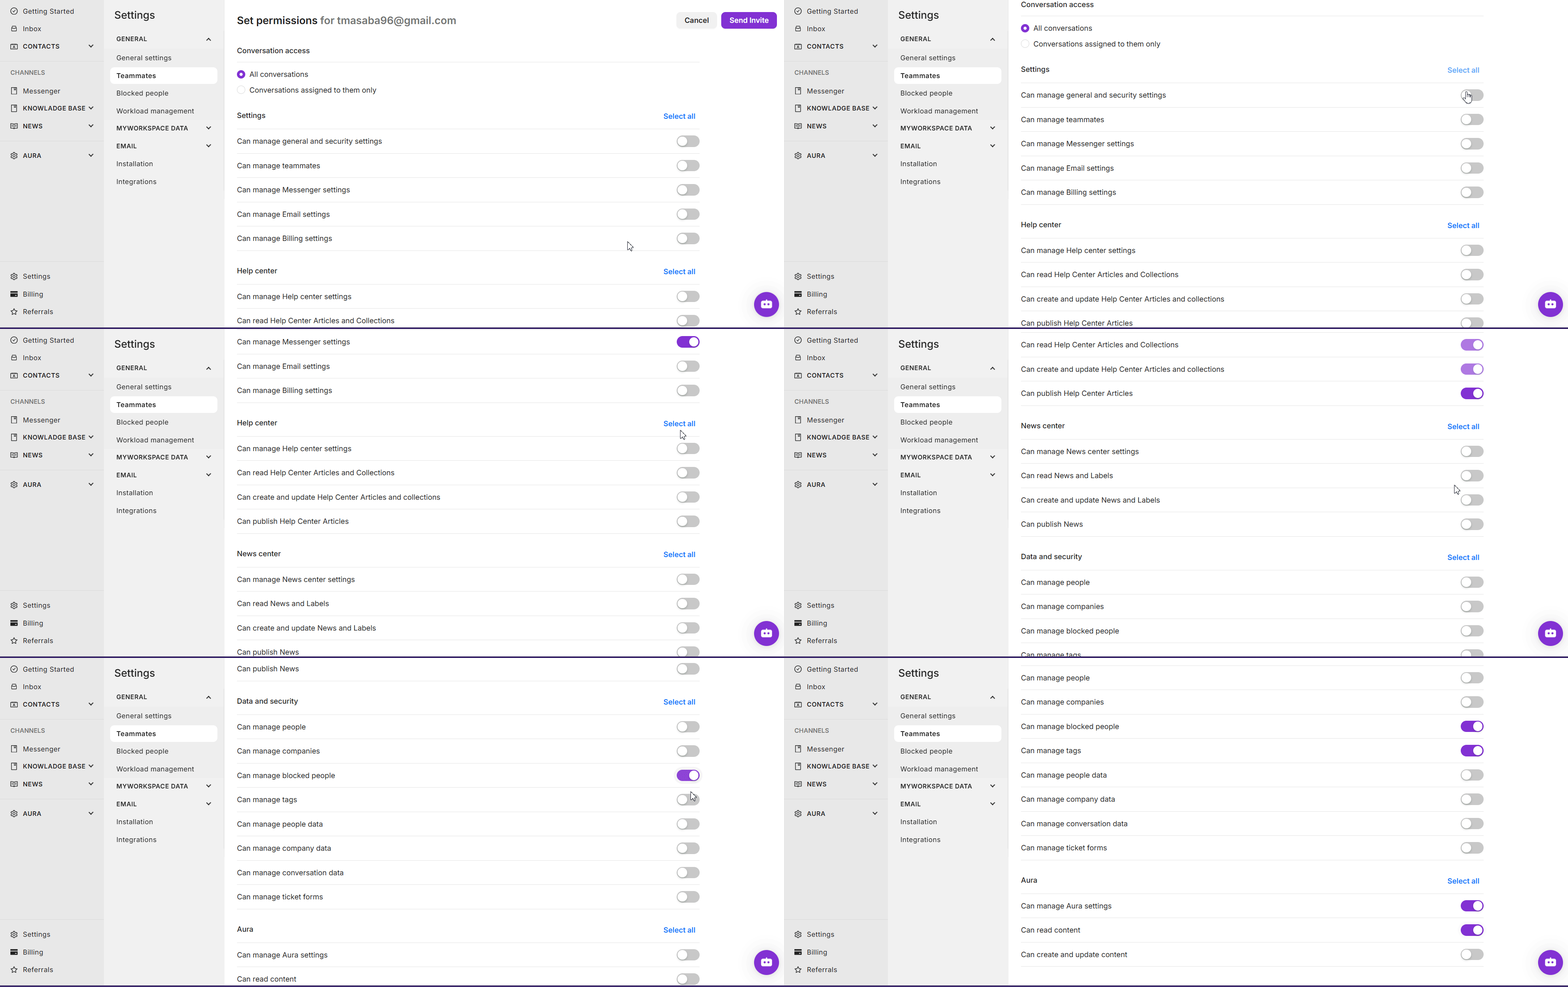
Once the email is entered, you will be directed to the permissions page, where you can set up specific permissions based on the role of the new team member.
Options include:
- Managing Conversation Settings: Choose whether teammates can access all conversations with customers, or only those assigned to them.
- Managing General & Security Settings: Allow the user to adjust workspace configurations and security options.
- Managing Team Member Settings: Grant access to add, remove, or update team members.
- Managing Email & Billing Settings: Enable permissions to update billing details, manage subscriptions, and oversee email preferences.
- Managing Messenger, News & Help Center Settings: Provide control over the setup and maintenance of Messenger, News updates, and Help Center features.
- Managing Aura AI Settings: Allow the team member to configure and adjust Aura AI features for the workspace.

After configuring permissions, confirm the setup to send an invitation email to the new team member. They will be prompted to accept the invitation and join your Web2Chat workspace.
Next Steps:
After inviting a new teammate and setting their permissions, they will have immediate access to the workspace with their designated role permissions. You can edit or remove team member access at any time by returning to the Teammates section.
If you need further assistance, contact our Customer Support.
Related Articles:
- Accepting an Invite to a Web2Chat Workspace
- Add, Delete/Remove or Export a Teammate
