Web2Chat provides extensive customization options for Aura AI, allowing you to tailor the look and feel of your virtual assistant to align with your brand. By customizing Aura's appearance, you can create a more engaging and personalized customer experience.
How to Customize Aura AI's Appearance
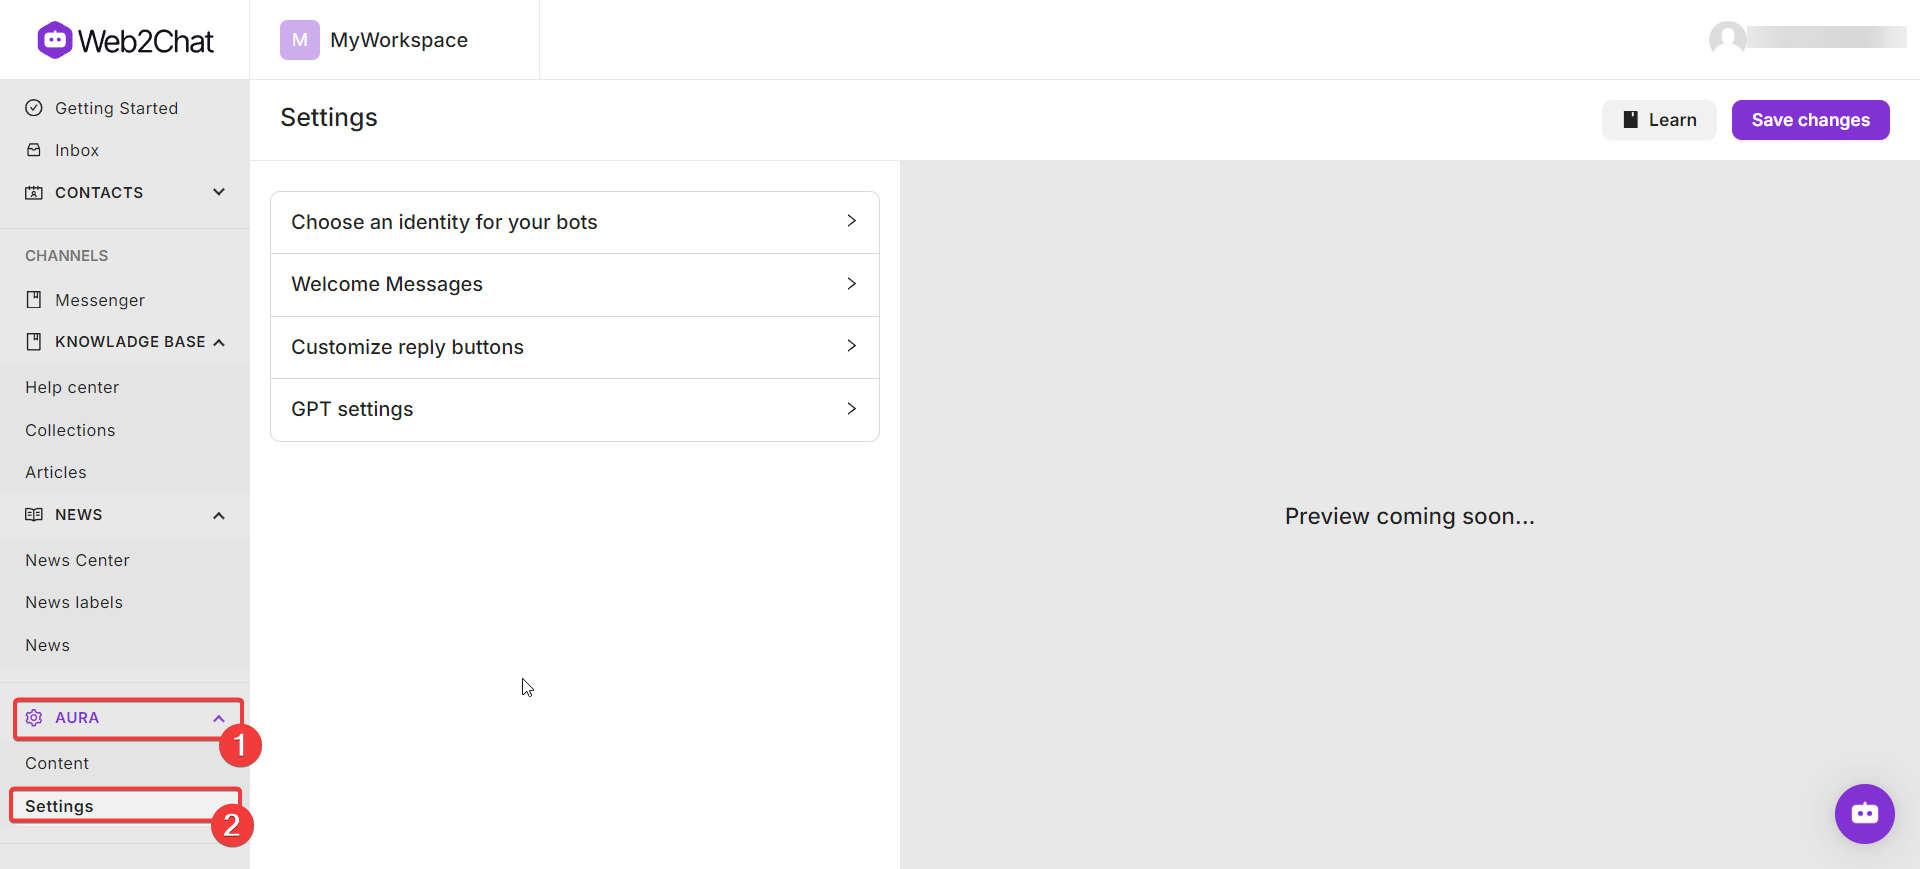
To customize Aura AI's appearance, navigate to your Web2Chat dashboard and follow these steps:
- Go to Aura > Settings.
- There, you will find the following customization options:
- Choose an Identity for Aura
- Customize Welcome Messages
- Customize Reply Buttons

Choose an Identity for Aura
You can give Aura a unique identity by setting a custom name and uploading an avatar. Follow these steps to choose an identity for Aura:
- Go to Aura > Settings in your Web2Chat dashboard.
- Click on Choose an identity for your bot.
- Click the Upload Avatar button and select an image file from your computer.The image will be used as Aura's avatar to visually represent it during customer interactions.
You can also set a custom name for Aura here in the ‘Name’ field. Once you have uploaded the avatar for Aura and given it a name, it will show up as shown below.
Make sure to enable the ‘Turn on Bot’ option so that customers can interact with Aura on your site.
Customize Welcome Messages
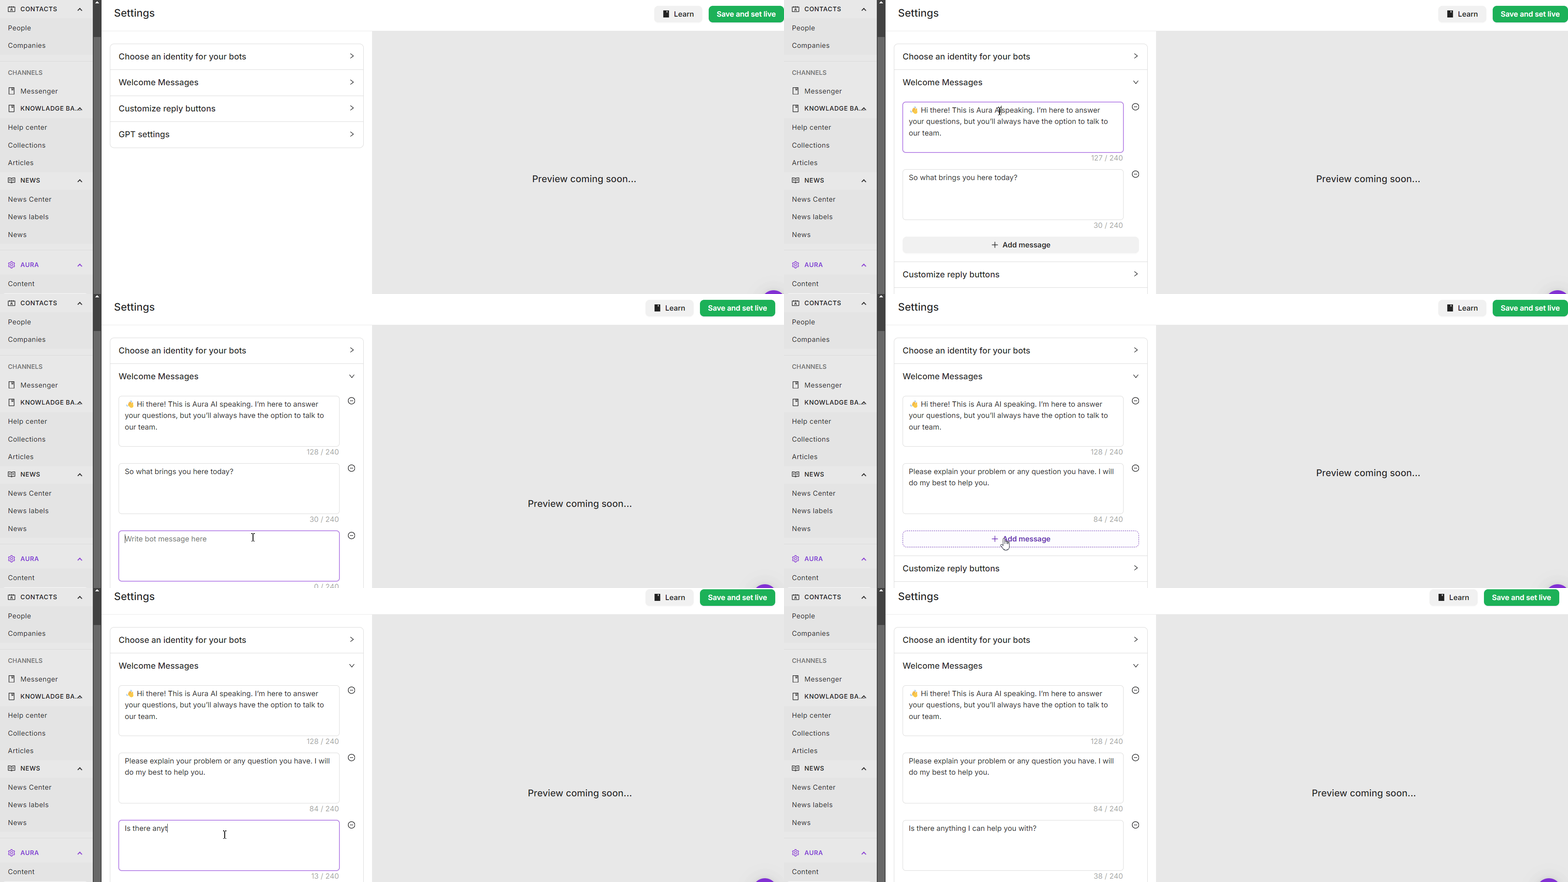
Customize Aura's welcome messages to make initial interactions more engaging and friendly. Follow these steps to add or delete custom welcome messages:
- Go to Aura > Settings in your Web2Chat dashboard.
- Click on Customize Welcome Messages.
- Add a Welcome Message:
- Click the Add New Message button.
- Enter the message text that Aura will use to greet customers.
- Save the message to add it to Aura's rotation.
- Delete a Welcome Message:
- Find the message you want to remove in the list.
- Click the Delete icon next to the message to remove it from Aura's greeting options.

Customize Reply Buttons
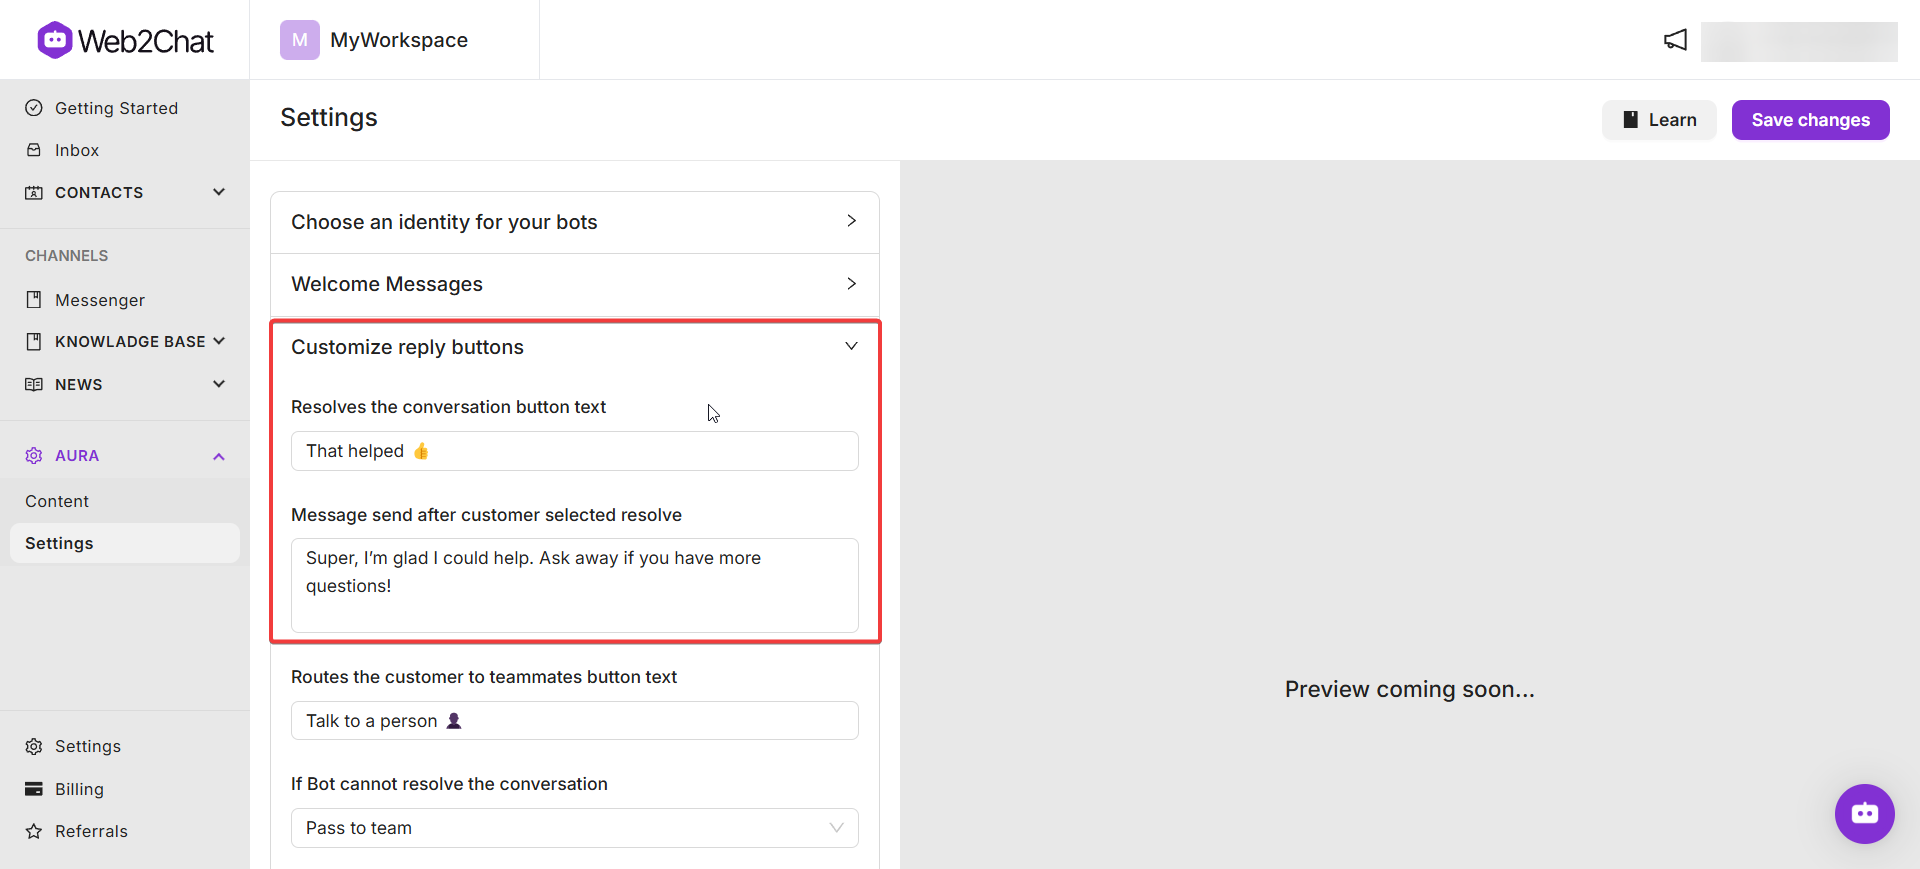
Reply buttons allow Aura to handle customer interactions smoothly by providing actionable responses. Here’s how to customize the reply buttons:
- Go to Aura > Settings in your Web2Chat dashboard.
- Click on Customize Reply Buttons.

You will find the following options to configure:
- "Resolve the Conversation" Button Text: Customize the text displayed on the button that resolves the conversation (e.g., "Mark as Resolved").
- Message Sent After Customer Selects Resolve: Enter the automated response that Aura will send once a customer clicks the resolve button (e.g., "Glad I could help!").
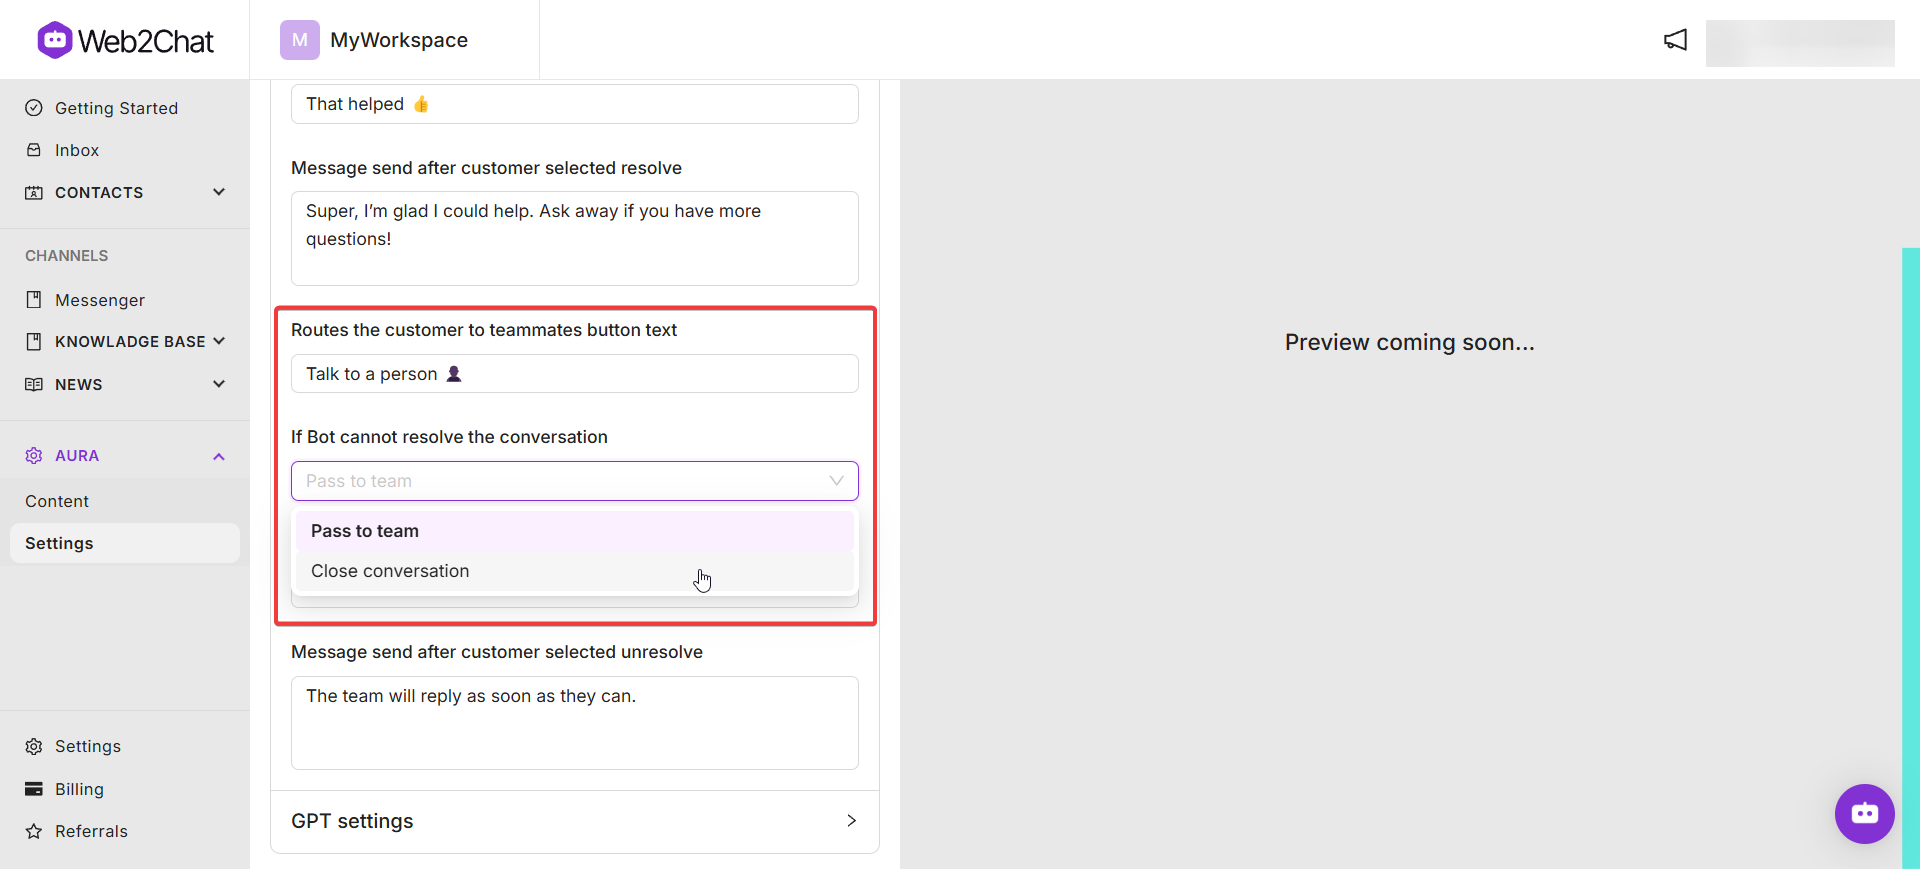
- "Route to Teammate" Button Text: Customize the text for the button that routes the conversation to a human agent (e.g., "Transfer to Support").
- If Aura Cannot Resolve the Conversation: Configure how Aura handles unresolved conversations. You can choose to either close the conversation or escalate it to a support team member for further assistance.

- Message Sent If Customer Marks the Conversation as Unresolved: Customize the automated response that Aura sends if a customer indicates the conversation remains unresolved (e.g., "I'm sorry I couldn't help. Let me connect you with a support agent for further assistance.").
If you need further assistance, contact our Customer Support.
