Adding a Web2Chat widget to your Wix website is a quick and easy way to integrate live chat functionality, enabling you to connect with your site visitors in real time.
Step 1: Copy Your Web2Chat Widget Code
Before you begin, make sure you have your Web2Chat widget code ready. If you haven’t generated the code yet, follow these steps:
- Log into Web2Chat Dashboard: Navigate to the Web2Chat platform and log in with your account credentials.
- Generate the Widget Code: Go to Settings and then select Installation. From here, you can choose the workspace where you want the widget installed.
- Copy the Widget Code: You will see a JavaScript code snippet. Copy this code to your clipboard, as you will need it to integrate the widget into your Wix site.

Step 2: Log In to Your Wix Account
- Go to Wix.com: Open your browser and go to Wix.com.
- Sign in: Log in to your Wix account using your credentials. You should land on your Wix dashboard.
Step 3: Add the Web2Chat Widget Code to Your Wix Site
Now that you have your Web2Chat widget code, you can begin adding it to your Wix website.
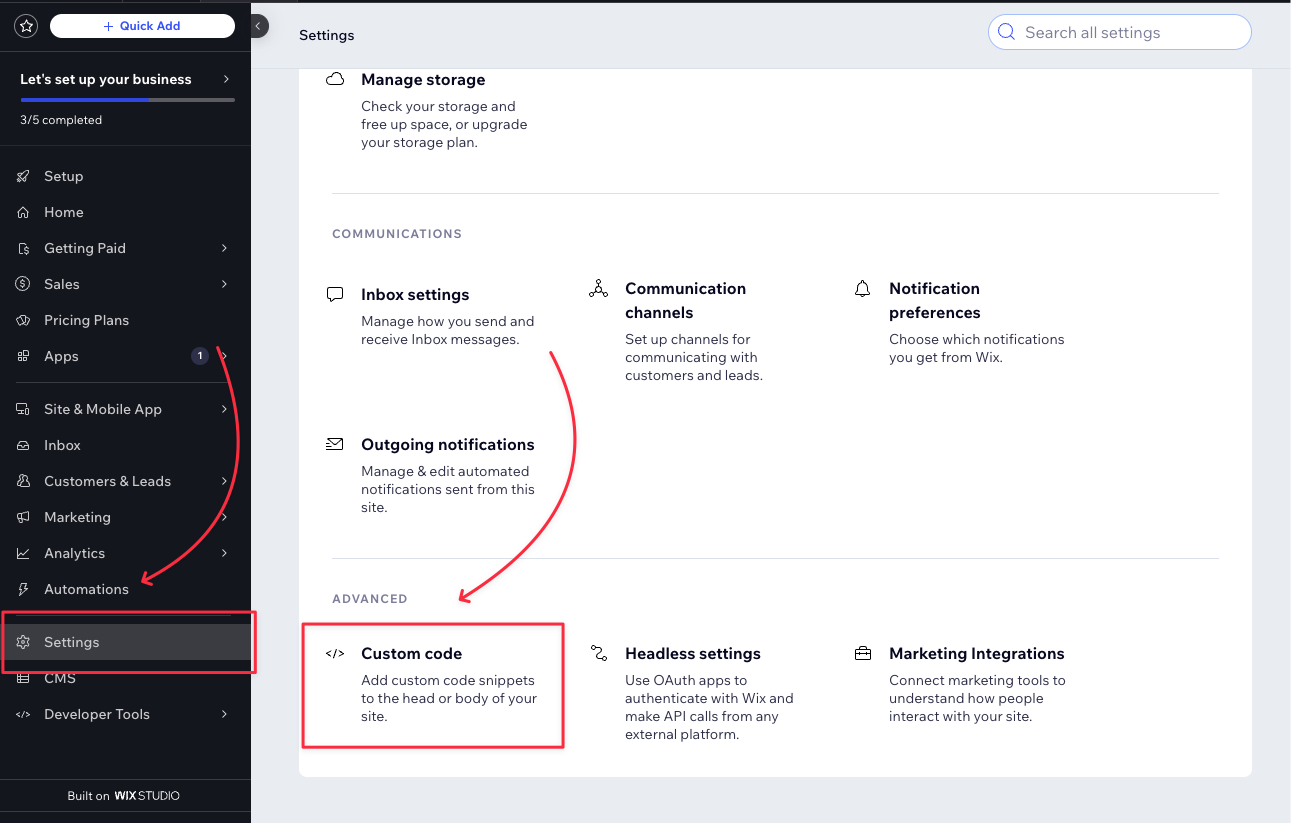
- Go to Your Site's Settings: From your Wix dashboard, select the website where you want to install the widget. Once inside the website editor, navigate to the Settings section on the left-hand side of the screen.
- Locate the Custom Code Section: In the settings menu, scroll down and find the Advanced section. Here, you will see an option labeled Custom Code. Click on it to open the custom code management interface.

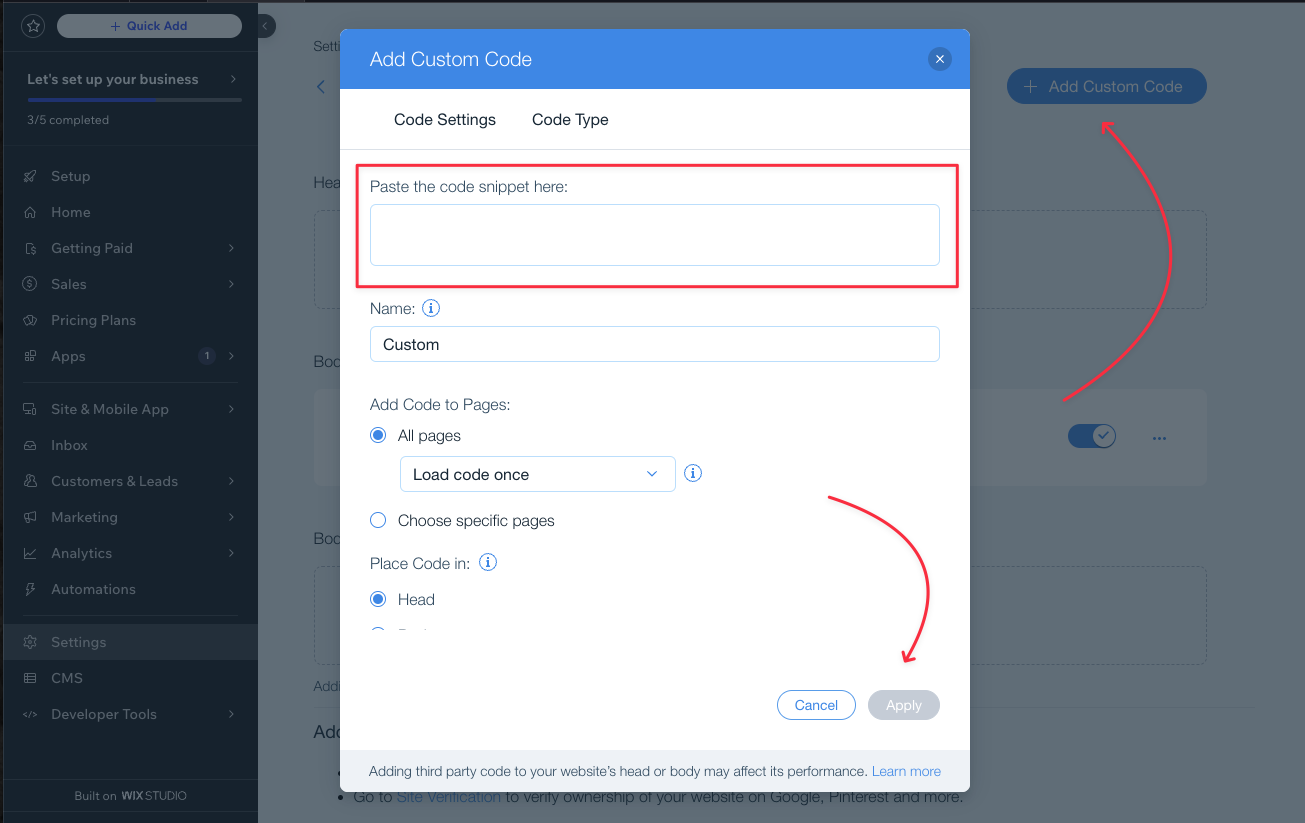
- Add a New Custom Code:
- Click on Add Custom Code at the top right.
- Paste the Web2Chat JavaScript widget code that you copied earlier.
- Set Code Placement: Under Place Code In, select Body - Start. This will ensure that the Web2Chat widget loads properly when your website is accessed.
- Name the Code: Give your custom code a descriptive name, such as “Web2Chat Bot” for easy identification.
- Set Code to Load on All Pages: In the Add Code to Pages section, choose All Pages to ensure the Web2Chat widget appears on every page of your website.
- Save and Apply: Once everything is set, click Apply to finalize the addition of the Web2Chat widget code to your site.

Step 4: Test the Widget
After adding the code, it's important to verify that the Web2Chat widget is working as expected:
- Preview Your Site: Click Preview in the Wix editor to check if the Web2Chat widget is visible on your site.
- Test the Chat Functionality: Initiate a chat through the widget to ensure it functions properly and that messages are being received. This will help confirm that the integration was successful.
Step 5: Customize and Optimize the Widget
Once your Web2Chat widget is live on your Wix website, you can customize and optimize it further through the Web2Chat dashboard:
- Customize Appearance: Adjust the design and appearance of the chat widget to match your site's branding.
- Add Automation: Set up automated responses, chatbot integration, and other advanced features to improve customer interaction.
- Track Engagement: Use analytics to monitor visitor engagement and optimize your communication strategy based on user behavior.
By following these steps, you’ll have a fully functional Web2Chat widget integrated into your Wix website, allowing you to enhance customer interaction and streamline communication. This easy integration will ensure a seamless and engaging user experience for your visitors.
