
Adding a Web2Chat widget to your WordPress site can greatly enhance customer engagement, offering instant communication directly from your website. Whether you're looking to offer customer support or improve lead generation, integrating Web2Chat is a seamless and effective way to enhance user experience.
Step 1: Copy Your Web2Chat Widget Code
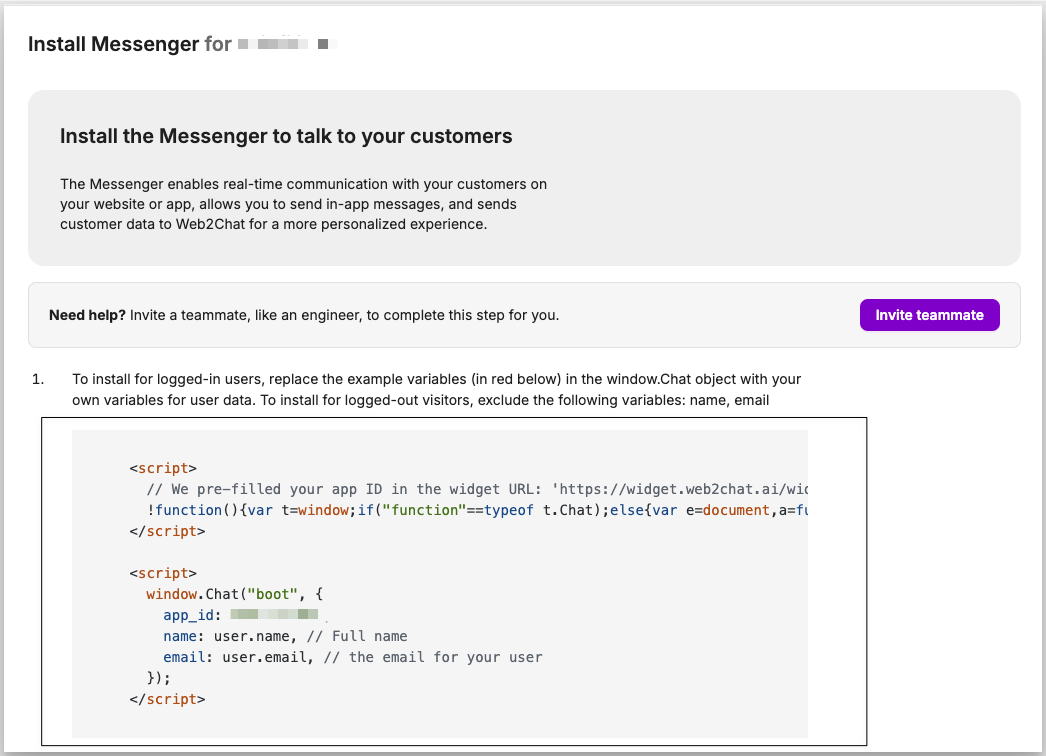
Before you can add the widget to WordPress, you need to generate the widget code from the Web2Chat platform. Here’s how you can do that:
- Navigate to Settings > Installation: In the dashboard, select the workspace you want to install the widget on. Go to Settings and then choose Installation.
- Copy the Widget Code: Here, you’ll find a unique JavaScript code snippet. Copy this code to your clipboard—this is the code you’ll need to add to your WordPress site.
Step 2: Log in to Your WordPress Dashboard
Now that you have your widget code ready, log in to your WordPress site.
- Go to WordPress Admin Panel: You can do this by visiting
yourdomain.com/wp-adminand logging in with your credentials.
Step 3: Add the Widget Code to Your WordPress Site
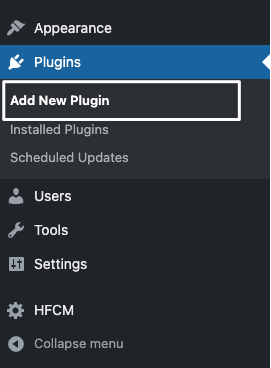
- Install a Code Snippet Plugin:
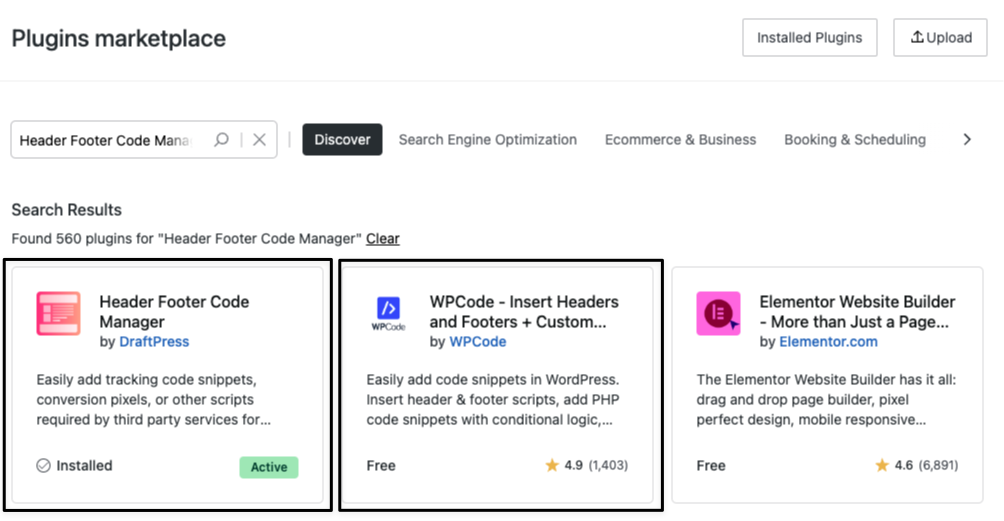
- Go to Plugins > Add New and search for a plugin like Header and Footer Code Manager or WPCode (formerly Insert Headers and Footers).
- Install and activate the plugin.
- Add the Widget Code:
- Once the plugin is activated, navigate to the plugin settings by going to Plugins > Installed Plugins > Header Footer Code Manager (or WPCode settings, depending on the plugin).
- You will see options to add code to the Snippet / Code of your site.
- Paste your Web2Chat widget code into the Snippet / Code.
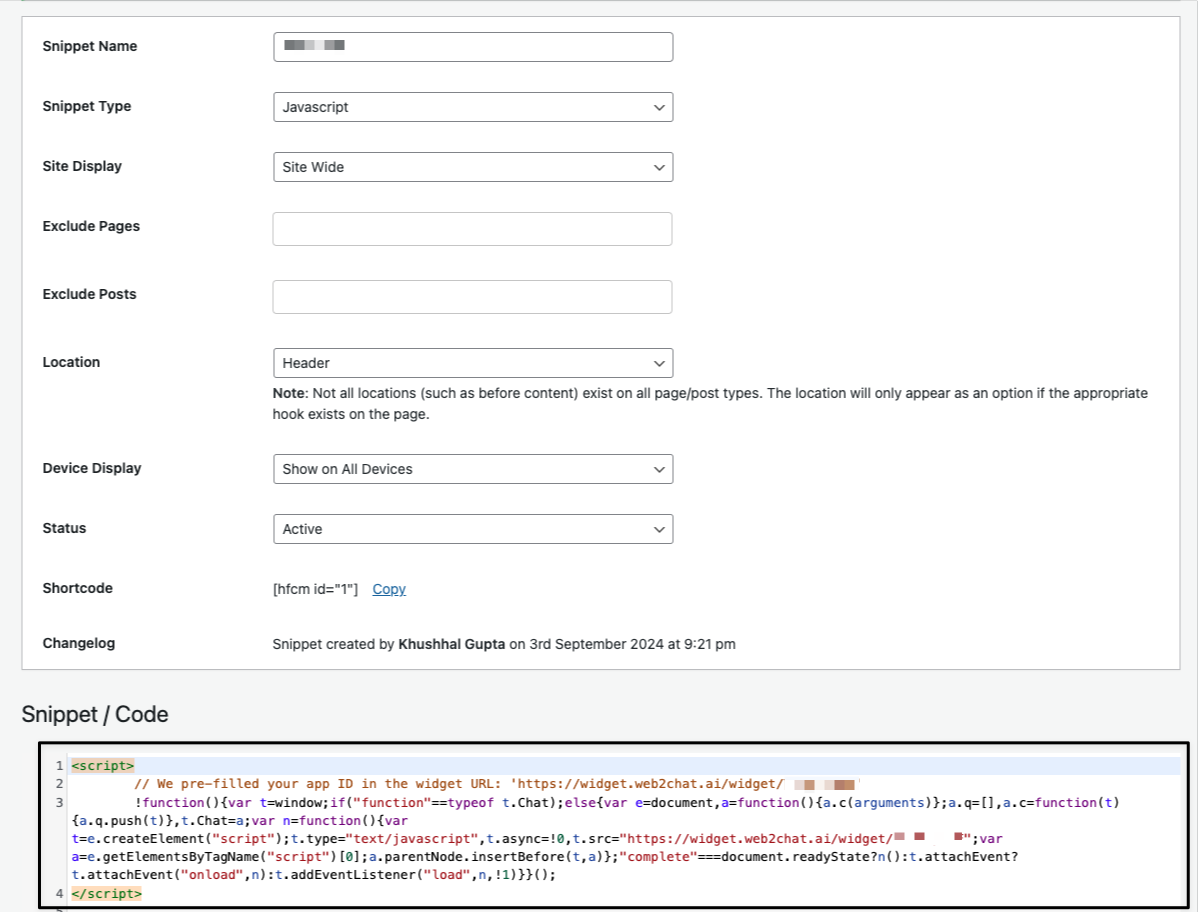
- Save Changes: After pasting the code, click Save or Publish.
The Web2Chat widget should now be integrated into your WordPress site without directly altering your theme files.
Step 4: Test the Widget
After adding the widget code, visit your WordPress site to ensure the Web2Chat widget is appearing correctly. Test its functionality by initiating a chat to verify the settings.
If the widget does not appear, check for any errors in your console (F12 > Console on most browsers), and ensure the code is placed correctly.
Step 5: Customize and Optimize
Now that the Web2Chat widget is live on your WordPress site, you can:
- Customize its appearance through your Web2Chat dashboard.
- Add advanced features such as automated responses or bot integration.
- Track visitor interactions and optimize your customer engagement strategy.
Adding a Web2Chat widget to WordPress is a straightforward process that can significantly improve your website’s user experience. Whether you use the theme editor or a plugin to add the widget code, Web2Chat provides an easy way to stay connected with your visitors.