
With Web2Chat, you can streamline customer support by automatically forwarding emails to your Help Desk. This ensures all customer inquiries are captured, tracked, and managed in one place, making it easier for your team to respond efficiently.
Why Forward Emails to Web2Chat?
- Centralized Support: Manage all customer communications from various email addresses directly in your Web2Chat Help Desk.
- Improved Response Times: Automate email forwarding to ensure no inquiry is missed, leading to faster resolutions.
- Seamless Workflow Integration: Keep your email communications organized alongside live chat and messaging interactions.
How to Automatically Forward Emails to Web2Chat
Below are the steps to automatically forward emails to Web2Chat.
Step 1: Find Your Web2Chat Email Address
- Log in to your Web2Chat Dashboard.
- Go to Settings > Email > Email Settings.
- You’ll find a unique Web2Chat-generated email address (e.g.,
[email protected]). This is where forwarded emails will be directed.
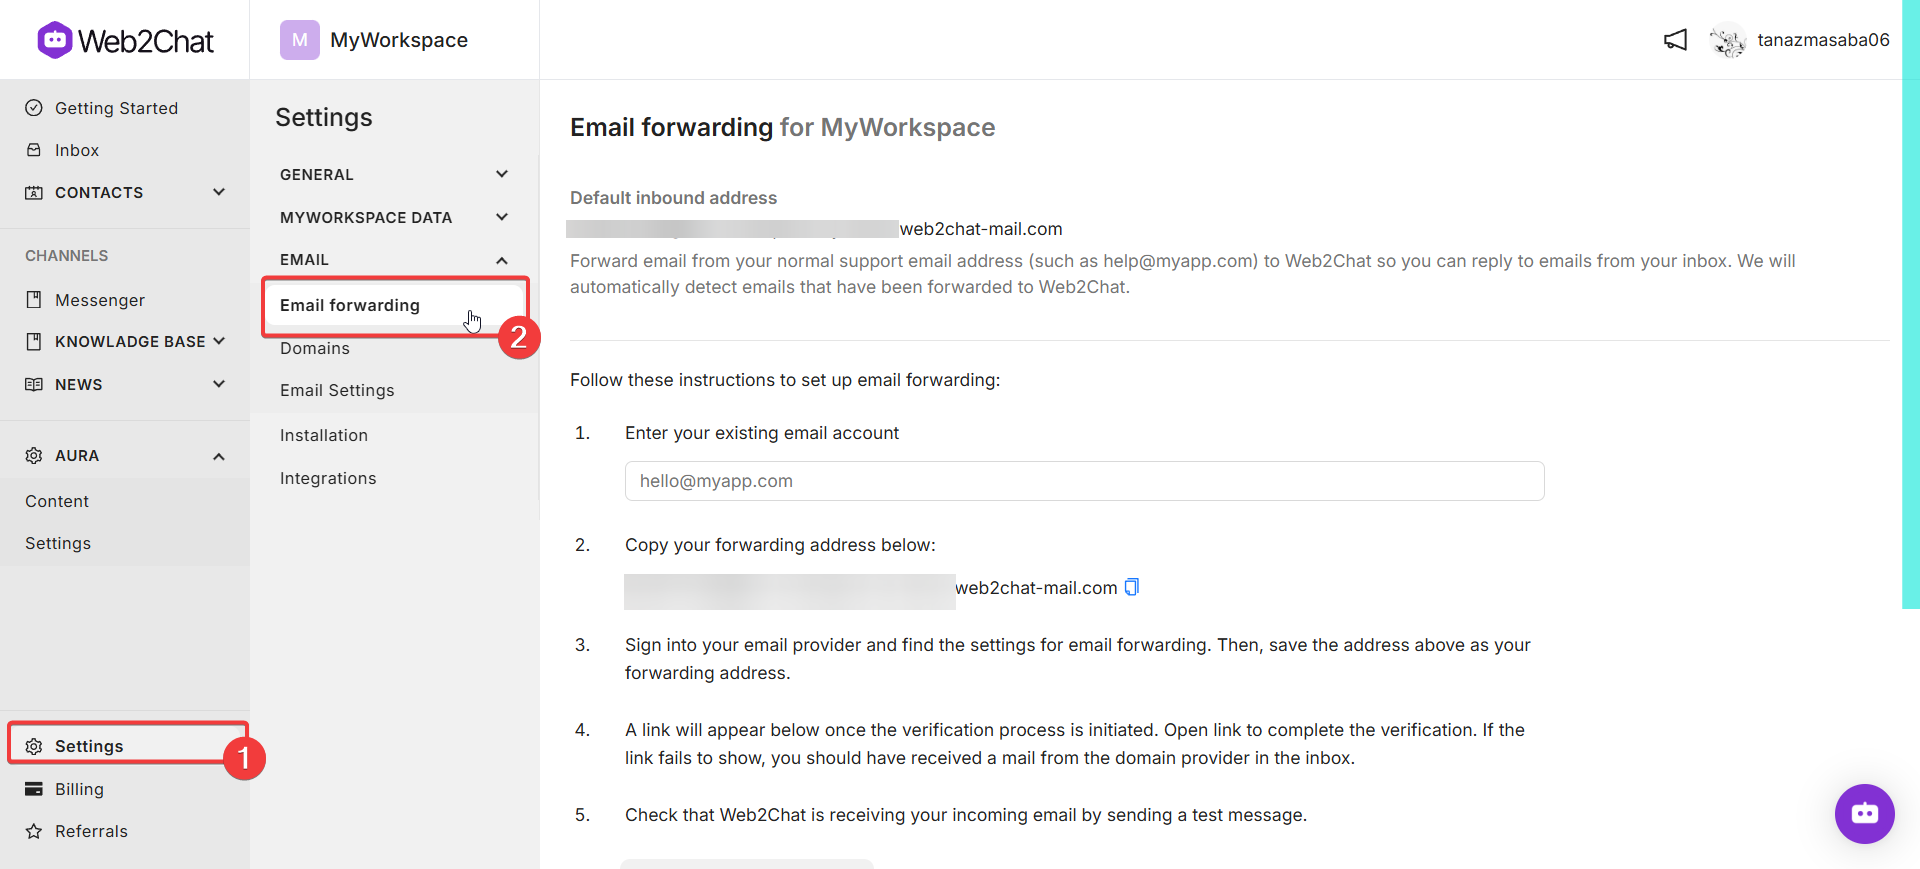
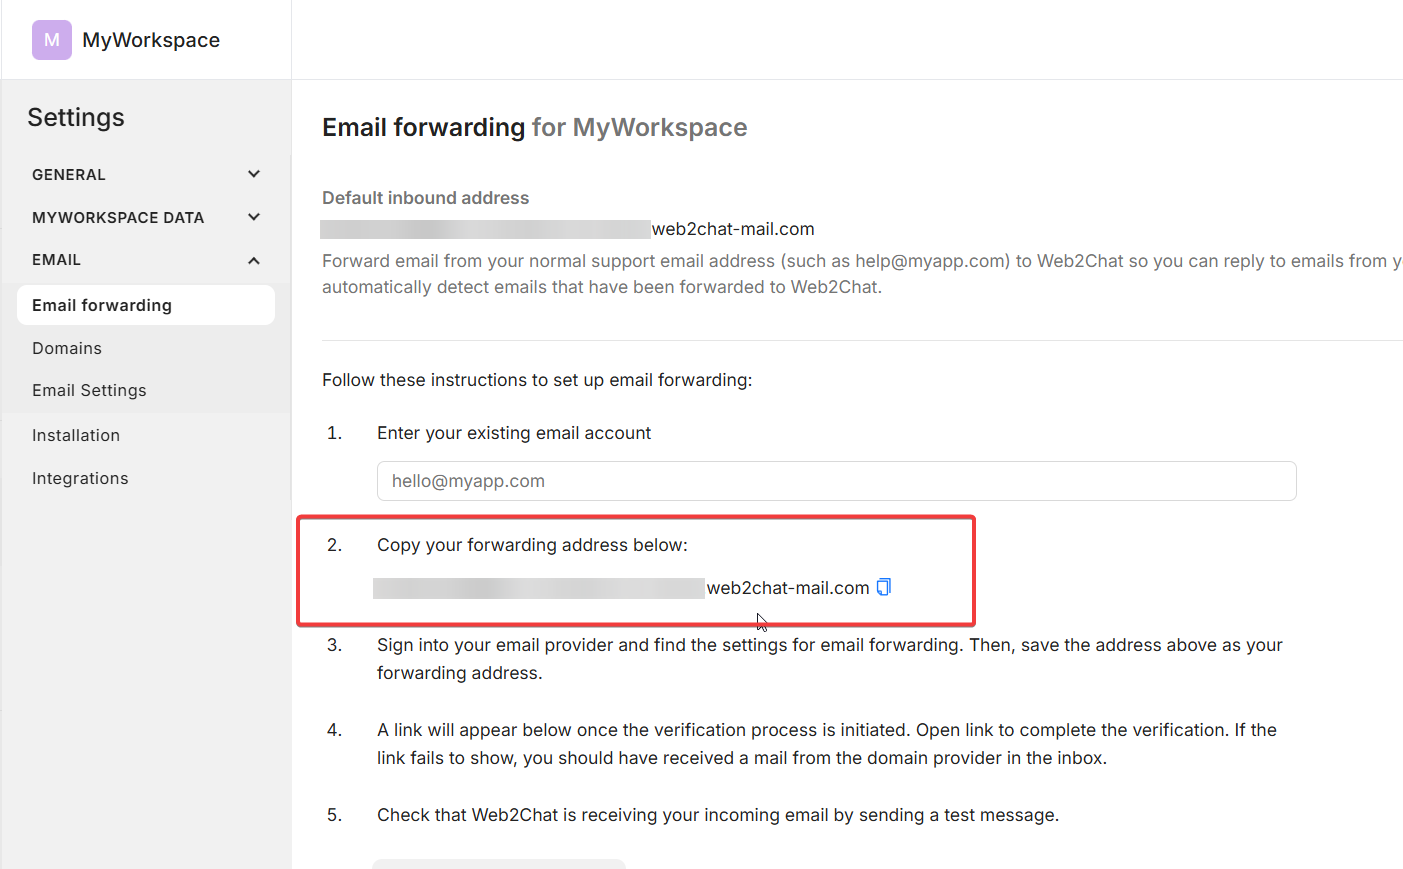
Step 2: Find Your Forwarding Address
- Navigate to Settings > Email > Email forwarding in Web2Chat.
- Copy the unique email forwarding address provided.
- Add the copied forwarding address as the new forwarding address in your email client settings.
- Repeat this process for any additional email addresses you want to forward to Web2Chat.
Step 3: Set Up Forwarding from Your Email Provider
Different email providers have varying settings and capabilities. Ensure you read the documentation for your email provider before getting started.
Avoid Mailing Lists: Do not use mailing lists (e.g., Google Groups) for forwarding as they may modify the envelope From address, causing issues with email association in Web2Chat.
For Gmail/Google Workspace Users:
- Open Gmail and go to Settings (gear icon) > See all settings.
- Click on the Forwarding and POP/IMAP tab.
- Under Forwarding, click Add a forwarding address.
- Enter your Web2Chat email address and click Next.
- Confirm the forwarding request in your Web2Chat inbox.
- Once confirmed, return to Gmail settings and select Forward a copy of incoming mail to your Web2Chat address.
- Save your changes.
For Outlook/Office 365 Users:
- Go to Outlook Settings > View all Outlook settings > Mail > Forwarding.
- Click Enable forwarding and enter your Web2Chat email address.
- Optionally, choose to keep a copy of forwarded emails in your Outlook inbox.
- Save your changes.
For Other Email Providers:
- Locate the forwarding or routing settings in your email provider’s dashboard.
- Add your Web2Chat email address as the forwarding destination.
- Save your changes.
Step 3: Test the Forwarding Setup
- Send a test email to your original support email address.
- Check the Web2Chat Help Desk to ensure the email appears as a new ticket.
- Verify that the email content, attachments, and sender information are correctly imported.
Remove Email Forwarding
If you wish to disconnect your email forwarding from Web2Chat, disable the forwarding settings in your email client.
By setting up email forwarding, you ensure that all customer support emails are directed to Web2Chat, allowing for streamlined and efficient handling of support requests.
If you need more assistance, feel free to contact our Customer Support.