
Web2Chat offers a variety of customization options to help you brand your Help Center and tailor its appearance for your customers. Here’s an in-depth overview of how you can configure and preview changes to your Help Center in real-time.
General Settings
In the General settings, you can manage essential aspects of your Help Center:
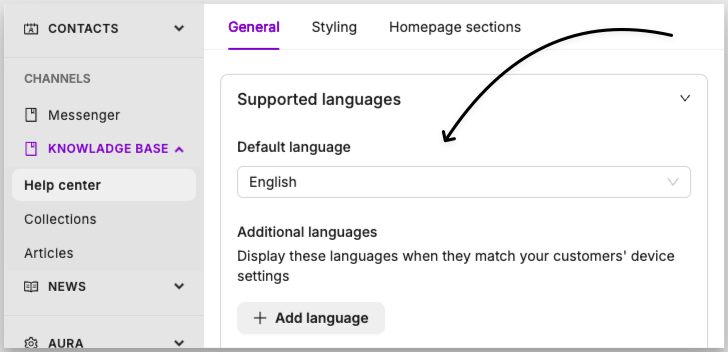
Supported Languages
You can choose a default language for your Help Center and support multiple languages to cater to a diverse customer base. Adjusting the default language changes the user interface elements like search prompts, article counts, and author names. This ensures that your Help Center is accessible and user-friendly for customers from different linguistic backgrounds. Additionally, if you’d like to change the language of the Messenger, you need to do this separately in your Messenger settings.
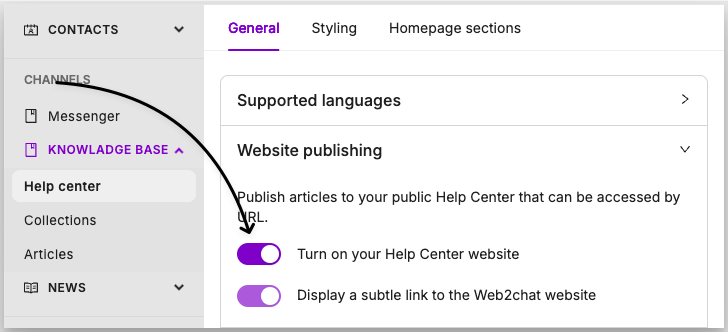
Website Publishing
When you’re ready to go live, you can publish your Help Center to make it accessible to your customers. This is also where you can enable search engine indexing or keep your articles private if necessary.
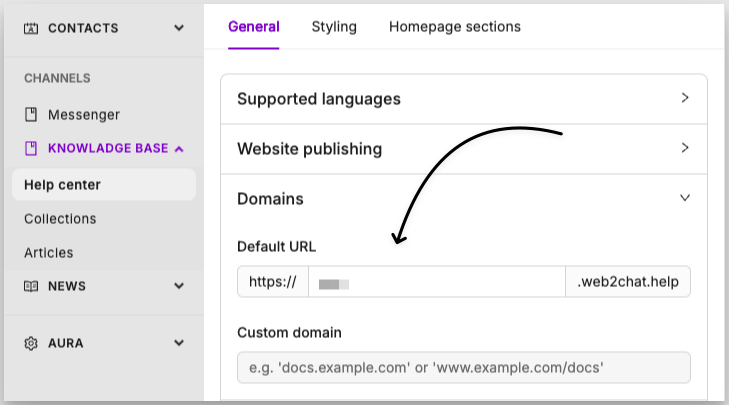
Domains
You have the option to use the default Web2Chat domain or set up a custom domain to give your Help Center a more branded and professional appearance. Setting up a custom domain involves configuring a CNAME record with your DNS provider, such as GoDaddy or Cloudflare.
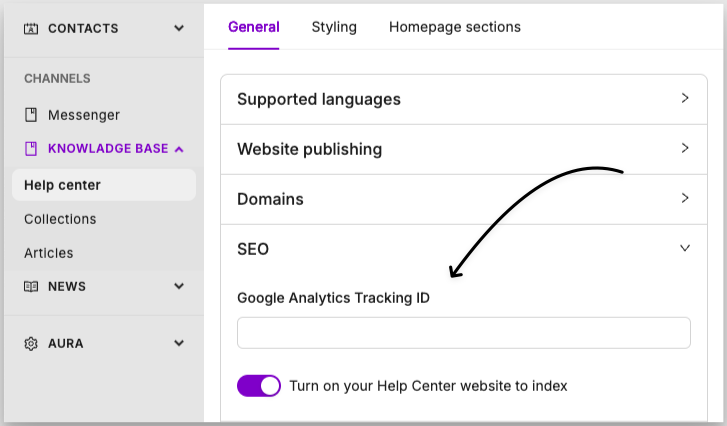
Analytics
By integrating Google Analytics, you can gain valuable insights into how your customers interact with your Help Center articles. Simply add your GA4 Measurement ID to start tracking visitor behavior and understand which content is most helpful.
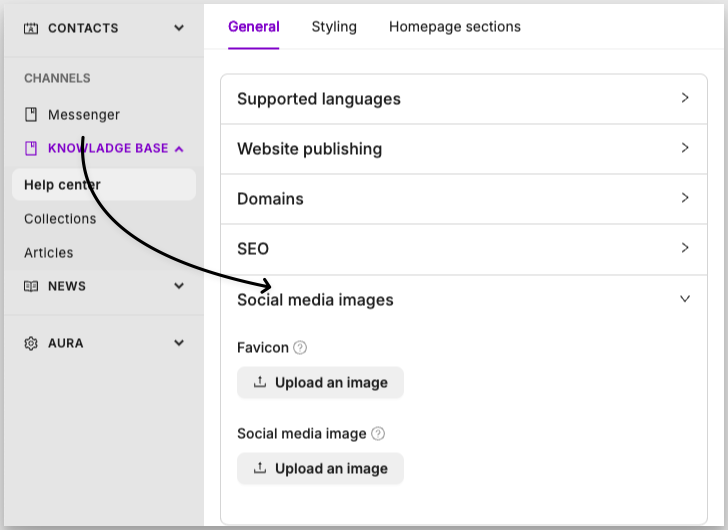
Social Media Images
Customize your Help Center’s appearance on social media by uploading a favicon and a high-resolution social media image. These images will appear when your Help Center or articles are shared on platforms like Facebook and Twitter.
Styling Settings
The Styling settings allow you to personalize the look and feel of your Help Center:
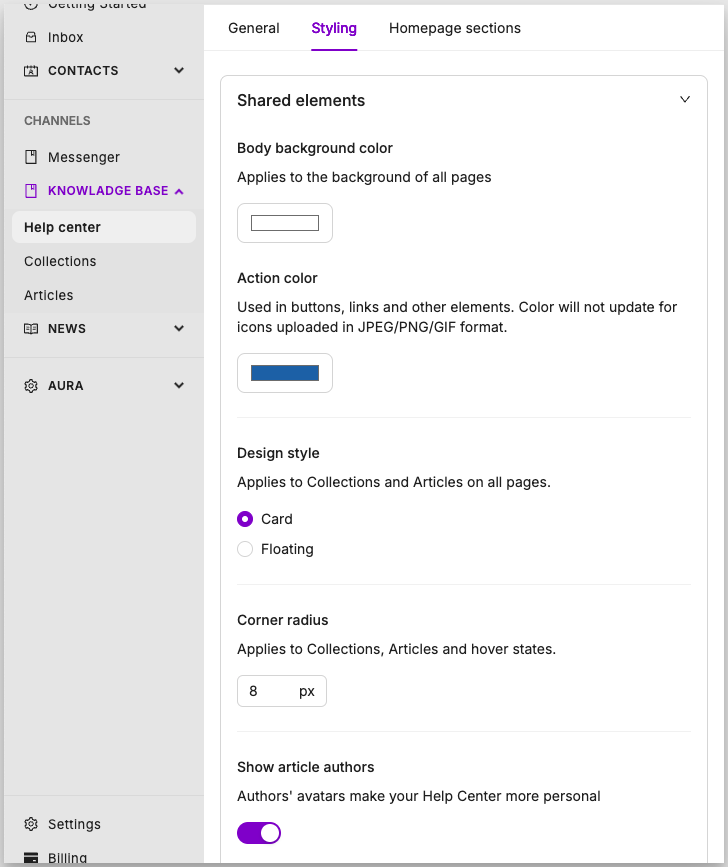
Shared Elements
Customize the overall appearance of your Help Center by setting the body background color and action color for buttons and links. You can choose between different design styles, such as Card or Floating, and set the corner radius for various elements to match your brand’s aesthetic.
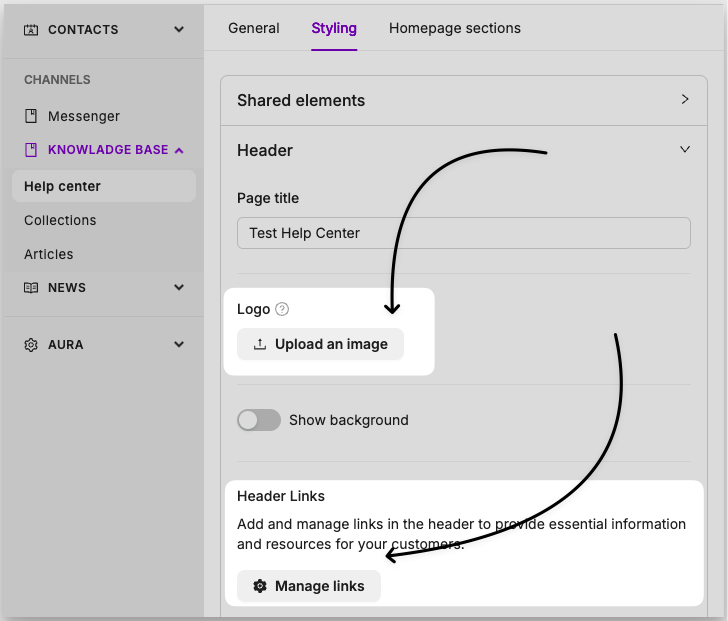
Header
Design the top header section to include your logo, page title, and header links. The header can be customized separately for each supported language, ensuring consistency across different locales.
- Logo: Upload a high-resolution logo, which will appear on the left-hand side of the header and in grayscale at the bottom of the page. Recommended ratio: 5:1. 1MB max, 720px maximum width/height.
- Header Links: Add multiple header links to direct users to other important pages, such as your blog, community forum, or product pages. This enhances navigation and helps users find valuable resources quickly. The links can be organized to appear prominently in the header for easy access. The header links will push other content down rather than sitting on top of it, ensuring a clean and organized layout.
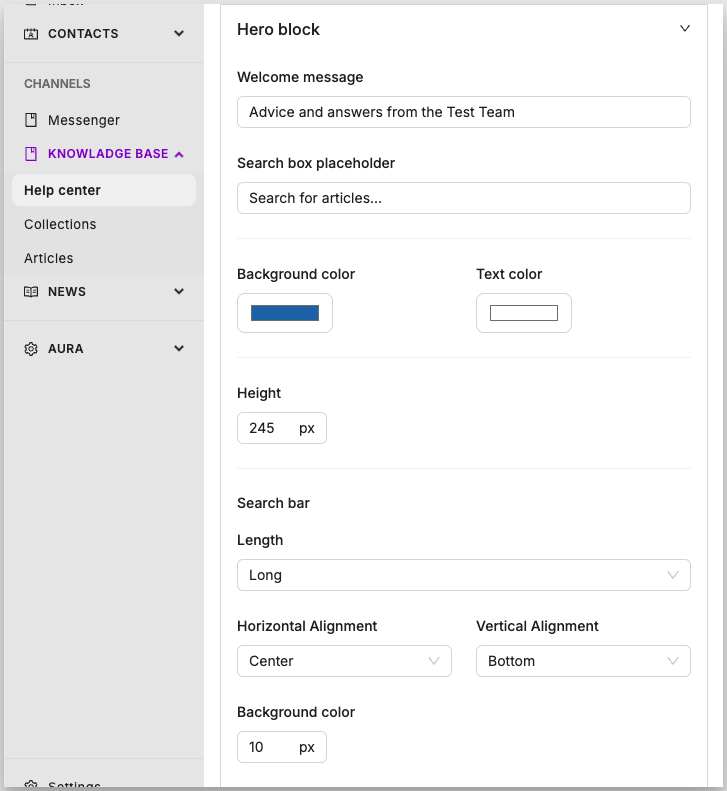
Hero Block
Customize the welcome message on your Help Center homepage to greet users with personalized text. You can add user attributes to the message, which will display specific information if the user is logged in. You can also set the text color and overall height of the hero block, and customize the search bar’s size and alignment.
Search Bar: Choose from different search bar sizes (short, medium, long) and alignments (vertical or horizontal). You can also set the corner radius of the search bar to ensure it fits seamlessly with the rest of your Help Center design.
Layout and Sections
Organize how collections and articles are displayed on the homepage. You can choose from different column layouts (1, 2, or 3 columns) and select a collections card style (Classic, Visual, or Compact). Additionally, you can enable specific sections for articles, content, and the tickets portal to enhance the user experience. For example, you can add an Articles section to highlight specific articles on the homepage, select the locale for those articles, choose how many columns to display, and give the section a title.
Collection Page
Manage content descriptions for each collection. You can choose to show or hide these descriptions, making it easier for customers to scan through articles or understand what each collection contains.
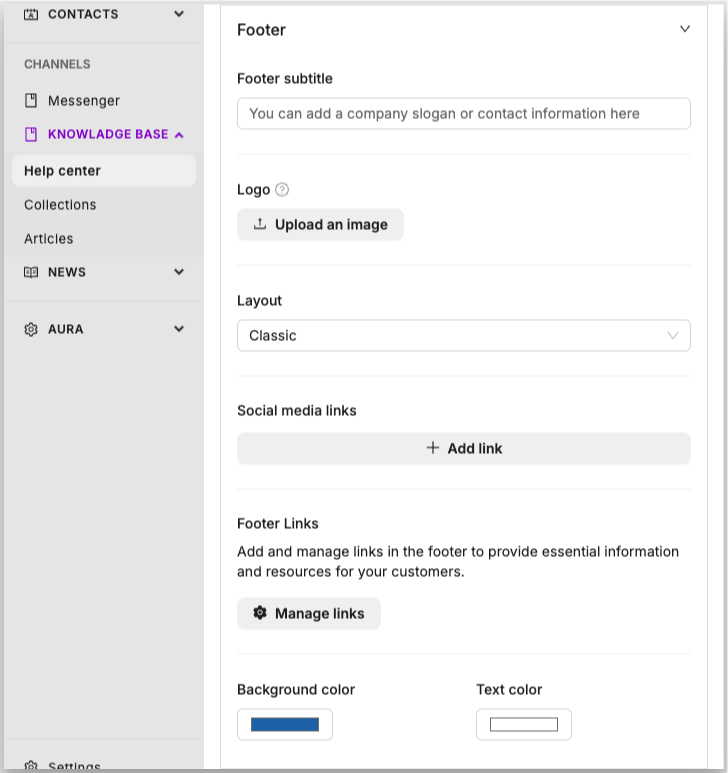
Footer
Customize the footer with three templates—Simple, Classic, or Multi-level. The footer can be branded by adding your logo, contact details, and up to 16 social media links. Footer links can be grouped into columns for better organization, and you can localize the footer links for different supported languages.
- Logo and Text Field: Upload a separate logo for the footer, independent of the header logo, and add your company slogan or contact information.
- Social Media Buttons: Add links to your social media profiles, such as Twitter, Facebook, LinkedIn, and more. You can reorder these buttons using a drag-and-drop tool and remove any that are not needed. Web2Chat supports up to 16 social platforms including Spotify, Instagram, LinkedIn, Twitter/X, Tumblr, Facebook, Twitch, TikTok, Telegram, Reddit, Discord, Pinterest, YouTube, GitHub, VK, and Dribbble.
- Manage Footer Links: Organize footer links into columns. Each column can contain multiple links, and you can name the columns to categorize the links effectively. Reorder links and columns as needed to ensure a logical flow and easy navigation for your users. Footer links are created independently from header links and must be set up separately.
- Localizing Footer Links: Use the language selector to customize footer links for different languages. This ensures that your Help Center footer is accessible and relevant to users from various regions. Once localized, the footer will display in the appropriate language based on your customers' device settings.
By leveraging these customization options, you can create a Help Center that not only aligns with your brand but also provides a seamless and intuitive support experience for your customers.